

I receive countless emails every day, and one thing that stands out is the variety of email signatures people use. Many still rely on simple, manually added signatures or even images that can cause issues with email delivery, sometimes sending your messages straight to the junk or quarantine folder.
Did you know you can set up a company-wide email signature directly from Exchange Online, completely free of charge? If you haven’t set this up yet, I’ve explained how you can add a professional email signature for your entire organization, with multiple templates to choose from. You can even design your own signature to maintain a polished, consistent look across all your communications. I’ve also covered all the options available to set up the email signature in the most efficient way.
A well-crafted email signature enhances professionalism, credibility, and brand consistency in every email you send. Whether you’re an individual professional or a business, setting up an Outlook 365 signature ensures your emails maintain a polished and standardized appearance.
An email signature is a block of text, images, and links automatically appended to outgoing emails. It typically includes:
- Full name and job title
- Company name and logo
- Contact details
- Website and social media links
- Legal disclaimers (if required)
Why Are Email Signatures Important?
A professional email signature provides several benefits:
- Professionalism – Establishes a consistent and professional brand identity.
- Brand Awareness – Reinforces your brand with every email.
- Legal Compliance – Includes necessary disclaimers for regulatory requirements.
- Convenience – Auto-inserts essential details, saving time.
- Marketing – Promotes your business with social links and website URLs.
How to Create an Email Signature in Outlook 365
Creating a Signature in the Outlook Desktop App
- Open Outlook and go to File > Options > Mail.
- Click Signatures… under the Compose messages section.
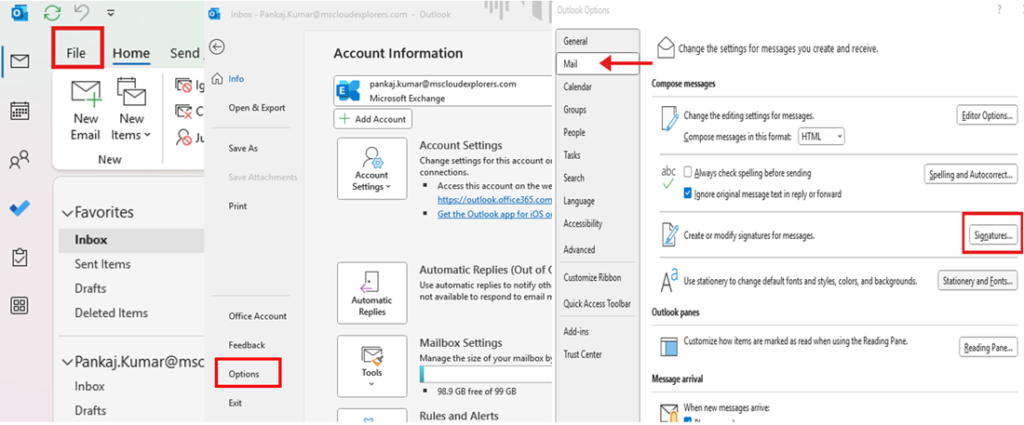
- Click New, enter a signature name, and design your signature.
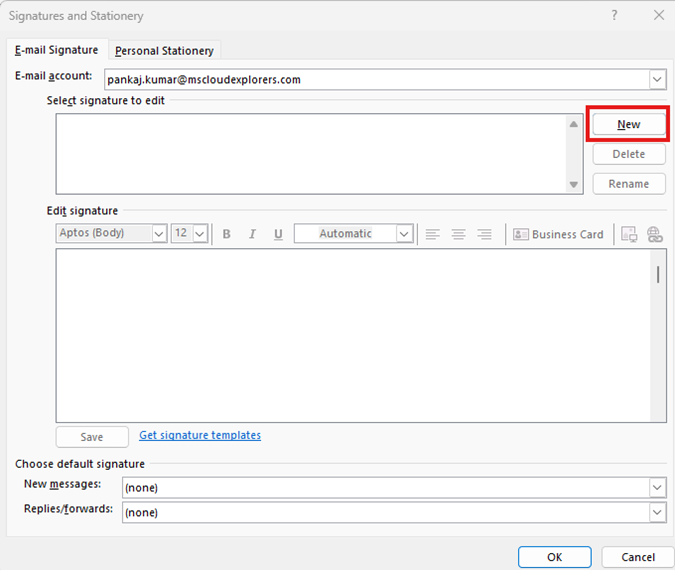
- Format text, add images, and insert links.
- If using templates, click Get signature templates.
- Select an email signature from the Templates Gallery, download it as a Word file.
- Customize the signature and copy the entire signature into the Edit Signature body.
- Set it as default for new emails and replies.
- Click OK to save.
Setting Up a Signature in Outlook Web (OWA)
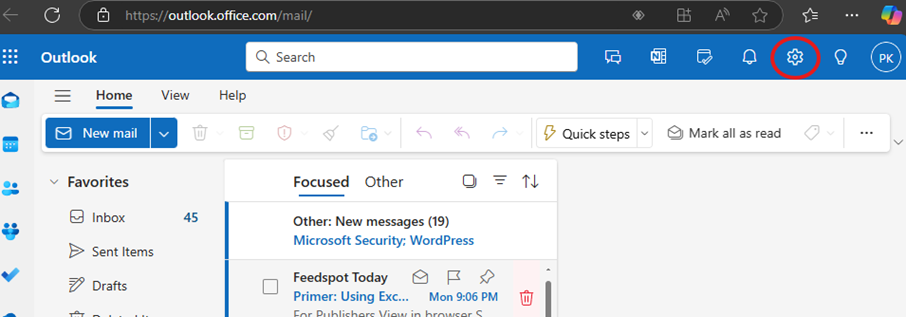
- Log in to Outlook Web.
- Click the gear icon and select View all Outlook settings.
- Navigate to Mail > Compose and reply.
- Under Email signature, enter your signature details.
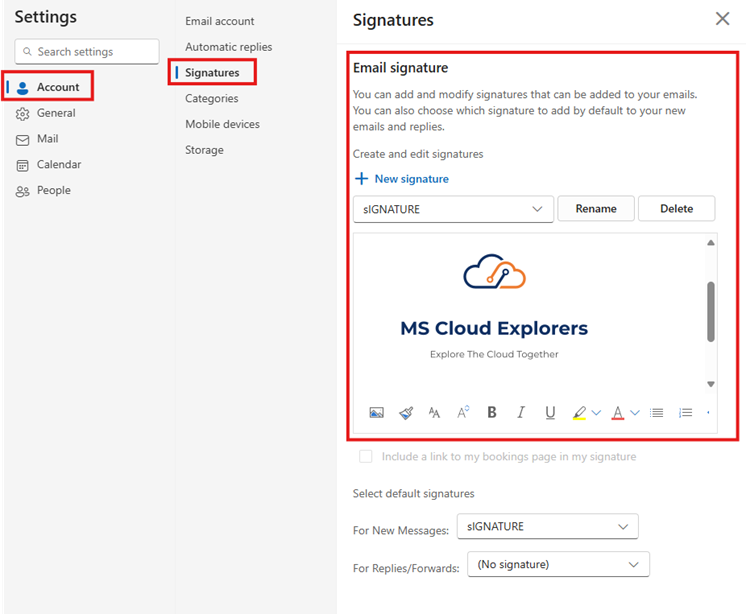
- Check the box to automatically include it in new emails and replies.
- Click Save.
Configuring a Signature in the New Outlook (Similar to OWA)
- Open New Outlook.
- Click Settings > Mail > Compose and reply.
- Enter the signature text, format it, and add images.
- Enable it for new emails and replies.
- Click Save.
How to Set Up an Organization-Wide Email Signature
For a uniform organization-wide signature, use the Exchange Admin Center (EAC).
Using Exchange Admin Center (EAC)
- Log in to Microsoft 365 Admin Center.
- Open Exchange Admin Center (EAC).
- Navigate to Mail flow > Rules.
- Click + Add a rule, then name it “Email Signature (Org-wide)”.
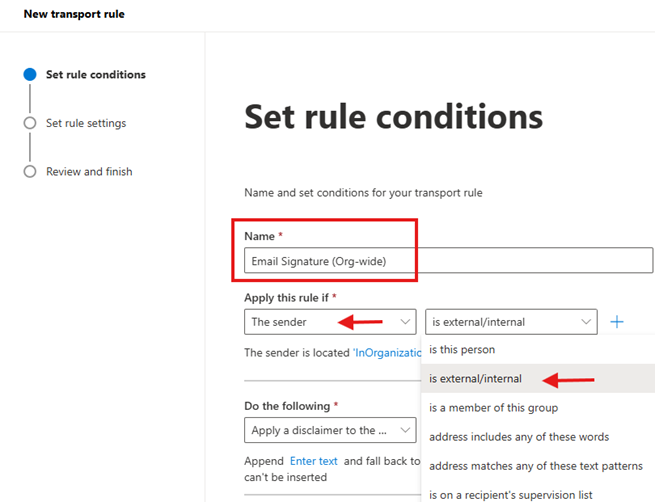
- Under Apply this rule, select The sender is External/Internal.
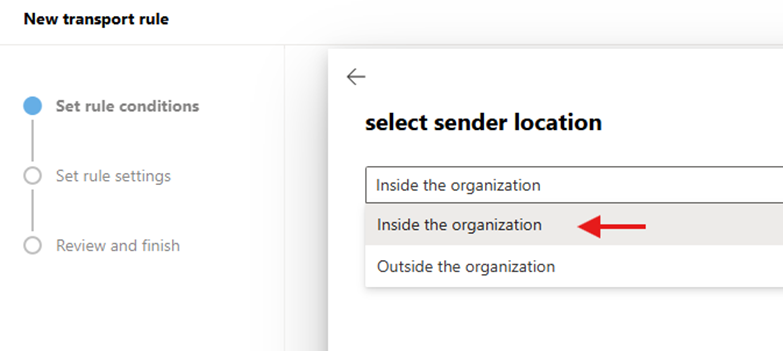
- Under The Sender is located, choose InOrganization.
Configuring the Signature with HTML Formatting
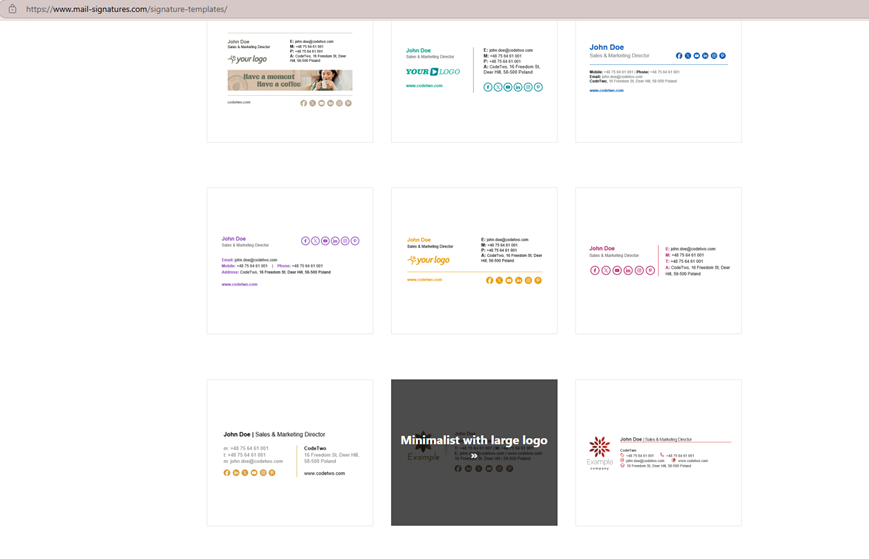
Configure the signature with HTML formatting. I am using a mail signature website to generate the HTML-formatted signature. You can also choose the best one from there, or you can request your developer to create a signature in HTML.
- Use an email signature generator or an HTML template.
- Open the template section and select a suitable design.
- Edit the signature with:
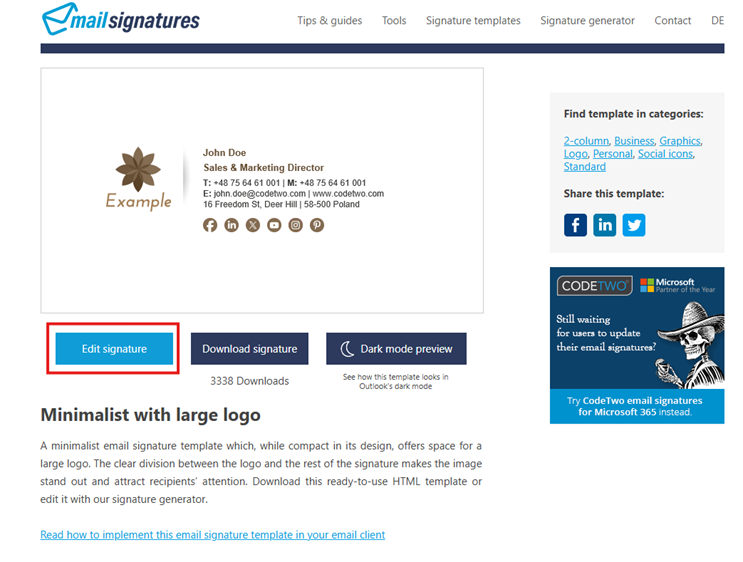
- Company details Company logo and graphics
- Colors and social media links
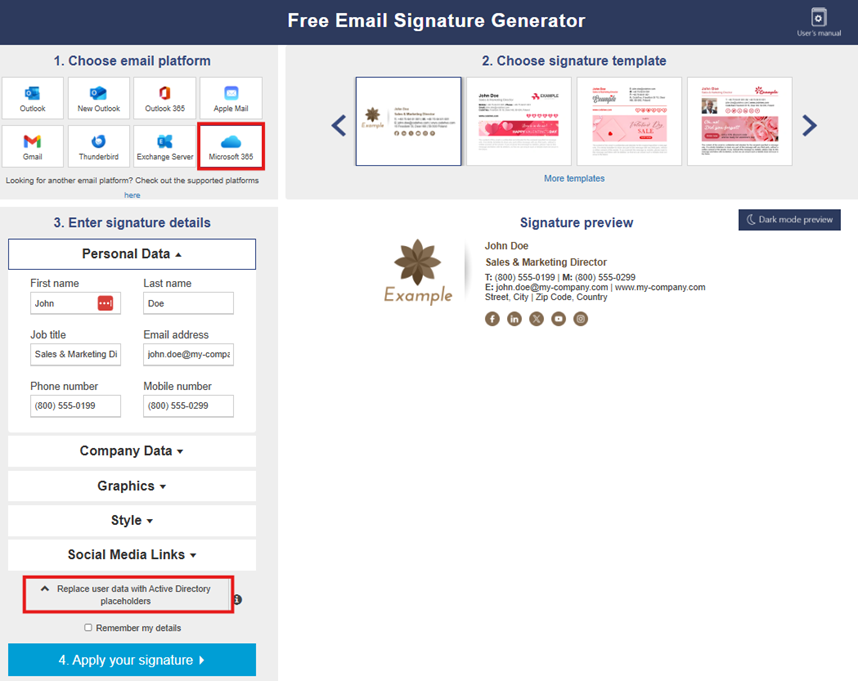
- Click Microsoft 365, then Replace user data with Active Directory placeholders.
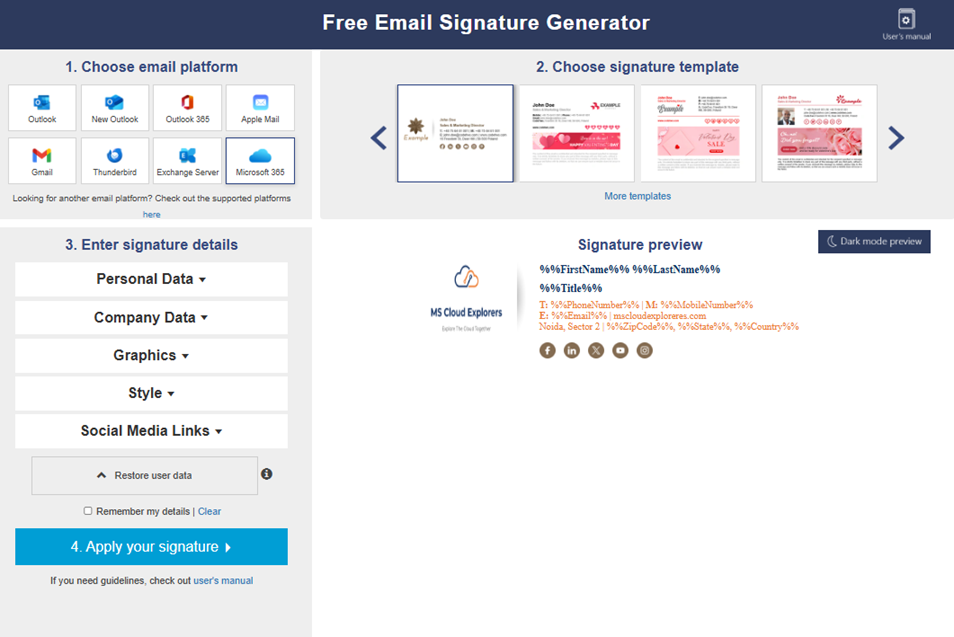
- Click Generate HTML.
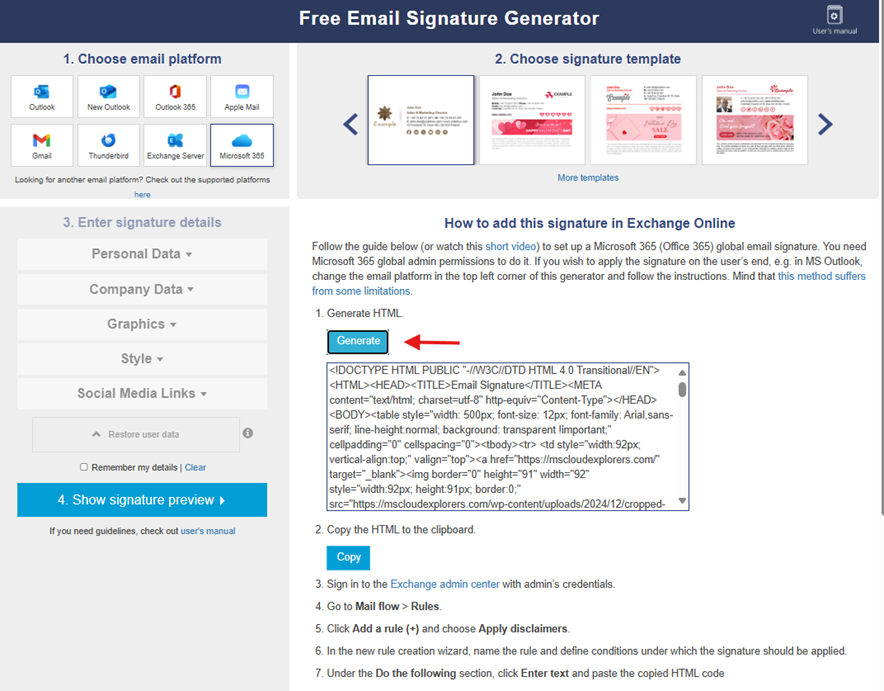
- Copy the HTML code.
You can use the website above for pre-built templates. If none of them meet your needs, you can easily use AI tools to generate the code. Simply upload the image or screenshot of the signature you’re currently using, and the AI will provide you with the entire code. You can then adjust the code length to fit within the required limits. - Go to Exchange Admin Center in the tab where you are creating the Transport rule, under Do the following, in the rule select Enter text.

- Click Enter text, paste the HTML code, and save it.
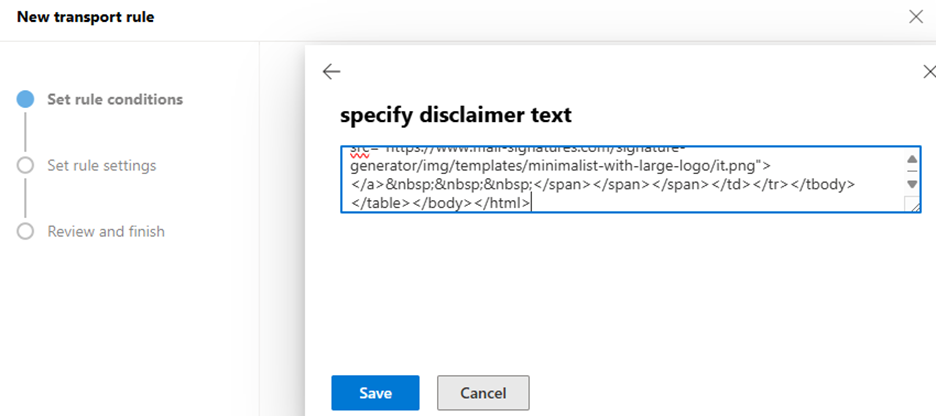
- Under Fall back action, select Wrap, then save.
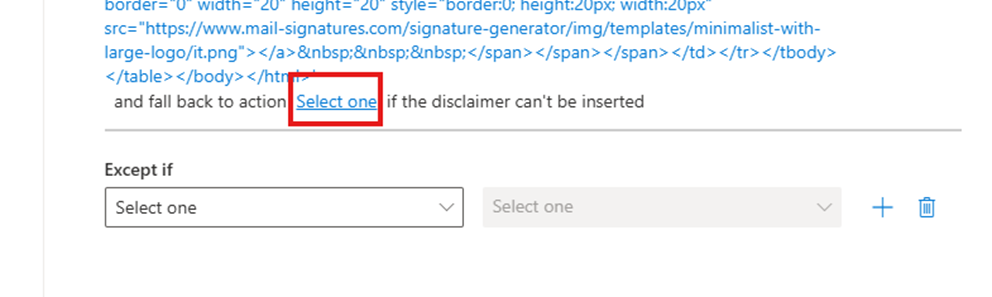
- Click Next, then Enforce the rule.
- Review the rule and click Finish.
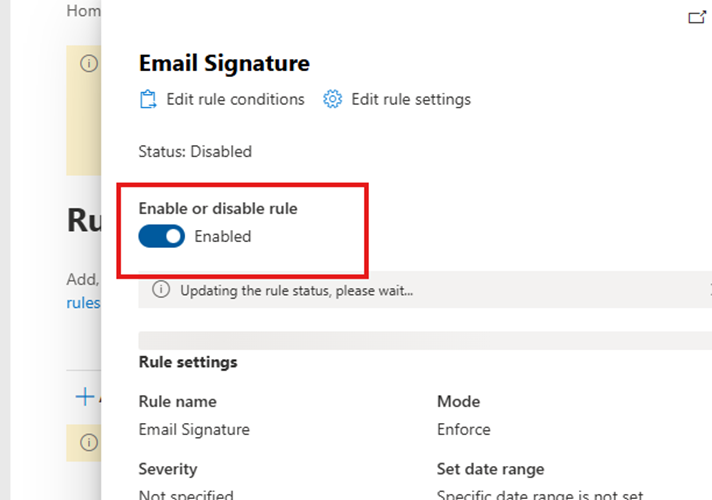
- Open the created rule and enable it.
Testing the Organization-Wide Email Signature
- Open Outlook and send a test email.
- Ensure all user details are completed in Microsoft 365 Admin>Contact information.
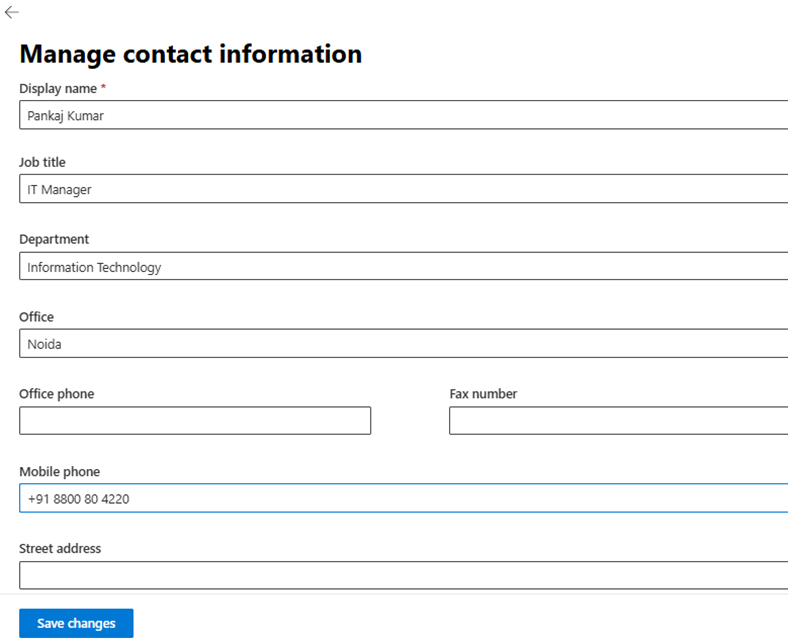
- Customize the logo if needed.
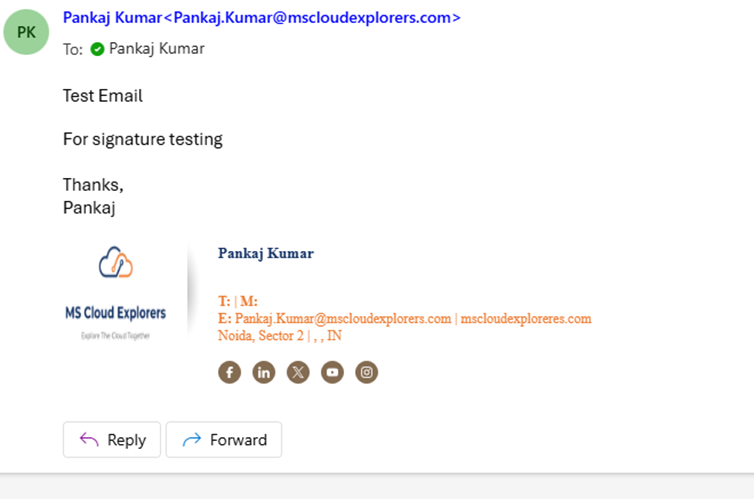 For some reason, the phone number and address did not display properly, but this can be fixed by tweaking the HTML code.
Best Practices for Designing Email Signatures
- Keep It Simple – Avoid cluttered designs.
- Use HTML Formatting – Ensures proper rendering.
- Optimize for Mobile – Ensure readability on all devices.
- Limit Colors & Fonts – Maintain brand consistency.
- Include Essential Information Only – Avoid excessive links or images.
Using External Tools to Generate Professional Signatures
Several online tools can help create professional email signatures:
Common Mistakes to Avoid in Email Signatures
- Using too many colors and fonts.
- Overloading with unnecessary details.
- Not ensuring a mobile-friendly format.
- Forgetting to test across different email clients.
Conclusion
A well-designed Outlook 365 signature enhances communication, strengthens brand identity, and maintains professionalism. Whether setting up a personal or organization-wide signature, Outlook 365 provides powerful tools to create and manage signatures efficiently.
FAQs
- How can I add an image to my Outlook email signature?
Go to Signature Settings, click Insert Picture, and upload your image. - Can I use a different signature for replies and forwards?
Yes, Outlook allows setting separate signatures for new emails and replies/forwards. - Is it possible to add a disclaimer in every email signature?
Yes, organization-wide signatures can include legal disclaimers using Exchange Admin Center. - How do I ensure my email signature is mobile-friendly?
Use simple fonts, limit images, and test across multiple devices. - What should I do if my email signature is not appearing in Outlook?
Ensure it is enabled under Settings and properly configured for the correct email account.


