
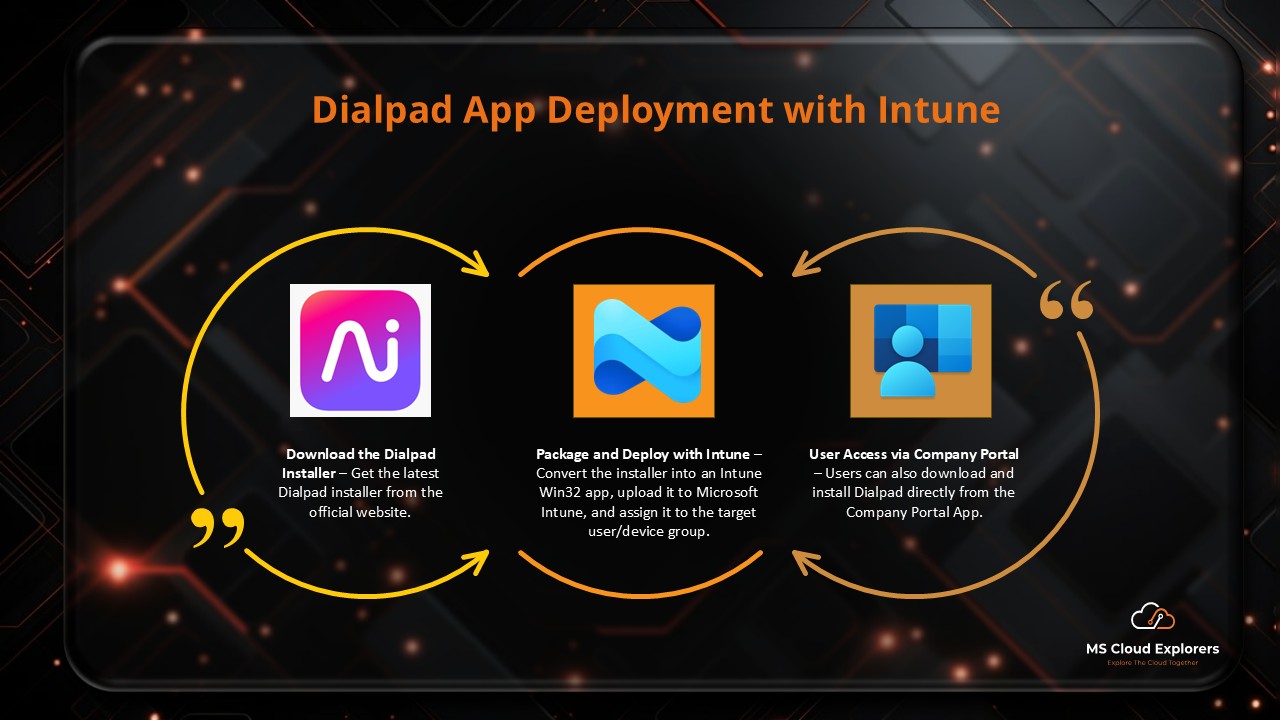
Deploy Dialpad with ease using this comprehensive guide on packaging and deploying the application through Microsoft Intune. Designed for both beginners and experienced IT professionals, this guide covers everything from fundamental concepts to advanced deployment strategies, ensuring a seamless process.
Step 1: Understand Intune and Its Capabilities
Microsoft Intune as a cloud based solution (Formally known as Endpoint manager) Its main functions are MAM and MDM. Before deploying any app, ensure you understand Intune’s capabilities:
- App management.
- Device compliance policies.
- Integration with Azure Active Directory (Azure AD).
For more information, review Intune’s official documentation.
Step 2: Prepare the Dialpad Application
Download the Installer
- Visit the Dialpad official download page OR Download from their website.
- Download the installer for your target platform (Windows or macOS).
- For Windows, ensure the .msi or .exe file is obtained.
- For macOS, download the .pkg file.
Gather App Metadata
Collect the following information:
- App Name: Dialpad.
- Publisher: Dialpad, Inc.
- Installation Commands (if any).
- Uninstall Commands (for silent removal).
Step 3: Test the Application Installation Locally
Before deploying via Intune, test the installation process on a local device:
- Run the installer manually.
- Check if the app installs and launches successfully.
- Note any prerequisites or dependencies (e.g., .NET Framework, Visual C++ Redistributables).
Step 4: Convert the Installer into Intune-Friendly Format
For deployment via Intune, use the Microsoft Win32 Content Prep Tool:
Install the Prep Tool
- Download the Win32 Content Prep Tool from the Microsoft GitHub repository.
- Extract the downloaded zip file.
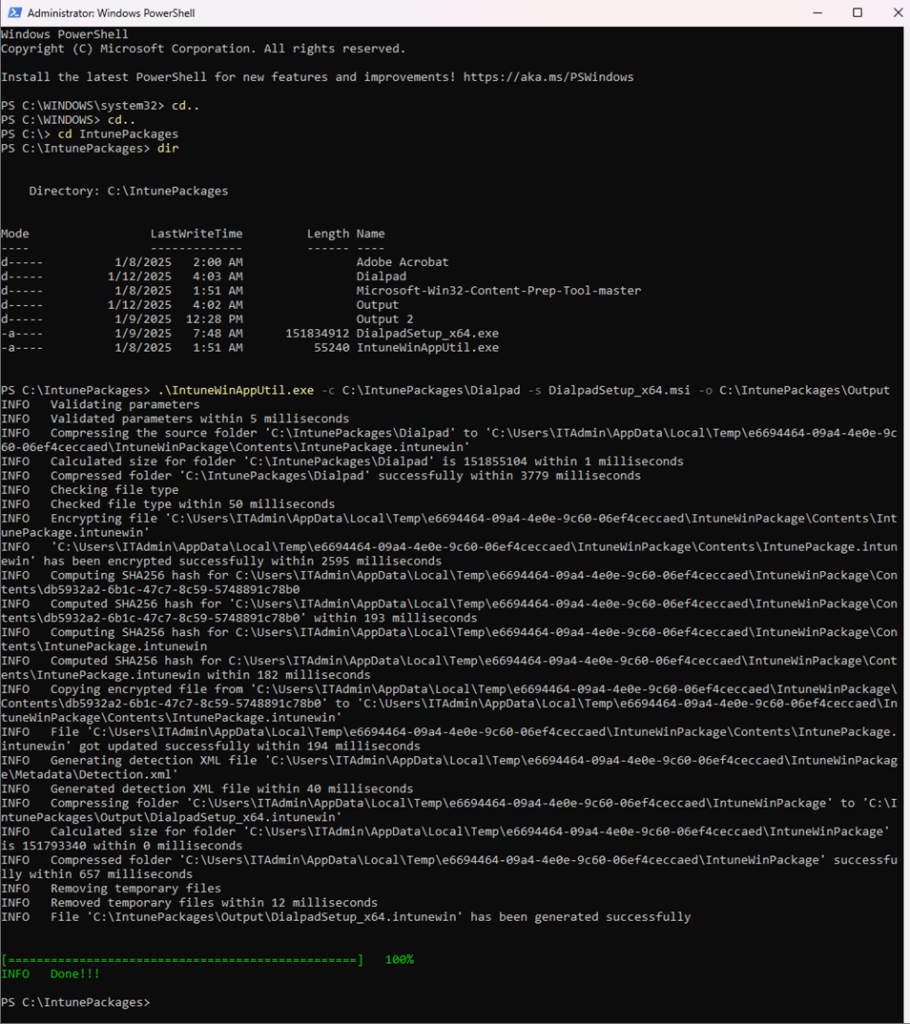
Prepare the Installer
- Place the Dialpad installer in a dedicated folder (e.g., C:\IntunePackages\Dialpad).
- Open PowerShell as Administrator.
- Navigate to the folder containing the prep tool.
- Run the following command:
.\IntuneWinAppUtil.exe -c C:\IntunePackages\Dialpad -s DialpadSetup.msi -o C:\IntunePackages\Output5. The output will generate a .intunewin file, ready for upload.
Step 5: Deploy Dialpad App in Intune
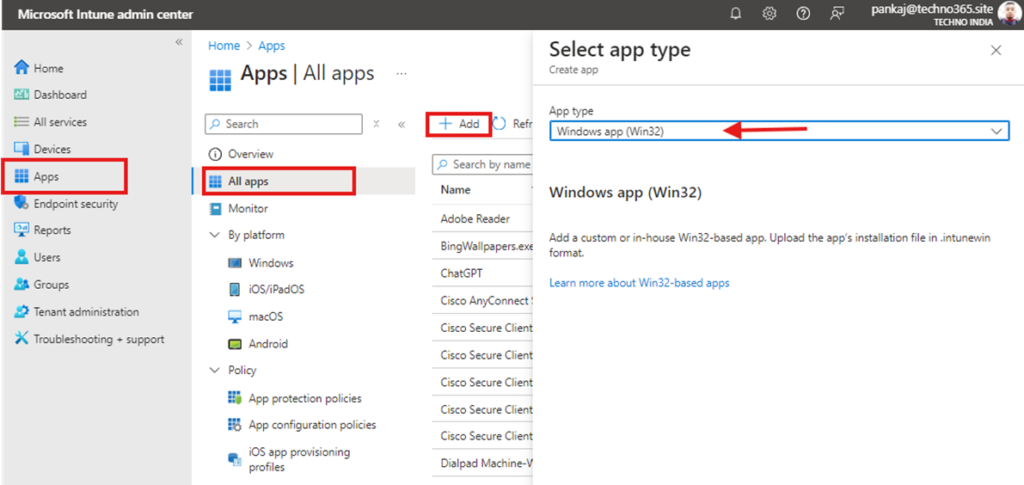
Upload the App
- Log in to the Intune Admin Portal.
- Navigate to Apps > All Apps > Add.
- Choose the Windows app (Win32) as the app type.
- Upload the .intunewin file.
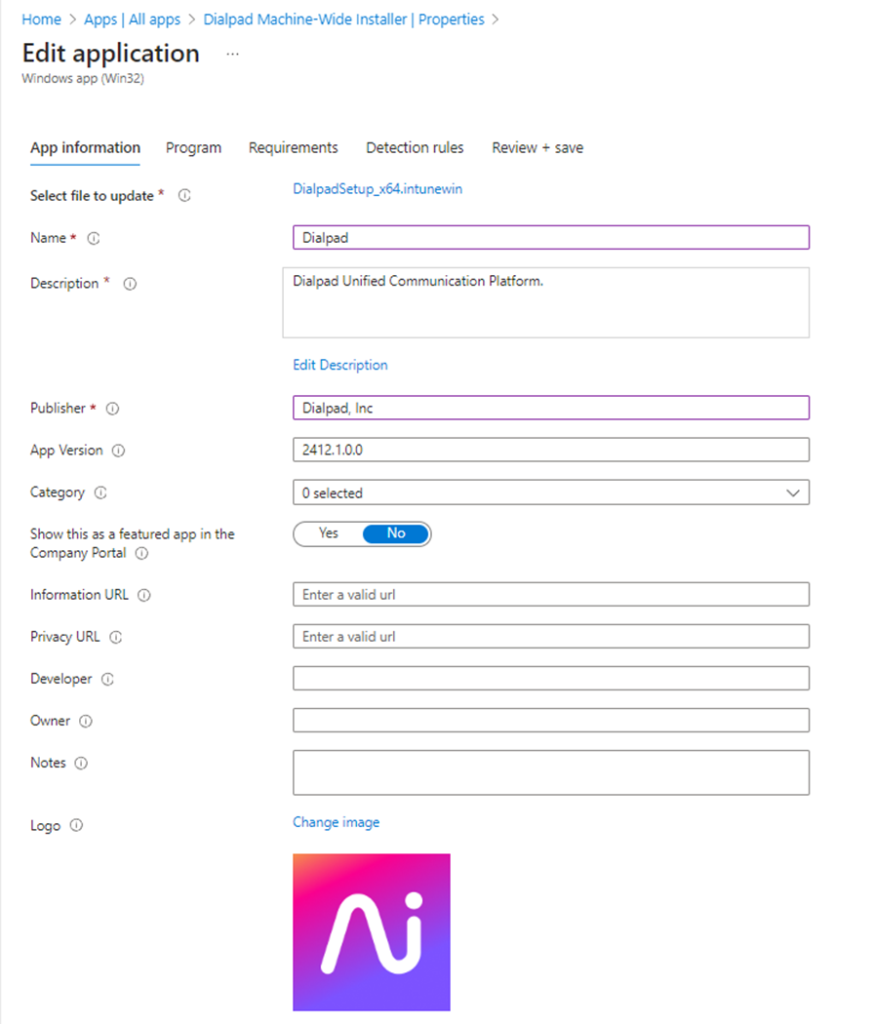
Configure App Information
- Enter details such as:
- Name: Dialpad.
- Description: “Dialpad Unified Communication Platform.”
- Publisher: Dialpad, Inc.
- Add an appropriate logo (optional).
- Click Next.
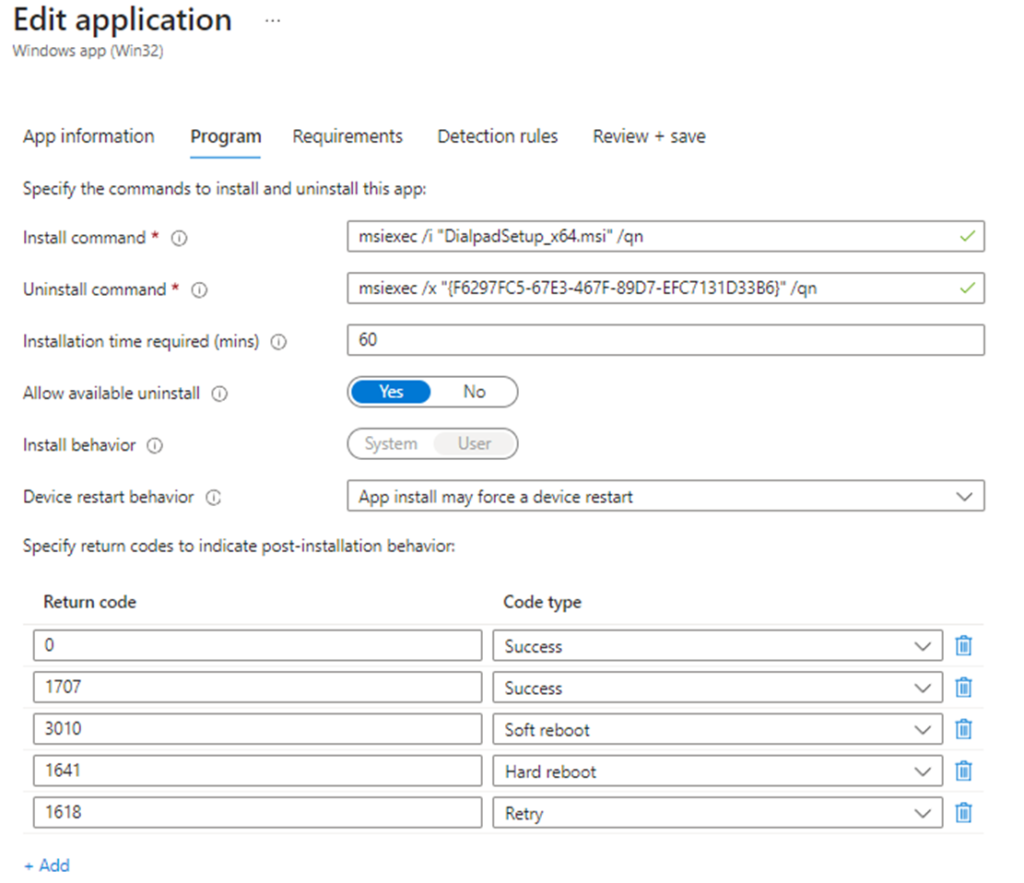
Configure Program
- Install Command: Use the default if available or specify any required silent installation switches, e.g.,:
msiexec /i "DialpadSetup_x64.msi" /qn
- Uninstall Command: Specify the silent uninstall command, e.g.,:
msiexec /x "{F6297FC5-67E3-467F-89D7-EFC7131D33B6}" /qn
- Installation time : Specify the time
- Leave the default settings.
- Click Next.
Configure Requirements
- Specify minimum system requirements (e.g., OS version, disk space).
- Add architecture constraints if needed (e.g., x64 only).
- Click Next.

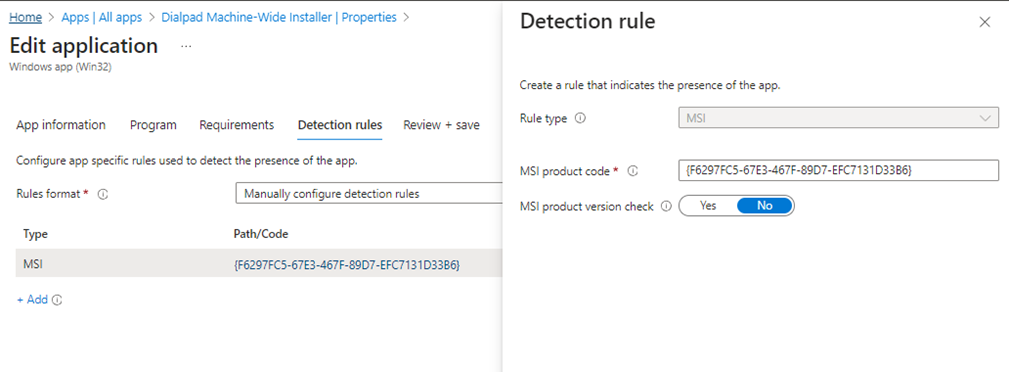
Detection Rules
- Choose a detection method (e.g., MSI or file presence).
- For MSI detection, use the product code.
- For file detection, specify the path to the app’s executable.
- Click Next.
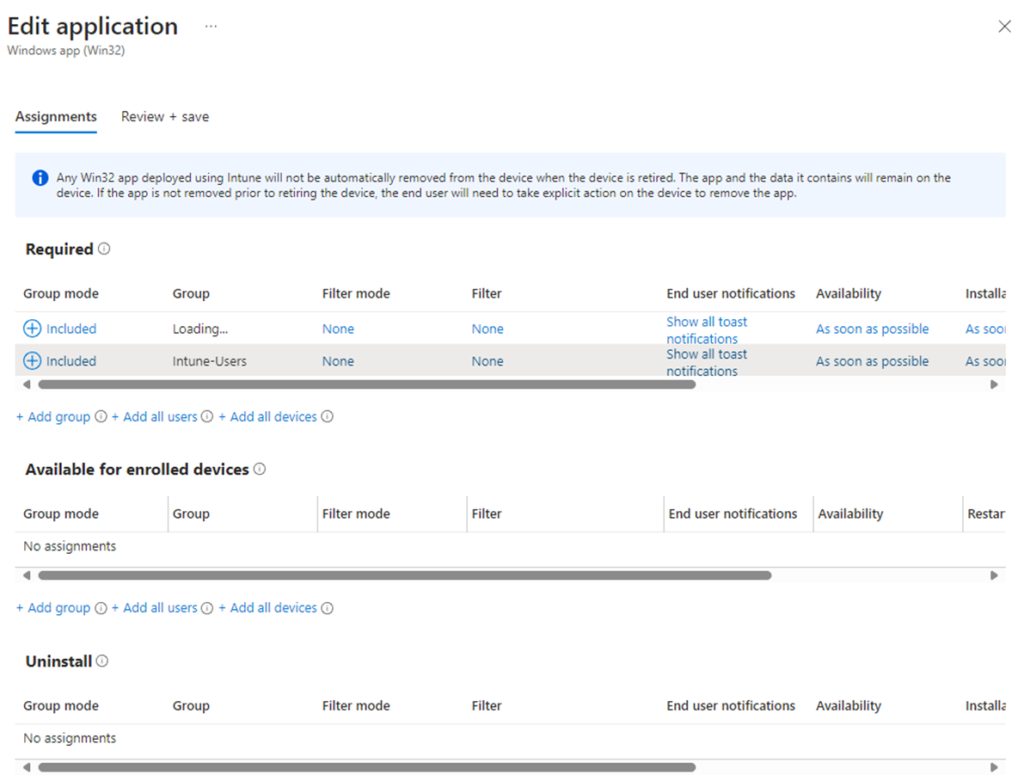
Assign the App
- Select the assignment group (e.g., All Devices, All Users, or a custom group).
- Configure app delivery:
- Required: Installs automatically.
- Available for enrolled devices: Allows users to install from the Company Portal.
- Click Next.
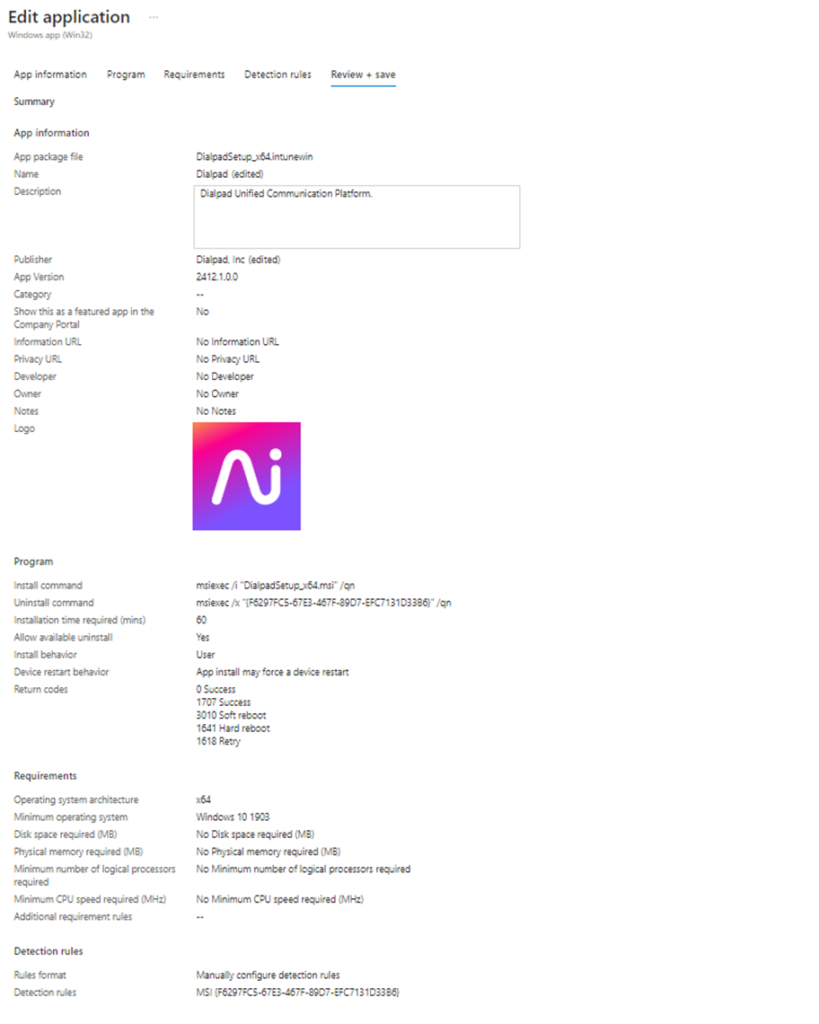
Review and Save
- Review all settings.
- Click Create to deploy the app.
Step 6: Monitor Deployment
- Navigate to Apps > Monitor > App Install Status in the Endpoint Manager Admin Center.
- Check the deployment status.
- Troubleshoot any issues by reviewing logs in C:\ProgramData\Microsoft\IntuneManagementExtension\Logs.

Best Practices
- Always test deployment in a controlled environment before rolling out to production.
- Keep the Dialpad installer and app information updated.
- Regularly monitor app performance and user feedback.
- Document any custom configurations or exceptions for future reference.
- Enable the SSO with Dialpad for best user experience and automatically onboard.
FAQs
1. How do I create an Intune-friendly installer for Dialpad
Use the Microsoft Win32 Content Prep Tool to convert the Dialpad installer (.msi or .exe) into a .intunewin file. Follow the steps outlined in Step 4 of this guide.
2. What are the silent install and uninstall commands for Dialpad?
For installation, use:
msiexec /i DialpadSetup.msi /quiet
For uninstallation, use:
msiexec /x {PRODUCT_CODE} /quiet
Replace {PRODUCT_CODE} with the GUID of the Dialpad app.
3. How do I troubleshoot failed Dialpad app installations via Intune?
Check the log files located at:
C:\ProgramData\Microsoft\IntuneManagementExtension\Logs
Look for errors and verify detection rules, prerequisites, and system requirements.
4. Can I assign the Dialpad app to specific user groups in Intune?
Yes, you can assign the app to specific user or device groups during the “Assign the App” step. This allows targeted deployment.
5. How do I ensure Dialpad remains compliant with company policies?
Use Intune’s App Protection Policies to enforce data security and compliance requirements for Dialpad and other managed apps.
This guide equips you to successfully package and deploy the Dialpad app using Intune, ensuring seamless installation and management across devices.
Related URLs:-
- How to Set Up Single Sign-On (SSO) for Dialpad with Azure AD
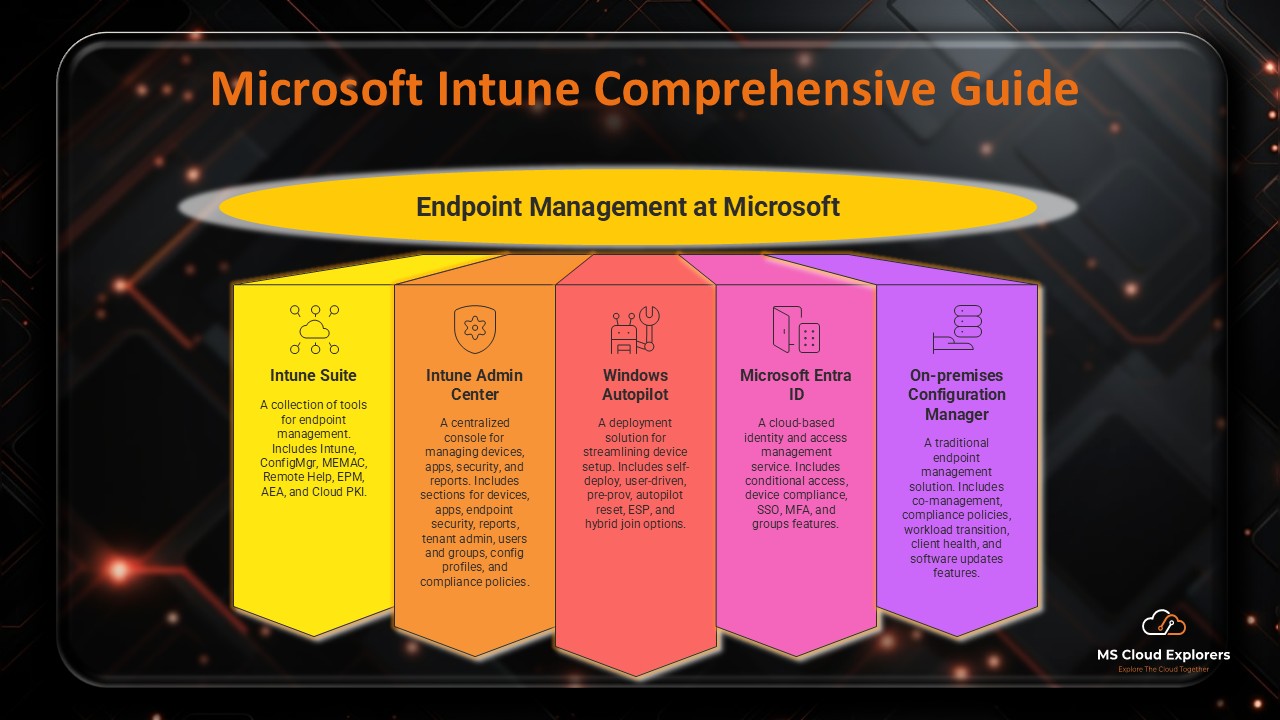
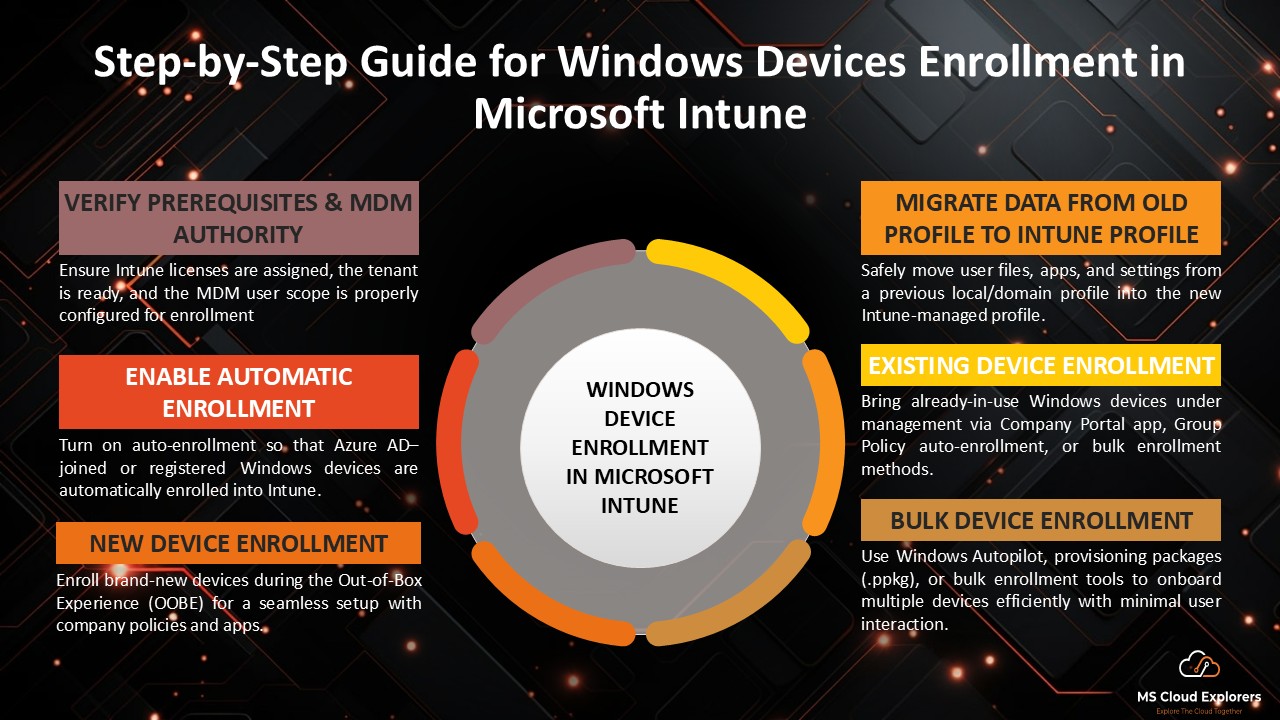
- Step-by-Step Guide for Windows Devices Enrollment in Microsoft Intune
- Effortlessly Deploy the ChatGPT and Microsoft Store Apps with Microsoft Intune
- How to Setup Microsoft Intune with Pre-Build templates (Zero to Hero)
- Microsoft Endpoint Manager (Intune): Comprehensive Beginner’s Guide


3 comments on “Step-by-Step Guide to Package and Deploy Dialpad App Using Intune”