
Adding a custom domain in Microsoft 365 is essential for building your brand and using professional email addresses. This comprehensive guide will walk you through how to add a domain in Microsoft 365, ensuring a smooth and hassle-free setup. Follow these simple steps to integrate your domain with Office 365 efficiently.
Prepare Your Domain
Before adding your domain to Office 365, ensure the following:
- Domain Ownership: Verify that you own the domain you plan to add.
- DNS Access: Ensure you can modify DNS records with your domain registrar.
- Compatibility: Confirm that your domain’s settings comply with Office 365 requirements.
Tools You’ll Need
- An active Office 365 subscription.
- Global Administrative access to your Office 365 account.
- Domain registrar login credentials.
Follow the Steps on How to add a domain in Microsoft 365.
Step 1: Log in to the Microsoft 365 Admin Portal with GA Admin
- Navigate to the Microsoft 365 Admin Center.
- Log in using your global administrator credentials.
- From the left-hand navigation pane, select Settings > Domains.
Step 2: Add Your Domain
- Click the Add domain button.
- Enter your custom domain name (e.g., yourdomain.com) in the provided field.
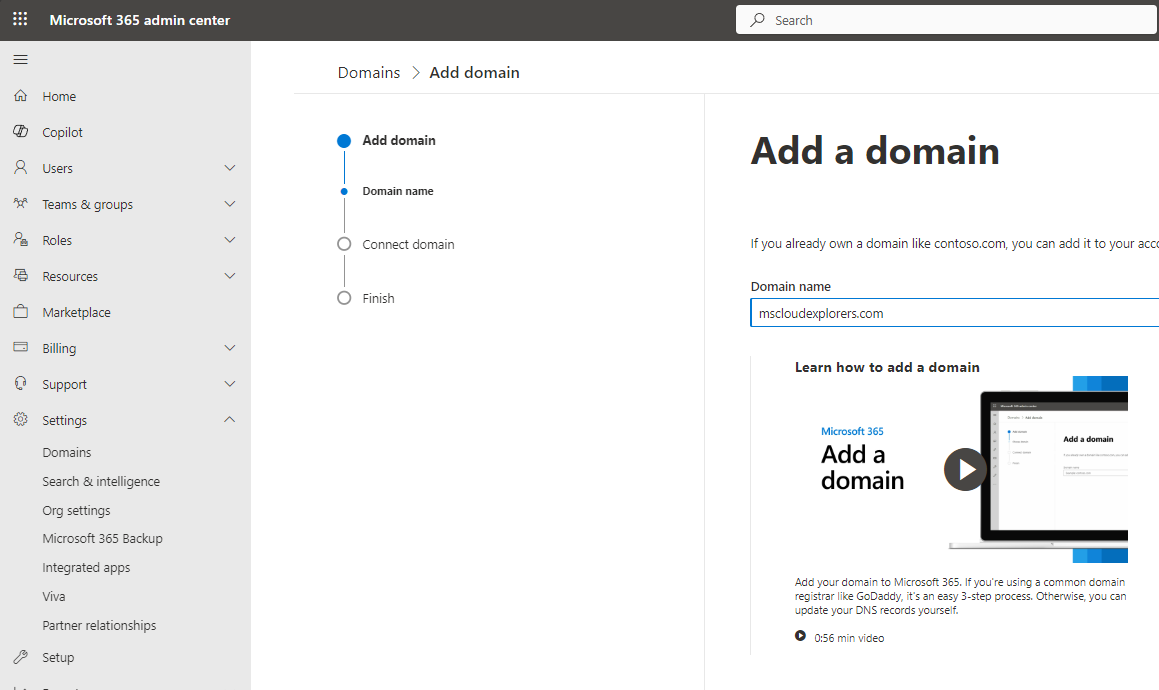
- Click Use this domain to proceed.
- Click on Add a TXT record to the domain’s DNS records and Continue.
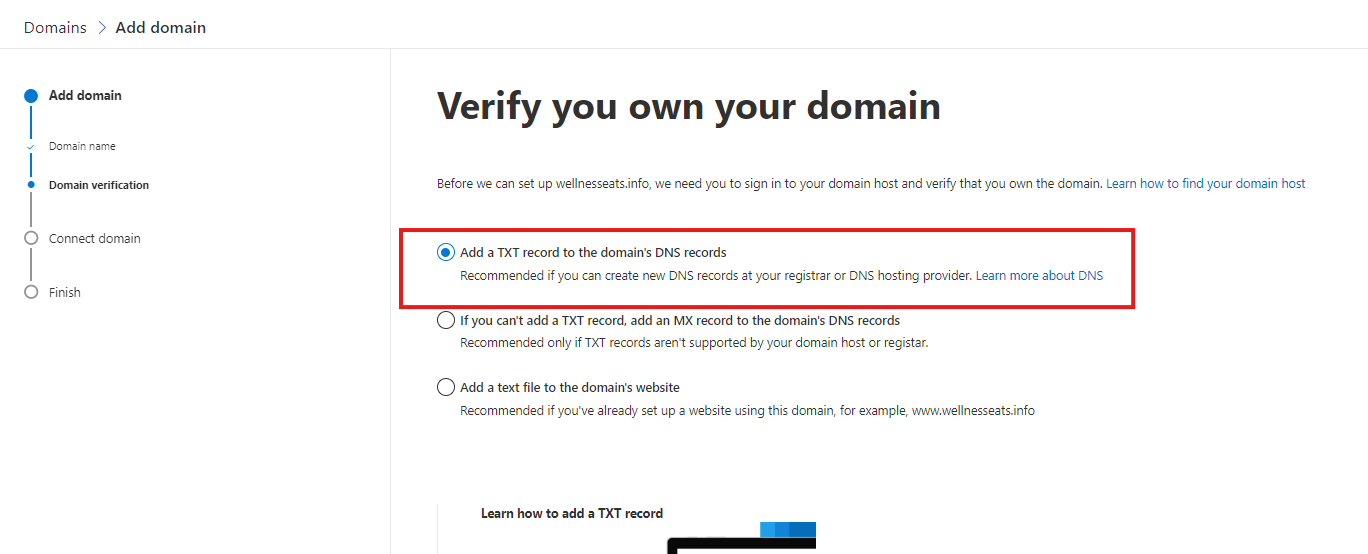
Step 3: Verify Domain Ownership (Connect Hostinger domain to office 365 tenant)
Microsoft requires you to verify ownership of the domain. Choose one of the following methods:
1: TXT Record Verification
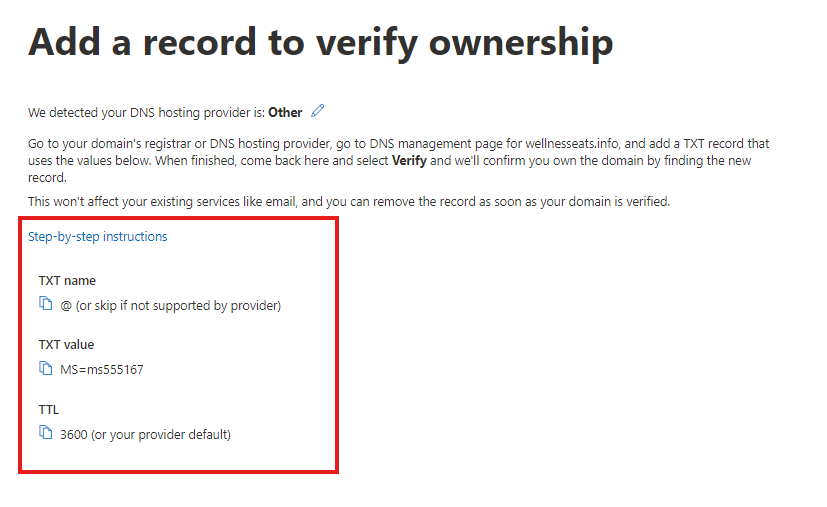
- Copy the TXT record provided by Microsoft.
- Log in to your domain registrar’s DNS management portal (For demo Purpose I’m using Hostinger You may have different DNS provider, but steps would be same.)
- In the DNS management portal go to domain section, Select the domain and click on the Manage DNS records.
- In the left side Click on the DNS/Nameservers.
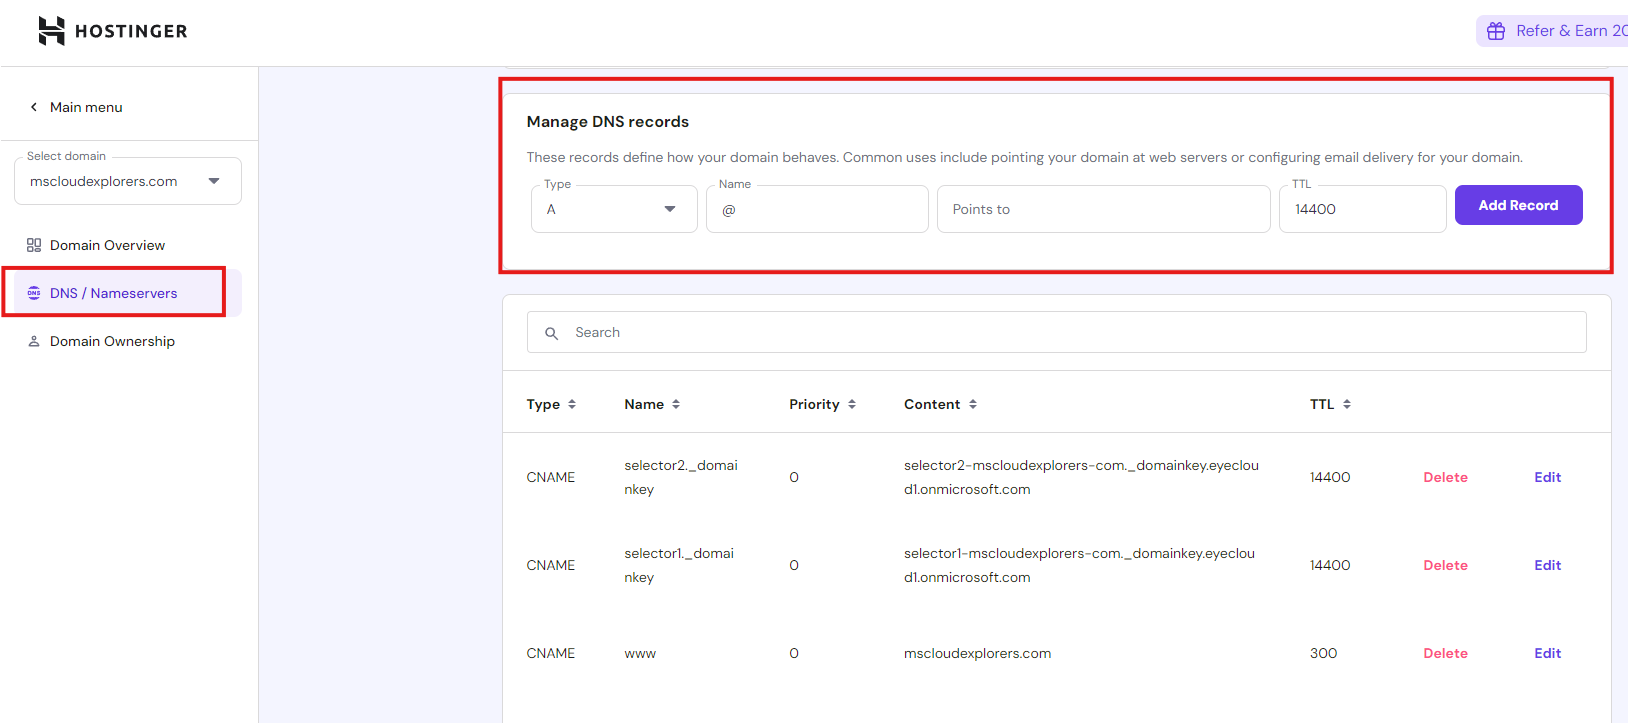
- Add a new TXT record with the following details:
- Host: @
- Value: The TXT record value provided by Microsoft.
- TTL: Set to the default value or 3600 seconds.

- Save the changes and return to the Microsoft 365 Admin Center.
- Click Verify to confirm ownership. (It may take some time to propagate the changes).
- Choose the Add your own DNS records and click continue.
Step 4: Configure DNS Records
Once ownership is verified, set up DNS records for Office 365 services like email, Teams, and OneDrive. Microsoft provides the required records:
2: MX Record Verification
- Copy the MX record details provided.
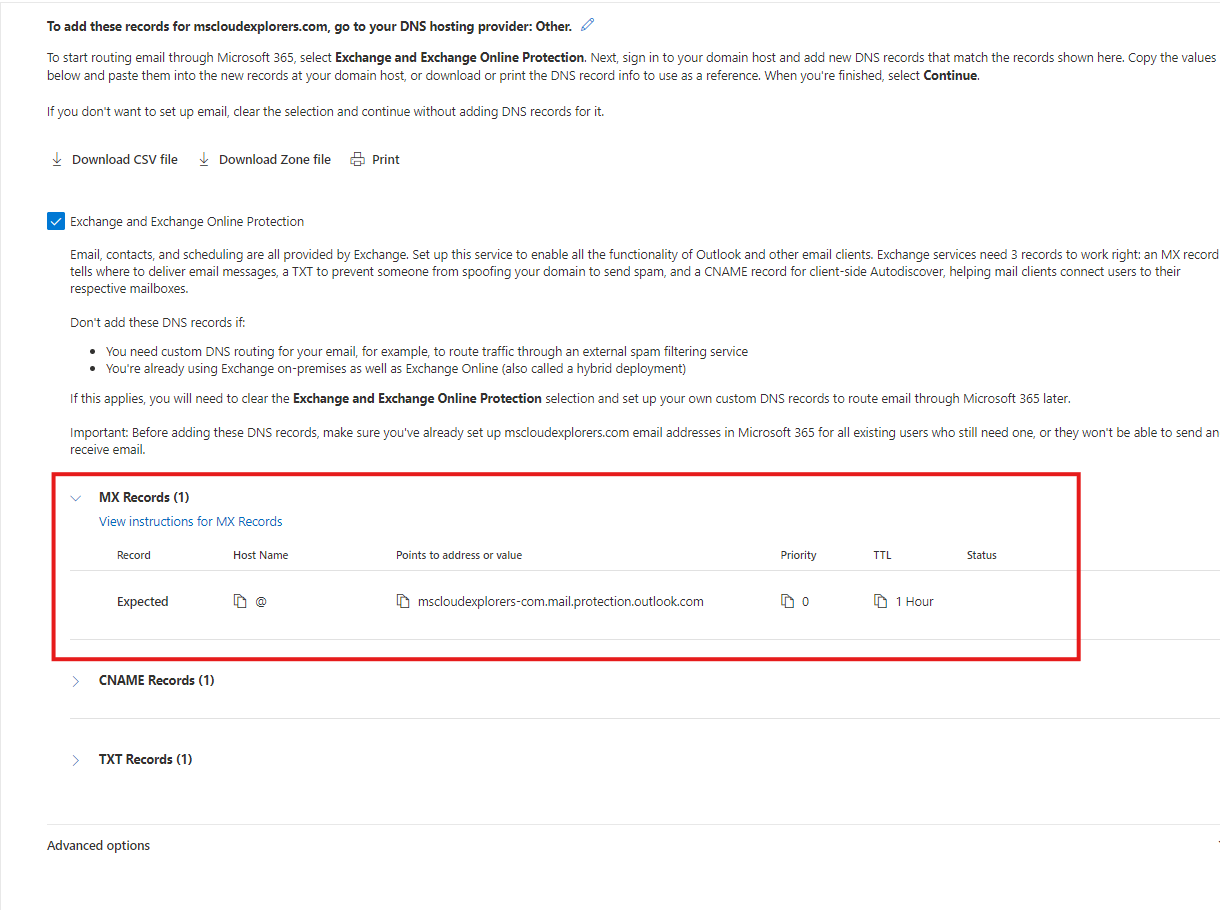
- Add an MX record in your DNS settings with these parameters:
- Priority: High (or the highest available setting).
- Value: The Microsoft-provided destination address.
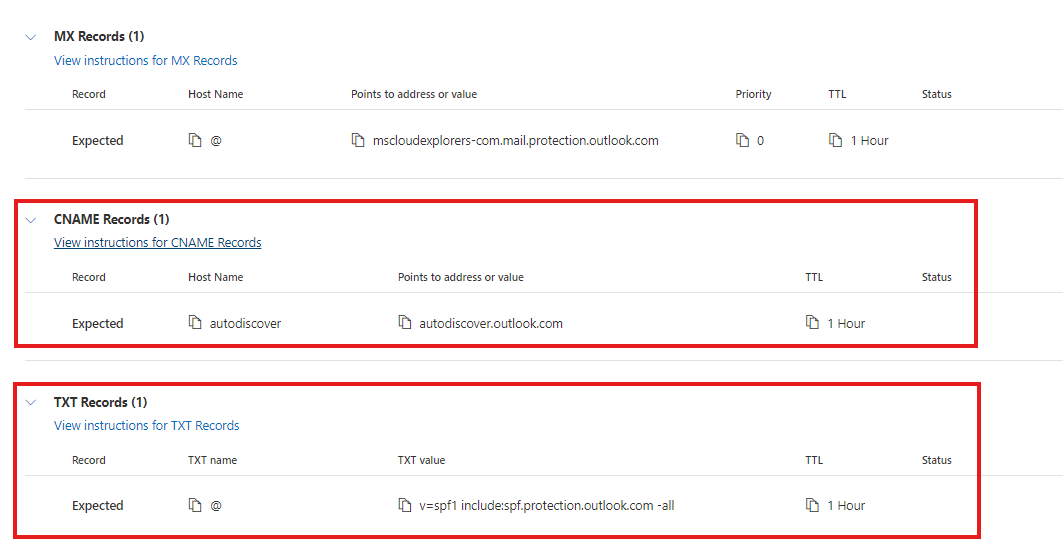
- Similar method copy the CNAME records and TXT Records.
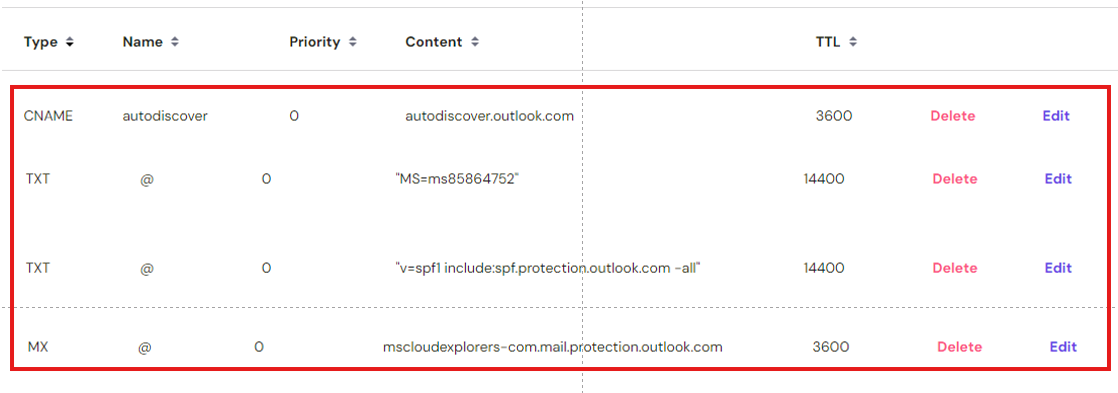
- Add these records to the DNS Management (For me its Hostinger)
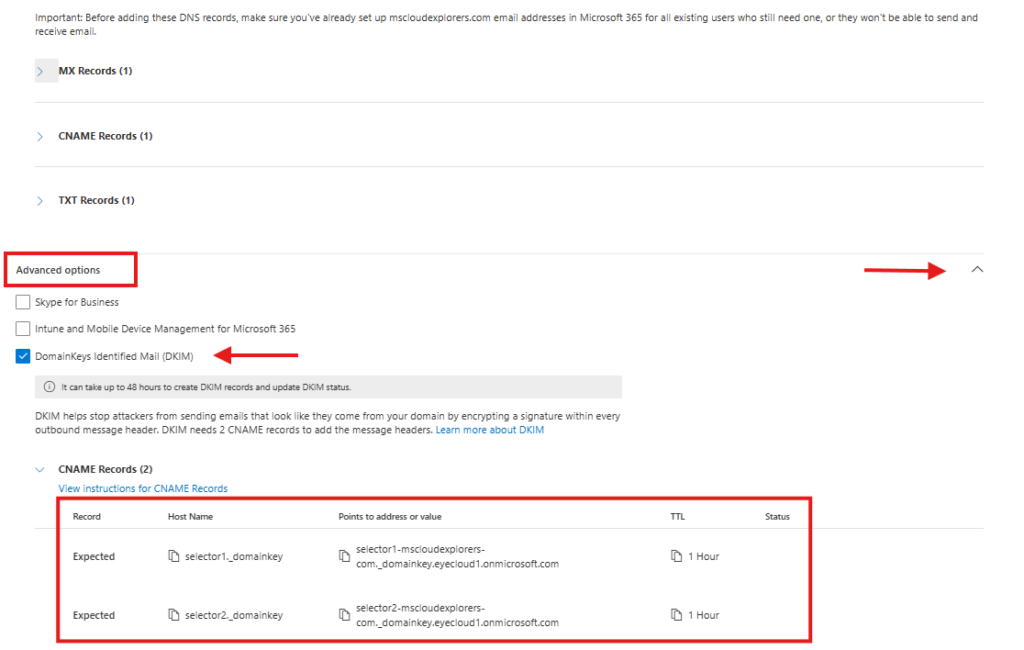
- Add the DNS Records for Intune and MDM: Under the Advanced option
- Click on the CNAME Records (2).
- Copy both of them and add into the DNS host similar to above.
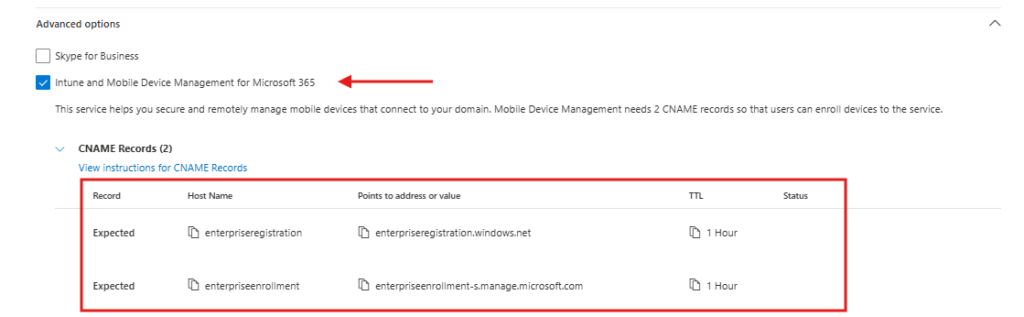
- Records for DKIM and Intune (MDM) Must be CNAME TTL Value 1hour or Default.
- Return to the Microsoft 365 Admin Center and verify the records.

3. You can also Add DKIM later from the Security Center.
- Go to Security Admin Center.
- Under Email and Collaboration Select the Policies and Rules.
- Open the Threat Policies options.
- Under the Rules select the Email authentication settings.
- Under the DKIM tab you should see all domains’ DKIM status.
Essential DNS Records
- MX Record: Routes email to Microsoft 365.
- CNAME Records: Supports services like Autodiscover and SPF.
- TXT Record: Ensures email security and delivery (SPF).
- SRV Records: Configures protocols like SIP and federation.
Automatic vs. Manual Configuration
- Automatic Setup: Some registrars allow automatic configuration. (Here’s Microsoft Guide that allow automatic setup – Automatic Registration)
- Manual Setup: For unsupported registrars, enter records manually.
Step 6: Finalize Setup
- After entering DNS records, click Finish in the Admin Center.
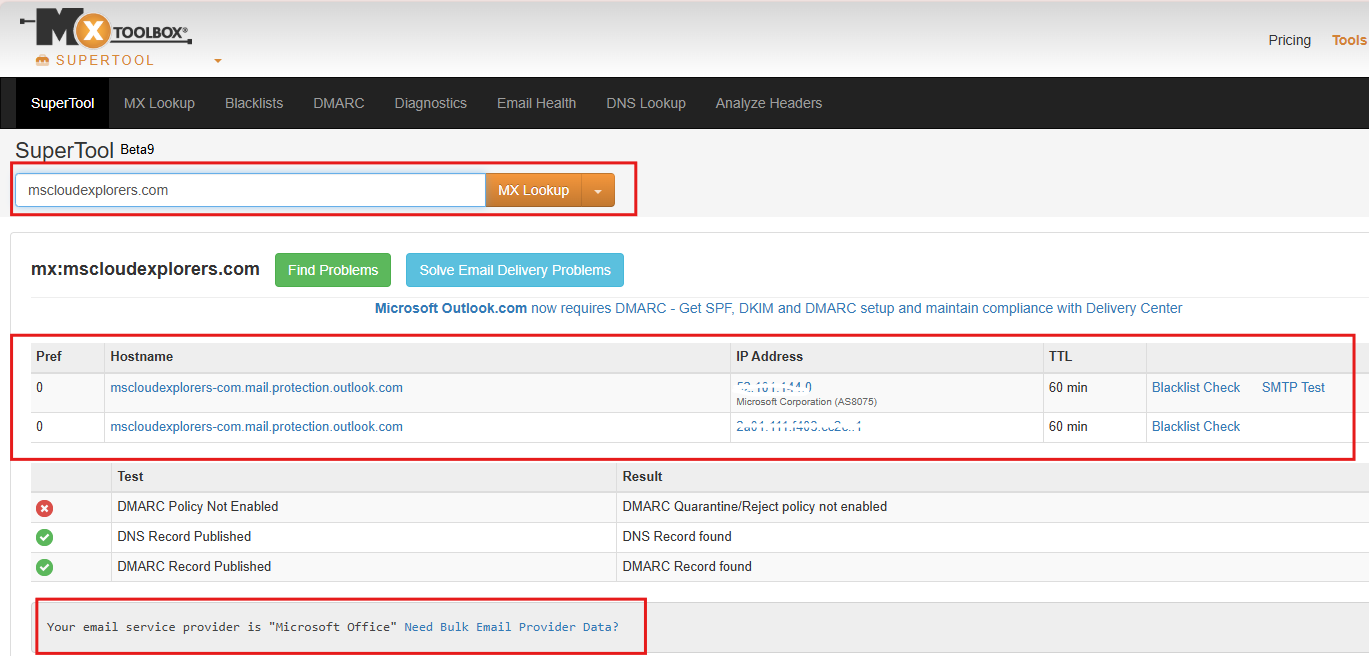
- Test your domain’s functionality by sending and receiving emails.
- Use the MX Tool Box diagnostic tools to troubleshoot any issues.
Step 7: Assign Users to the New Domain
Once the domain has been setup and verified you can start changing the username of the accounts.
In the Admin Center, navigate to Users > Active users.
Select all the user accounts that you want to assign the new domain.
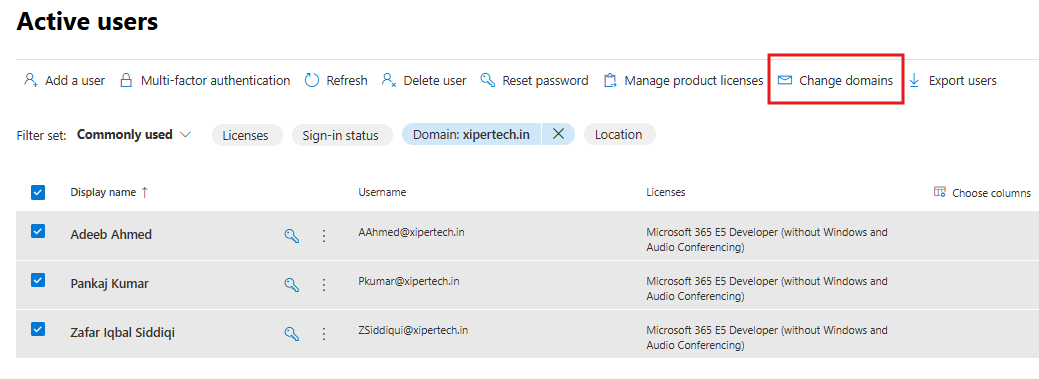
Click Change Domains.
Select the newly added domain Name in the dropdown list (e.g.,
mscloudexplorers.com).Save the changes.
DMARC Records in Microsoft 365
While DMARC (Domain-based Message Authentication, Reporting, and Conformance) has always been highly recommended for email security and deliverability, it will become essential for certain organizations using Microsoft 365. Starting May 2025, all organizations sending 5,000 or more emails per day to Microsoft consumer services (Outlook.com, Hotmail, Live.com) must publish valid SPF, DKIM, and at least a DMARC record with a ‘p=none’ policy. Without these records, your emails may be marked as spam or rejected, reducing deliverability and increasing risk.
Key DMARC Points:
Even if you don’t meet the high-volume threshold, setting up DMARC is strongly recommended for all domains to improve mail security and gain visibility into how your domain is used.
- DMARC helps protect your domain from phishing, spoofing, and unauthorized use.
- It works by aligning SPF and DKIM with the “From:” address in your messages and gives you control over how unauthenticated emails are handled.
- DMARC helps protect your domain from phishing, spoofing, and unauthorized use.
DMARC Record Example (customize for your needs):
Plaintext
v=DMARC1; p=quarantine; rua=mailto:dmarc-reports@yourdomain.com; ruf=mailto:forensic@yourdomain.com; pct=100; fo=1;Explanation of Each Tag
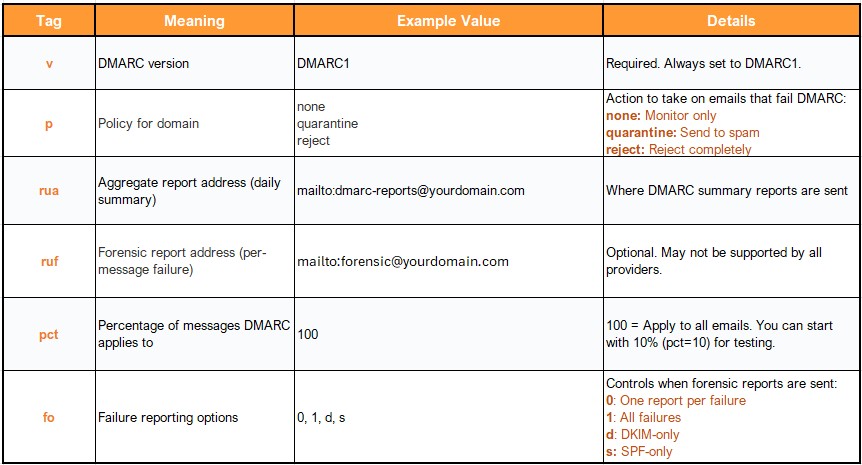
Simplified/Minimal DMARC Record Example (Monitoring Only)
Plaintext
v=DMARC1; p=none; rua=mailto:dmarc-reports@yourdomain.comThis simply monitors DMARC alignment without affecting mail flow. Good for starting out.
Important Notes:
Gradually move from none → quarantine → reject as you validate email sources.
Make sure the reporting email addresses (rua/ruf) are set up and can receive mail. You can separate Shared Mailbox for it.
If you’re using third-party services (e.g., Mailchimp, Salesforce), they must be configured to align with your domain via SPF/DKIM.
Use this to monitor DMARC results without affecting email delivery. Ideal for initial setup or testing.
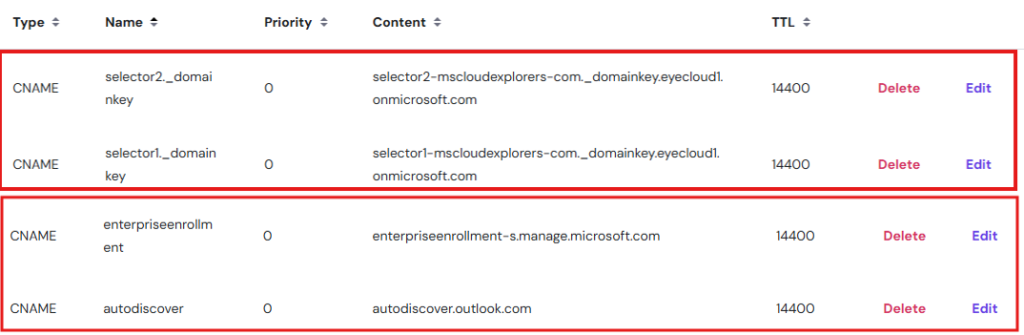
DNS Host Management
Your DNS records should look like the following:

Troubleshooting Common Issues
Verification Failures
- Ensure DNS changes have propagated (may take up to 72 hours).
- Double-check record values for typos.
Email Delivery Issues
- Verify MX record priority settings.
- Use the Microsoft 365 Admin Center Diagnostic Tools for insights.
Authentication Problems
- Ensure proper setup of SPF, DKIM, and DMARC records to enhance email security.
By following these steps, you can successfully add a domain to Office 365, ensuring professional communication and seamless service integration.
Conclusion
Integrating a custom domain with Office 365 not only enhances your organization’s professional image but also ensures consistent branding across all communications. By following this step-by-step guide, you’re taking a pivotal step toward building a credible and unified digital presence.
Explore More from MS Cloud Explorers
- A Practical Guide to Successful Microsoft 365 Adoption
- How to Configure SMTP Relay in Office 365: A Comprehensive Guide
- Microsoft Zero Trust Assessment: A Step-by-Step Guide for IT Admins
- Mail Flow Rules in Exchange Online: A Comprehensive Guide
Enjoyed the article?
We’d love to hear your thoughts—share your comments below!
For more insights, guides, and updates from the Microsoft ecosystem, be sure to subscribe to our newsletter and follow us on LinkedIn. Stay connected and never miss out on the latest tips and news!


Hey! I’m pretty new to Office 365 admin stuff, but this guide made adding a domain way less scary than I thought 😅. The DNS steps were super clear too. Quick Q—how long does it usually take for the domain to verify? Mine’s been stuck for a bit.
Welcome to the world of 365 admin! 😊 So glad the guide helped—it can definitely feel overwhelming at first. Domain verification can take anywhere from a few minutes to an hour, depending on your DNS provider. If it’s been longer, double-check the TXT record for typos. Let me know if you’re still stuck—we’ve all been there!