
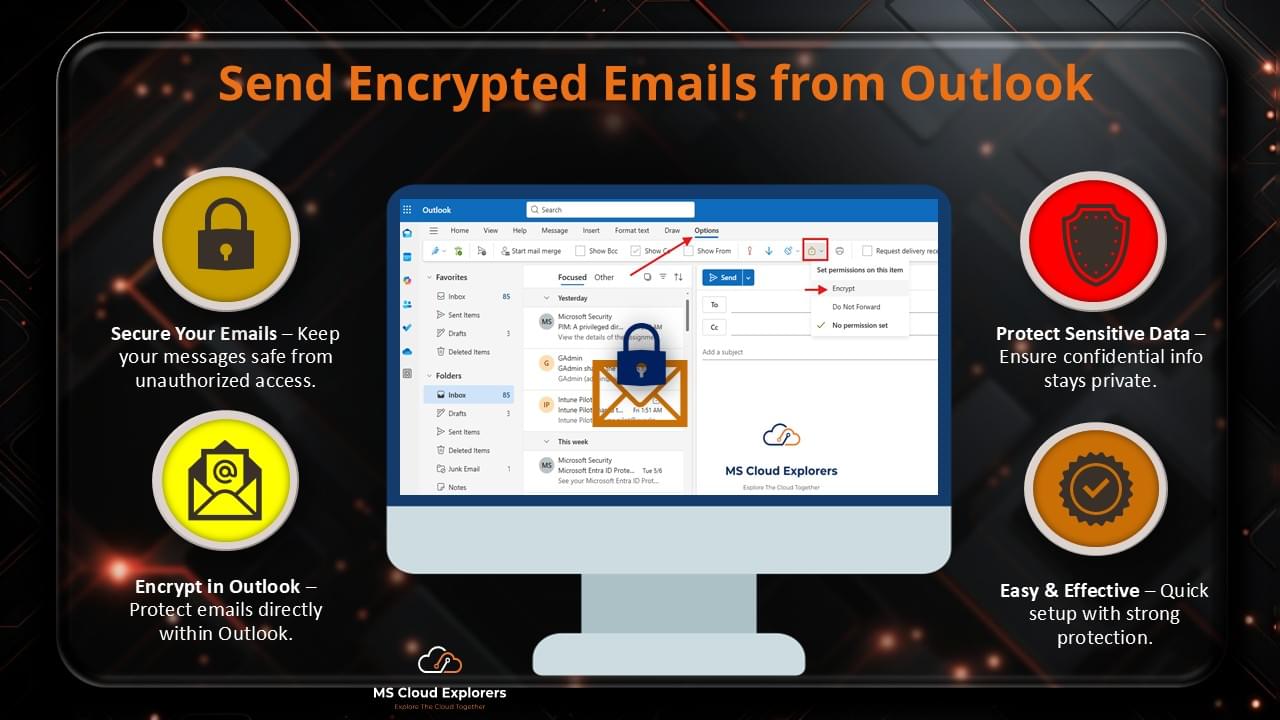
How to Send Encrypted Email in Outlook – Step-by-Step Guide
In today’s digital world, email security isn’t optional — it’s essential. Whether you’re sharing contracts, financial details, or sensitive health records, protecting email content is critical. If you’re wondering how to send encrypted email in Outlook, this guide will walk you through everything: Outlook Desktop App, New Outlook, Outlook on the Web (OWA), and admin setup in Microsoft 365.
Why Encrypting Emails in Outlook Matters
Without encryption, emails can be intercepted during transit. Encryption locks your message so only the intended recipient can open it — like a secure digital envelope. Using Outlook’s built-in encryption tools helps:
-
Keep sensitive information safe in transit and at rest.
-
Comply with regulations such as HIPAA and GDPR.
-
Build trust with clients, partners, and stakeholders.
Types of Email Encryption in Outlook
Outlook supports two main encryption methods:
-
S/MIME Encryption – Uses certificates for end-to-end protection. Ideal for internal users with matching certificates.
-
Microsoft Purview Message Encryption (MPME) – Cloud-native, certificate-free, works across organizations, supports Encrypt and Do Not Forward options.
Prerequisites for Sending Encrypted Emails
Before you start, make sure these requirements are met:
Microsoft 365 Subscription Requirements
You need at least one of the following plans:
-
Microsoft 365 Business Premium
-
Microsoft 365 E3/E5
Basic plans do not include Microsoft Purview Message Encryption.
Licensing and Access
Ensure:
-
You have mailbox rights.
-
The encryption service is included in your license.
-
You are using Exchange Online (POP/IMAP is not supported).
Admin Setup for Encryption Features
Admins should configure:
-
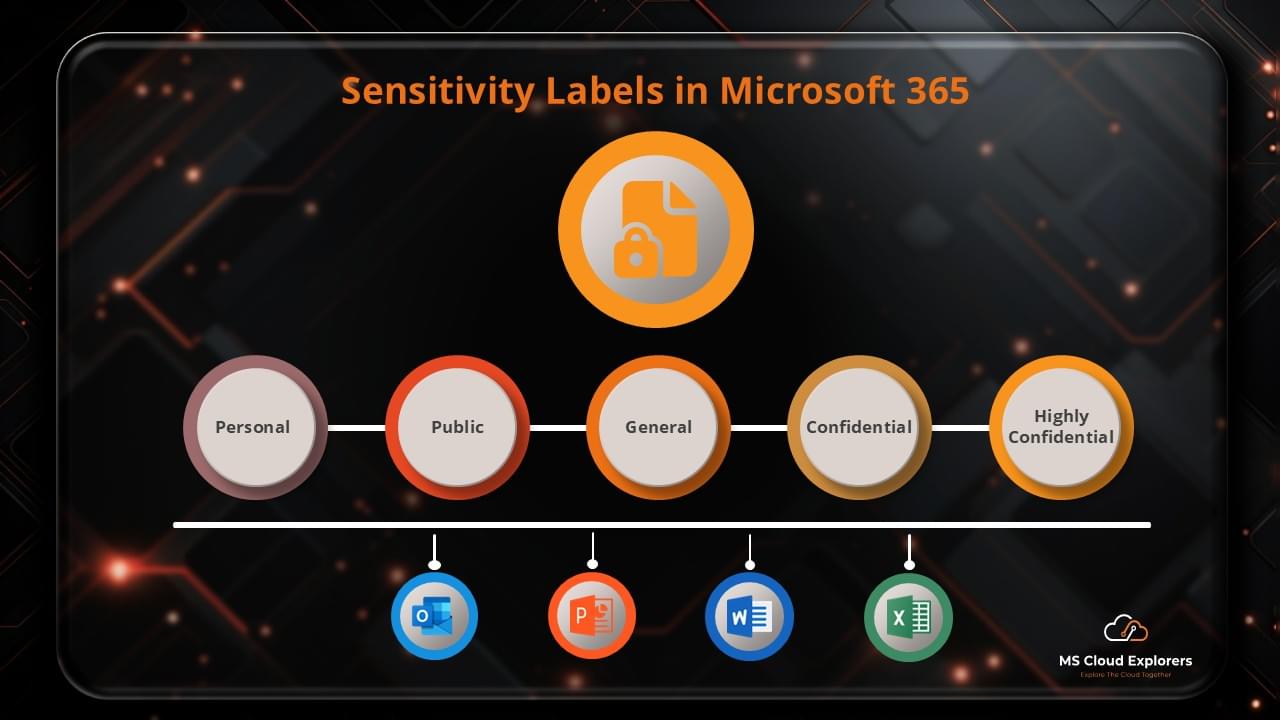
Sensitivity Labels with encryption
-
Rights Management Services (RMS)
-
Optional: mail flow rules to trigger encryption automatically
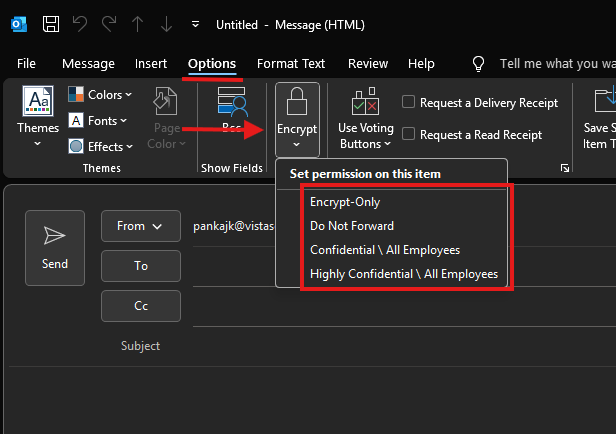
How to Send Encrypted Email in Outlook App (Desktop)
Follow these steps to secure your messages:
-
Open Outlook Desktop App.
-
Click New Email.
-
Compose your message.
-
Go to the Options tab.
-
Click Encrypt and choose:
-
Encrypt-Only – message can be read and forwarded only by intended recipients.
-
Do Not Forward – locks down forwarding, copying, and printing.
-
Receiving
Recipients will see a notice like “This email is protected.” For Outlook or modern web browsers, access is seamless.
How to Send Encrypted Email in New Outlook
Using New Outlook?
-
Enable the New Outlook toggle.
-
Click New Mail.
-
Select Options at the top of the compose window.
-
Choose Encrypt or Do Not Forward.
-
Send your message.
It’s as intuitive as the classic version and works across devices.
How to Send Encrypted Email in Outlook on the Web (OWA)
If you use Outlook in your browser:
-
-
Go to https://outlook.office.com.
-
Click New Message.
-
Select Options → Encrypt.
-
Compose and send your email.
-
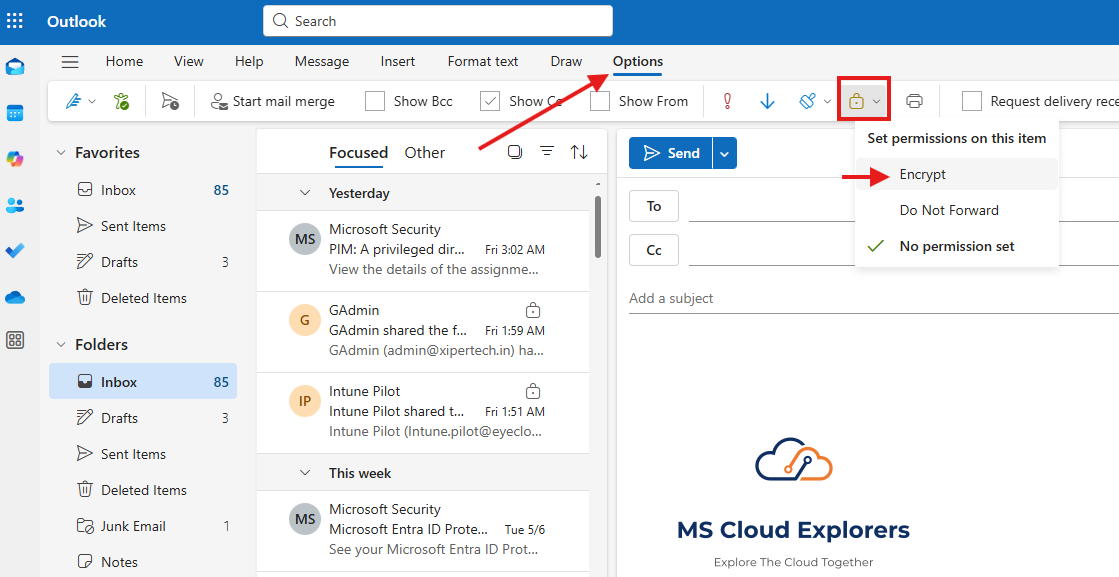
No plugins or extensions are required — just a browser and your Microsoft 365 login.
Admin Guide: Configuring Email Encryption in Microsoft 365
The Email Encryption option should already be enabled. However, If email encryption options (such as Encrypt or Do Not Forward) are not available in Outlook or OWA, follow these PowerShell steps to configure Azure Rights Management (Azure RMS) and enable Information Rights Management (IRM).
✅ Step-by-Step PowerShell Configuration with Explanations
1. Connect to Exchange Online
Connect-ExchangeOnlineConnects your session to Exchange Online, allowing you to run mailbox and IRM-related commands.
2. Connect to Azure Information Protection (AIP) Service
Connect-AIPServiceEstablishes a session with the Azure Information Protection service, required to configure rights management.
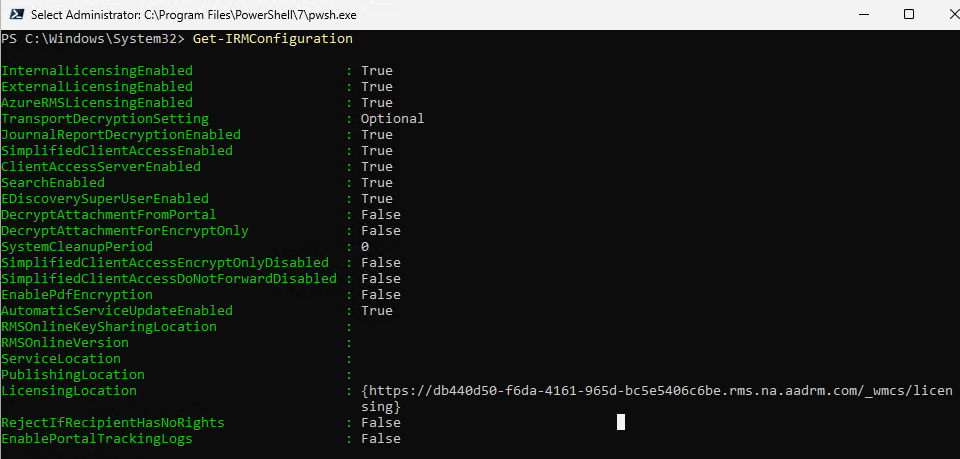
3. Check Current IRM Configuration
Get-IRMConfigurationDisplays the current Information Rights Management (IRM) settings for your Exchange Online environment.
4. Reset IRM Configuration (if misconfigured)
Set-IRMConfiguration -LicensingLocation $null -InternalLicensingEnabled $falseResets the licensing location and disables internal licensing temporarily to allow reconfiguration.
5. Activate Azure RMS
Enable-AIPServiceActivates the Azure Rights Management service, which is required to use IRM and message protection.
6. Retrieve Azure RMS Licensing Configuration
$rmsConfig = Get-AipServiceConfiguration

$licenseUri = $rmsConfig.LicensingIntranetDistributionPointUrl
Retrieves the licensing URL needed for IRM. This URL points to the Azure RMS licensing endpoint used for user authentication and license acquisition.
7. Fetch Existing IRM Configuration
$irmConfig = Get-IRMConfiguration

$list = $irmConfig.LicensingLocation
Gets the current list of licensing URLs in the IRM configuration. These URLs are used by Office applications to enforce encryption policies.
8. Add Azure RMS Licensing URL (if missing)
if (!$list) { $list = @() }

if (!$list.Contains($licenseUri)) { $list += $licenseUri }
Ensures that the correct Azure RMS licensing endpoint is present in the configuration list.
9. Enable Azure RMS in IRM Configuration
Set-IRMConfiguration -LicensingLocation $list

Set-IRMConfiguration -AzureRMSLicensingEnabled $true -InternalLicensingEnabled $true
Applies the correct licensing location and enables Azure RMS and internal IRM licensing for Office 365 message protection.
10. Enable the ‘Protect’ Button in Outlook on the Web
Set-IRMConfiguration -SimplifiedClientAccessEnabled $trueEnables the simplified ‘Protect’ interface in Outlook on the Web, allowing users to apply encryption and rights restrictions easily.
Make sure all of the above settings are set to True, and the Licensing Location is configured using the Azure RMS (ARM) template.
After Configuration
- Restart Outlook or refresh Outlook on the Web to see the “Encrypt” and “Do Not Forward” options.
- Ensure users are licensed for Microsoft 365 plans that include Microsoft Purview Message Encryption (MPME).
- You can verify protection by sending a test email with encryption and checking if it applies restrictions as expected.
Viewing Encrypted Emails
-
Internal recipients: Outlook and OWA show messages directly.
-
External recipients: They receive a secure link; third-party apps may require a one-time passcode (OTP).
Benefits of Using Encrypted Email in Outlook
-
Secures sensitive data in transit and at rest.
-
Meets compliance requirements (HIPAA, GDPR).
-
Builds trust with clients and partners.
-
Allows administrators to control message access and revoke permissions if needed.
Tips for Managing Encrypted Emails
-
Use auto-labeling to ensure sensitive emails are protected automatically.
-
Train users on when to use Encrypt vs Do Not Forward.
-
Monitor encrypted email usage and revoke access when necessary using Microsoft Purview.
Common Mistakes to Avoid
-
Relying solely on mail flow rules — users must understand when to encrypt.
-
Using unsupported email clients.
-
Forgetting to test external recipients’ access.
Conclusion
Sending encrypted emails in Outlook isn’t just for big corporations or IT geeks — it’s for anyone who wants to protect sensitive information. Whether you’re using the desktop app, new Outlook, or the web version, encryption is just a few clicks away.
Admins, don’t forget to configure everything on the backend — that’s what makes this tool powerful and reliable for your entire org.
Now go ahead, lock those emails down — because privacy is power.
FAQs
-
What happens if the recipient doesn’t use Outlook?
They receive a secure link to view the email with a one-time passcode. -
Is encrypted email available in the free version of Outlook?
No. Microsoft Purview Message Encryption requires Microsoft 365 Business Premium or Enterprise plans. -
Can I set encryption automatically for certain users or keywords?
Yes — admins can create mail flow rules to apply encryption based on keywords, departments, or recipient domains. -
What’s the difference between S/MIME and Microsoft Purview Encryption?
S/MIME requires certificates and is more complex. Microsoft Purview is cloud-native and easier to manage. -
How can I verify if an email was encrypted successfully?
Sent messages show a banner indicating encryption, and recipients receive the email in a protected format.
Related Links:-
As an IT admin managing a hybrid Microsoft 365 setup, I found this post really helpful. Users often ask about securely sending sensitive info, and this breakdown of encryption options in Outlook is exactly what they need. I appreciate the inclusion of both built-in M365 Message Encryption and S/MIME—makes it easier for us to guide different departments based on their needs. Definitely sharing this with my team.
Thank you for your feedback! We’re glad the guide was helpful for managing encryption across your Microsoft 365 environment. It’s great to hear that you’re sharing it with your team—our goal is to make these features more approachable for admins and users alike. If there are any specific scenarios or tools you’d like us to cover in future posts, feel free to suggest them!