

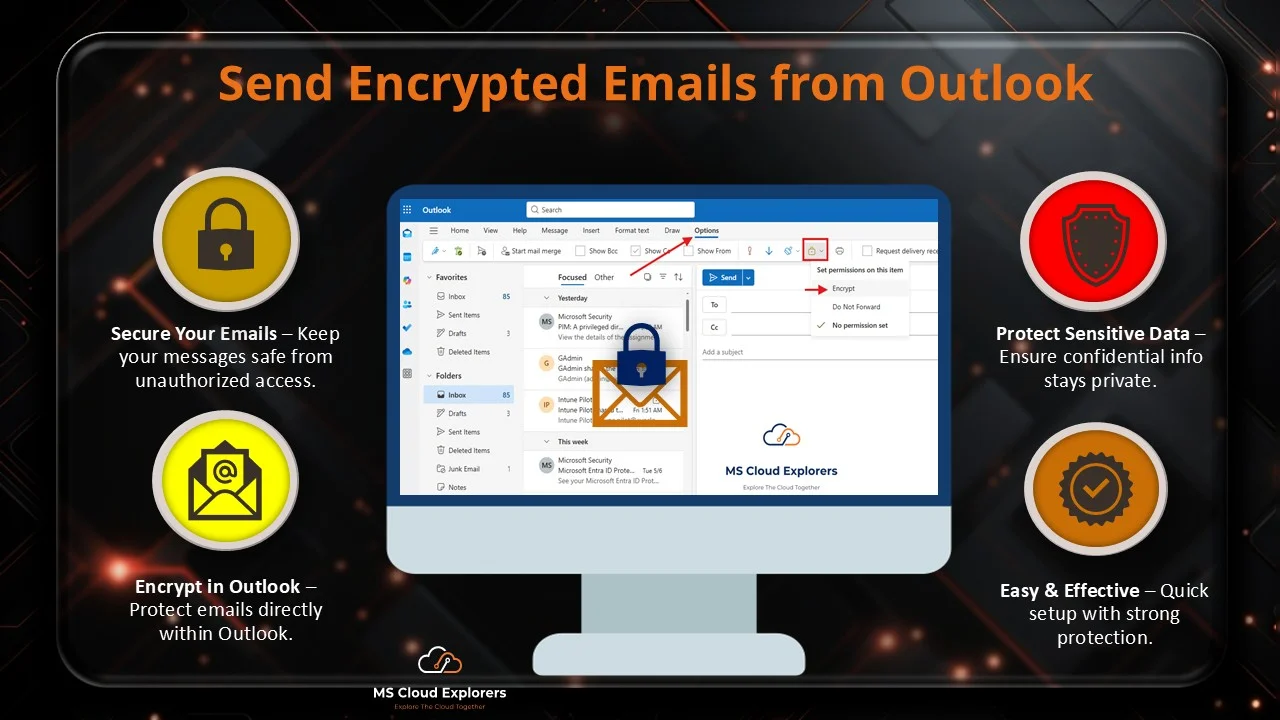
Sending confidential information through email is common, but it also comes with risk. If you are sharing contracts, financial records, HR documents, customer information, legal files, or any sensitive business data, you should know how to send encrypted email in Outlook.
Microsoft Outlook includes built-in encryption options that help protect email messages and attachments so only authorized recipients can access the content. In Microsoft 365, this protection is commonly powered by Microsoft Purview Message Encryption, which allows users to send encrypted messages to people inside and outside the organization, including Gmail, Yahoo, Outlook.com, and other email services.
In this guide, I will explain how to send encrypted email using Outlook Desktop App, New Outlook, Outlook on the Web, Outlook for Mac, Outlook Mobile, Microsoft 365 admin configuration, PowerShell validation, and troubleshooting.
Quick Answer: How to Send Encrypted Email in Outlook
- Open Outlook.
- Click New Email.
- Compose your message.
- Go to the Options tab.
- Select Encrypt.
- Choose Encrypt or Do Not Forward.
- Click Send.
If you do not see the Encrypt option, your Microsoft 365 license, Outlook client, or tenant-level encryption configuration may need to be checked.
|
Quick Tip |
What Is Email Encryption in Outlook?
Email encryption protects message content so that only the intended recipient can read it. Instead of sending the message as readable plain text, encryption converts the message into protected content that requires authorization before it can be opened.
Microsoft 365 supports multiple email encryption technologies, including Microsoft Purview Message Encryption, S/MIME, Information Rights Management, and Transport Layer Security. Microsoft 365 also uses TLS to encrypt connections between mail servers, but TLS only protects the connection between mail systems. If you want the email message itself to remain protected after delivery, use Outlook’s Encrypt or Do Not Forward options.
Outlook Email Encryption Options Explained
|
Encryption Option |
What It Does |
Best Use Case |
|
TLS |
Encrypts the connection between mail servers. |
Standard email transport protection. |
|
Encrypt |
Keeps the message encrypted and protected in Microsoft 365-supported experiences. |
Sending sensitive content that should remain protected. |
|
Do Not Forward |
Encrypts the email and restricts forwarding, copying, and printing in supported clients. |
Highly confidential emails. |
|
S/MIME |
Uses certificates to encrypt and digitally sign emails. |
Certificate-based organization-to-organization communication. |
|
Microsoft Purview Message Encryption |
Allows protected email to be sent to internal and external recipients. |
Business and enterprise email encryption. |
Encrypt vs Do Not Forward in Outlook
When you click Encrypt in Outlook, you may see different protection options depending on your Microsoft 365 subscription and tenant configuration.
|
Option |
Description |
Recipient Permissions |
|
Encrypt |
The email message remains encrypted. |
Recipient can read the email. Forwarding may be allowed depending on policy and client behavior. |
|
Do Not Forward |
The email is encrypted and usage restrictions are applied. |
Recipient cannot forward, copy, or print the email in supported clients. |
|
No Permission Set |
Removes encryption from the message. |
Email is sent normally. |
Requirements to Send Encrypted Email in Outlook
1. Supported Microsoft 365 License
Microsoft Purview Message Encryption is included with several Microsoft 365 and Office 365 plans, including:
- Office 365 Enterprise E3 and E5
- Microsoft 365 Enterprise E3 and E5
- Microsoft 365 Business Premium
- Office 365 A1, A3, and A5
- Office 365 Government G3 and G5
Azure Information Protection Plan 1 can also be added to selected plans such as Exchange Online Plan 1, Exchange Online Plan 2, Office 365 F3, Microsoft 365 Business Basic, Microsoft 365 Business Standard, and Office 365 Enterprise E1 to receive Microsoft Purview Message Encryption capabilities.
|
Important Licensing Note |
2. Exchange Online Mailbox
The user should have an Exchange Online mailbox. Microsoft Purview Message Encryption is designed for Microsoft 365 and Exchange Online-based email protection scenarios.
3. Supported Outlook Client
Microsoft 365 users can read and respond to protected messages using Outlook for Windows, Outlook for Mac, Outlook on the web, and Outlook mobile for Android and iOS.
4. Tenant-Level Encryption Configuration
In most Microsoft 365 tenants, encryption options are already available. However, if the Encrypt button is missing, administrators may need to validate Information Rights Management and Microsoft Purview Message Encryption settings.
How to Send Encrypted Email in Outlook App (Desktop)
Follow these steps to secure your messages:
-
Open Outlook Desktop App.
-
Click New Email.
-
Compose your message.
-
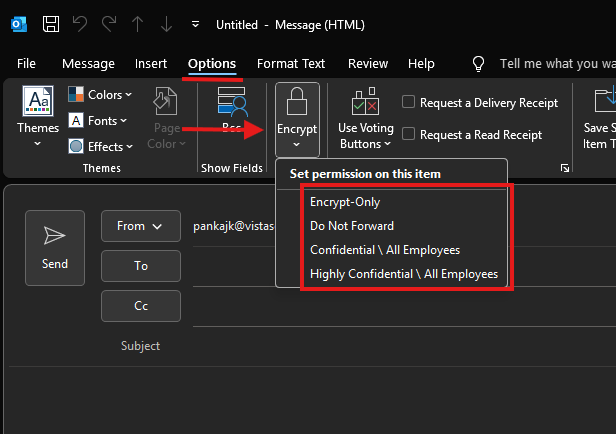
Go to the Options tab.
-
Click Encrypt and choose:
-
Encrypt-Only – message can be read and forwarded only by intended recipients.
-
Do Not Forward – locks down forwarding, copying, and printing.
-
Receiving
Recipients will see a notice like “This email is protected.” For Outlook or modern web browsers, access is seamless.
How to Send Encrypted Email in New Outlook
Using New Outlook?
-
Enable the New Outlook toggle.
-
Click New Mail.
-
Select Options at the top of the compose window.
-
Choose Encrypt or Do Not Forward.
-
Send your message.
It’s as intuitive as the classic version and works across devices.
How to Send Encrypted Email in Outlook on the Web (OWA)
If you use Outlook in your browser:
-
-
Go to https://outlook.office.com.
-
Click New Message.
-
Select Options → Encrypt.
-
Compose and send your email.
-
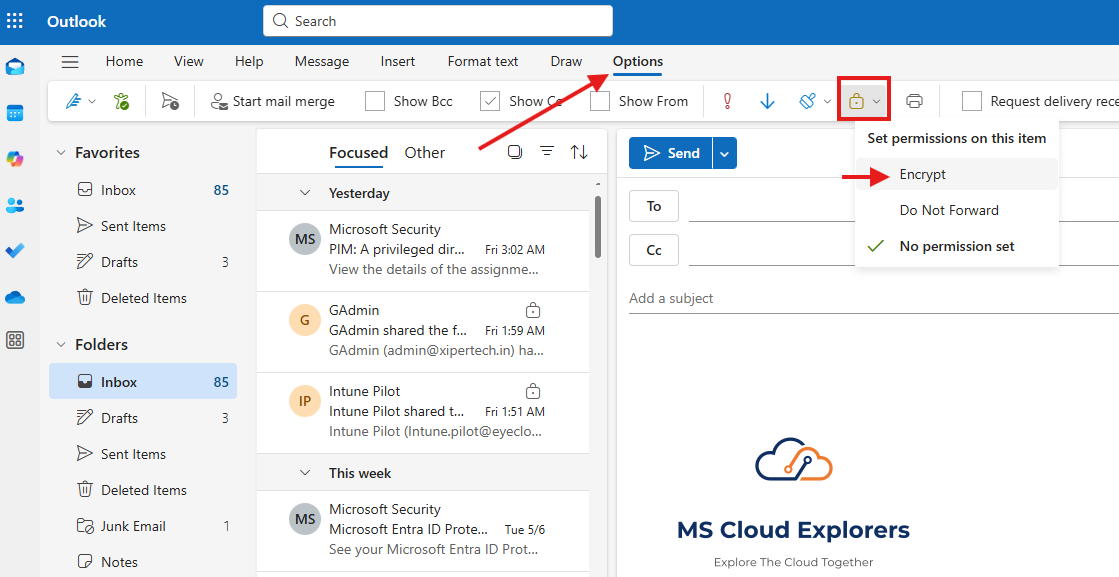
No plugins or extensions are required — just a browser and your Microsoft 365 login.
How to Send Encrypted Email in Outlook for Mac
- Open Outlook for Mac.
- Create a new email.
- Add the recipient and message content.
- Look for the Options or Security menu.
- Select an encryption or protection option.
- Send the email.
The exact interface may vary depending on the Outlook for Mac version and your Microsoft 365 configuration. Outlook for Mac is supported for reading and replying to protected emails, and Microsoft also provides guidance for S/MIME-based signed and encrypted messages on Mac.
Can You Send Encrypted Email from Outlook Mobile?
Outlook mobile can be used to read encrypted and protected messages. For sending encrypted messages from mobile, the available options depend on tenant configuration, Outlook mobile version, and the protection features enabled by the organization.
If the encryption option is not available on mobile, send the encrypted message from Outlook desktop, New Outlook, or Outlook on the web.
What Happens When the Recipient Receives an Encrypted Email?
|
Recipient Type |
Experience |
|
Microsoft 365 user using Outlook |
The message opens directly in Outlook. |
|
Outlook.com user |
The message can usually be opened directly in a supported Outlook experience. |
|
Gmail or Yahoo user |
The recipient may authenticate using Gmail/Yahoo credentials or a temporary passcode. |
|
Other email provider |
The recipient may receive a wrapper message and open the email in the encrypted message portal. |
|
Third-party email client |
The recipient may need to open the protected message using a browser-based experience. |
Are Attachments Encrypted in Outlook Encrypted Emails?
Yes, attachments can be protected, but behavior depends on the file type and protection option. Office files such as Word, Excel, and PowerPoint can remain protected after download when protection is applied. Other files, such as PDFs or images, may behave differently depending on configuration.
To enable PDF encryption, an administrator can run:
Set-IRMConfiguration -EnablePdfEncryption $true
Admin Guide: How to Enable or Validate Email Encryption in Microsoft 365
Microsoft Purview Message Encryption is already enabled in many Microsoft 365 tenants. However, if users cannot see the Encrypt or Do Not Forward option in Outlook, administrators should validate the tenant configuration
✅ Step-by-Step PowerShell Configuration with Explanations
1. Connect to Exchange Online
PowerShell
Connect-ExchangeOnlineConnects your session to Exchange Online, allowing you to run mailbox and IRM-related commands.
2. Connect to Azure Information Protection (AIP) Service
PowerShell
Connect-AIPServiceEstablishes a session with the Azure Information Protection service, required to configure rights management.
3. Check Current IRM Configuration
PowerShell
Get-IRMConfigurationDisplays the current Information Rights Management (IRM) settings for your Exchange Online environment.
4. Reset IRM Configuration (if misconfigured)
PowerShell
Set-IRMConfiguration -LicensingLocation $null -InternalLicensingEnabled $falseResets the licensing location and disables internal licensing temporarily to allow reconfiguration.
5. Activate Azure RMS
PowerShell
Enable-AIPServiceActivates the Azure Rights Management service, which is required to use IRM and message protection.
6. Retrieve Azure RMS Licensing Configuration
PowerShell
$rmsConfig = Get-AipServiceConfiguration
$licenseUri = $rmsConfig.LicensingIntranetDistributionPointUrl
Retrieves the licensing URL needed for IRM. This URL points to the Azure RMS licensing endpoint used for user authentication and license acquisition.
7. Fetch Existing IRM Configuration
PowerShell
$irmConfig = Get-IRMConfiguration
$list = $irmConfig.LicensingLocation
Gets the current list of licensing URLs in the IRM configuration. These URLs are used by Office applications to enforce encryption policies.
8. Add Azure RMS Licensing URL (if missing)
PowerShell
if (!$list) { $list = @() }
if (!$list.Contains($licenseUri)) { $list += $licenseUri }
Ensures that the correct Azure RMS licensing endpoint is present in the configuration list.
9. Enable Azure RMS in IRM Configuration
PowerShell
Set-IRMConfiguration -LicensingLocation $list
Set-IRMConfiguration -AzureRMSLicensingEnabled $true -InternalLicensingEnabled $true
Applies the correct licensing location and enables Azure RMS and internal IRM licensing for Office 365 message protection.
10. Enable the ‘Protect’ Button in Outlook on the Web
PowerShell
Set-IRMConfiguration -SimplifiedClientAccessEnabled $trueEnables the simplified ‘Protect’ interface in Outlook on the Web, allowing users to apply encryption and rights restrictions easily.
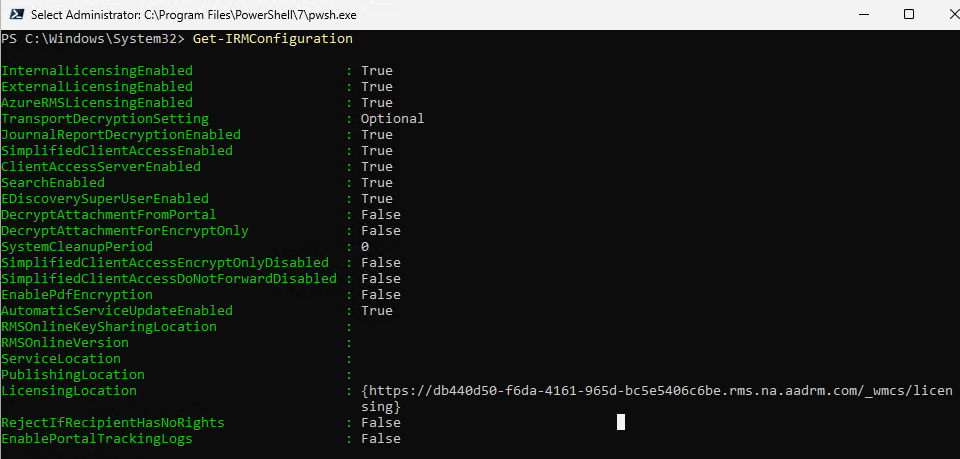
Make sure all of the above settings are set to True, and the Licensing Location is configured using the Azure RMS (ARM) template.
Step 10: Test Email Encryption
- Restart Outlook.
- Sign out and sign back in if needed.
- Create a new email.
- Go to Options > Encrypt.
- Send a test encrypted email to an internal Microsoft 365 user.
- Send a test encrypted email to an external Gmail or Yahoo user.
- Confirm that recipients can open the protected message.
After Configuration
- Restart Outlook or refresh Outlook on the Web to see the “Encrypt” and “Do Not Forward” options.
- Ensure users are licensed for Microsoft 365 plans that include Microsoft Purview Message Encryption (MPME).
- You can verify protection by sending a test email with encryption and checking if it applies restrictions as expected.
How to Automatically Encrypt Emails Using Mail Flow Rules
Microsoft 365 administrators can create mail flow rules in Exchange Online to automatically encrypt emails. This is useful when encryption should be applied based on recipient domain, external recipients, sensitive keywords, subject line text, message body content, department-based requirements, or compliance policies.
|
Scenario |
Recommended Rule |
|
Encrypt emails sent to external recipients |
Apply encryption when the recipient is outside the organization. |
|
Encrypt emails containing financial keywords |
Apply encryption when subject or body contains selected keywords. |
|
Encrypt HR documents |
Apply encryption based on sender group or department. |
|
Prevent forwarding of confidential emails |
Apply Do Not Forward protection. |
Troubleshooting: Encrypt Button Missing in Outlook
Check the User License
Make sure the sender has a license that includes Microsoft Purview Message Encryption or a supported add-on such as Azure Information Protection Plan 1.
Check Outlook Client Support
Use a supported Outlook client such as Outlook desktop, Outlook for Mac, Outlook on the web, Outlook mobile, or New Outlook.
Check IRM Configuration
Run Get-IRMConfiguration and confirm that AzureRMSLicensingEnabled, InternalLicensingEnabled, and SimplifiedClientAccessEnabled are set to True.
Restart Outlook
After configuration changes are made, restart Outlook or refresh Outlook on the web.
Check Cached Credentials
If the user recently received a new license or policy, sign out of Outlook and sign back in.
Check Sensitivity Label Policies
If the organization uses Microsoft Purview sensitivity labels, confirm that the label policy is published to the user.
Check Shared Mailboxes
Encryption options may behave differently when sending from a shared mailbox, delegate mailbox, or group mailbox. Test from the user primary mailbox first.
Check Hybrid Mail Flow
If the organization uses Exchange hybrid, make sure outbound mail is routed through Exchange Online if Exchange Online mail flow rules should apply encryption.
Common Mistakes to Avoid
- Assuming TLS is the same as message encryption: TLS protects the connection, but message-level encryption protects the message content after delivery.
- Using the wrong license: If the user does not have the required Microsoft 365 license or add-on, encryption options may not appear.
- Applying multiple encryption technologies to the same email: Avoid applying multiple email encryption technologies to the same message because some clients may not be able to open it correctly.
- Forgetting to test external recipients: Always test with recipients outside your organization, such as Gmail or Yahoo, before broad rollout.
- Assuming all attachments behave the same way: Attachment protection depends on file type, client, and encryption option used.
- Not training users on Encrypt vs Do Not Forward: Users should understand when to use encryption and when to restrict forwarding, copying, and printing.
Best Practices for Sending Secure Email in Outlook
- Use Encrypt when sending sensitive business data.
- Use Do Not Forward for highly confidential messages.
- Use sensitivity labels for consistent data protection.
- Configure mail flow rules for automatic encryption.
- Train users on when to encrypt email.
- Test encrypted messages with internal and external recipients.
- Keep Outlook clients updated.
- Review Microsoft Purview audit and compliance reports.
- Avoid sending passwords or secrets by email, even when encrypted.
Conclusion
Learning how to send encrypted email in Outlook is important for anyone who handles sensitive business or personal information. Whether you use Outlook desktop, New Outlook, Outlook on the web, Outlook for Mac, or Outlook mobile, Microsoft 365 provides built-in options to help protect email content.
For end users, the process is simple: create a new email, go to Options, select Encrypt, and send the message.
For Microsoft 365 administrators, the real value comes from validating licensing, enabling Microsoft Purview Message Encryption, configuring IRM correctly, using mail flow rules, and training users on when to use Encrypt versus Do Not Forward.
If the Encrypt option is missing, start by checking the user license, Outlook client, IRM configuration, and tenant-level Microsoft Purview settings.
FAQs
How do I send an encrypted email in Outlook?
Open Outlook, create a new email, go to Options, select Encrypt, choose the required encryption option, and send the email.
How do I send a secure email in Outlook?
To send a secure email in Outlook, use the Encrypt option from the message compose window. If you want to restrict forwarding, copying, and printing, choose Do Not Forward.
What is the difference between Encrypt and Do Not Forward?
Encrypt protects the message content, while Do Not Forward protects the message and applies usage restrictions such as preventing forwarding and copying in supported clients.
Can Gmail users open encrypted emails sent from Outlook?
Yes. Gmail and Yahoo recipients can receive a wrapper email and authenticate using supported credentials or access the encrypted message portal.
Do I need S/MIME to send encrypted email in Outlook?
Not always. Microsoft Purview Message Encryption does not require users to manually exchange S/MIME certificates. S/MIME is certificate-based and is generally used when peer-to-peer certificate-based encryption or digital signing is required.
Why is the Encrypt button missing in Outlook?
The Encrypt button may be missing because of licensing, unsupported Outlook client, disabled IRM configuration, cached credentials, missing sensitivity label policy, or tenant-level configuration issues.
Is Microsoft Purview Message Encryption included in Microsoft 365 Business Basic?
Microsoft Purview Message Encryption is not included by default in Business Basic, but Azure Information Protection Plan 1 can be added to Microsoft 365 Business Basic to receive Microsoft Purview Message Encryption capabilities.
Can admins automatically encrypt emails in Microsoft 365?
Yes. Administrators can use Exchange Online mail flow rules or Microsoft Purview DLP policies to automatically encrypt messages based on conditions such as keywords, recipient domains, or sensitive content.
Are attachments encrypted in Outlook encrypted emails?
Attachments can be encrypted, but behavior depends on attachment type and encryption option. Office files can remain protected, while other file types may behave differently depending on configuration.
Can I revoke an encrypted email after sending?
Microsoft Purview Advanced Message Encryption includes additional controls such as revocation and expiration for certain external recipient scenarios when recipients access the email through the web portal.
Explore More from MS Cloud Explorers
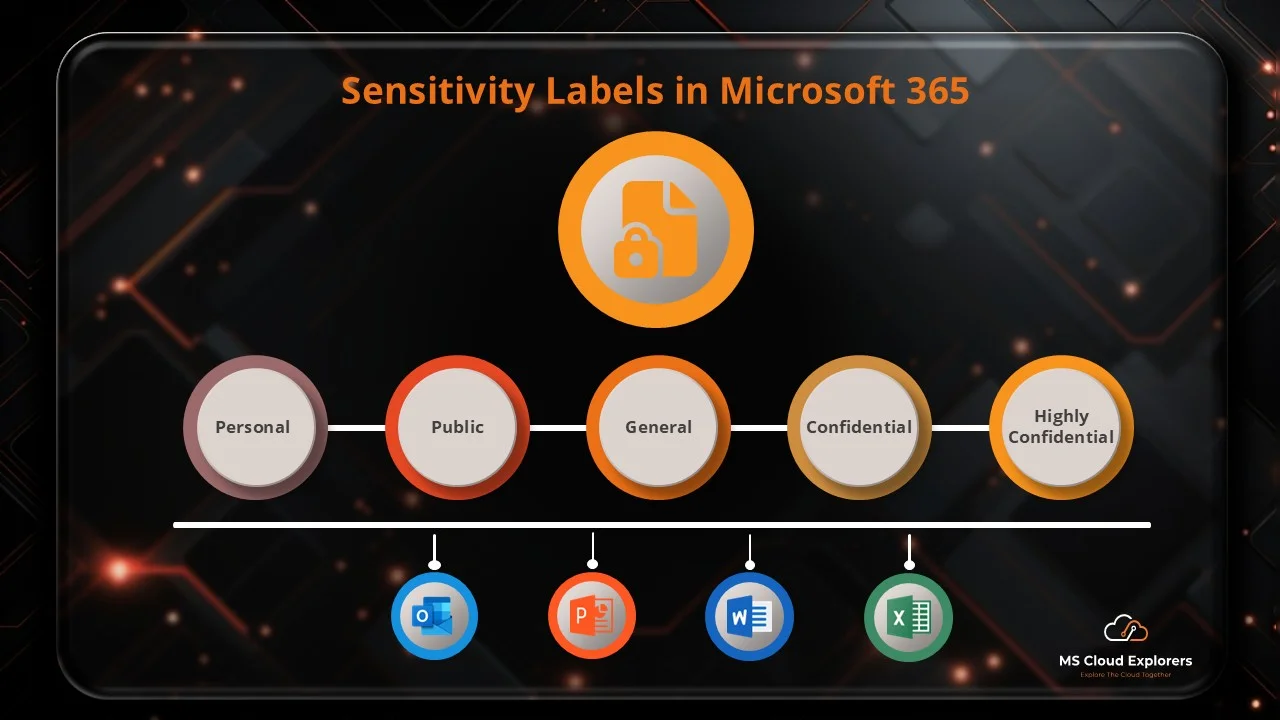
- Microsoft 365 Sensitivity Labels.
- Microsoft 365 Data Loss Prevention (DLP).
- Microsoft 365 Security Audit and Assessment.
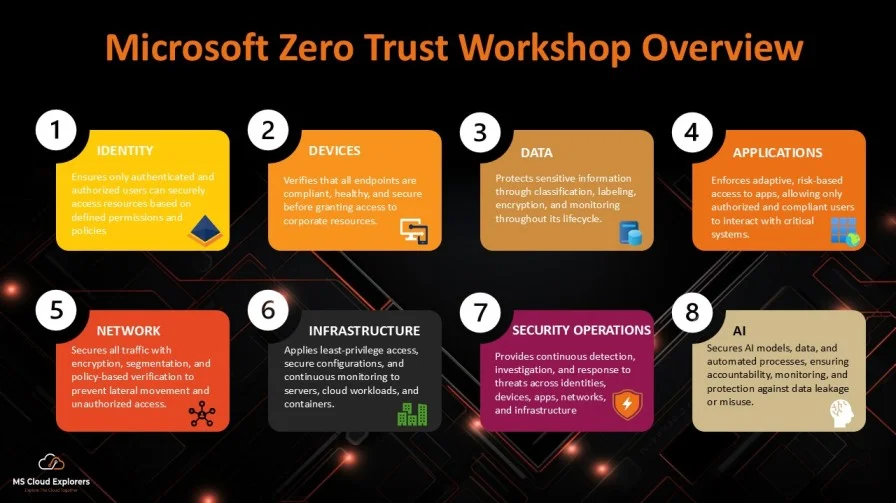
- Microsoft Zero Trust Assessment Tool: Complete Step-by-Step Guide for IT Admins (2026)
- Microsoft 365 Data Protection: The Ultimate Guide to Secure Your Cloud Data
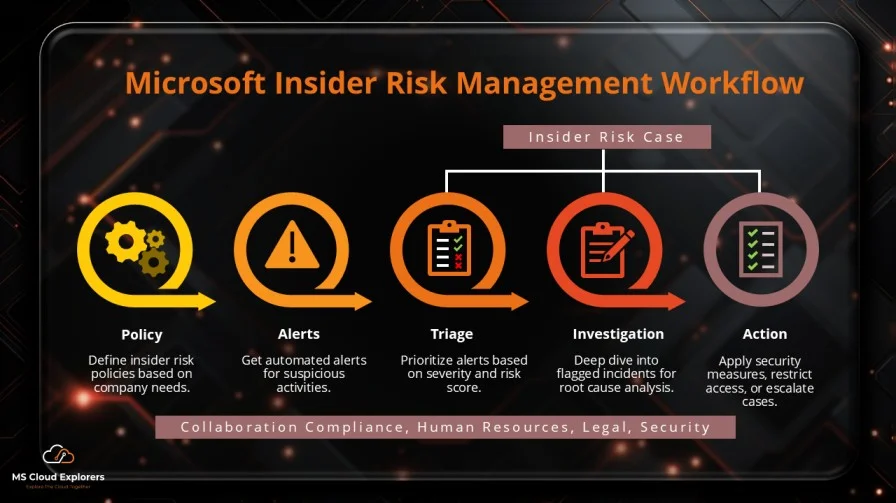
- Microsoft Insider Risk Management: A Complete Guide to Prevent Insider Threats
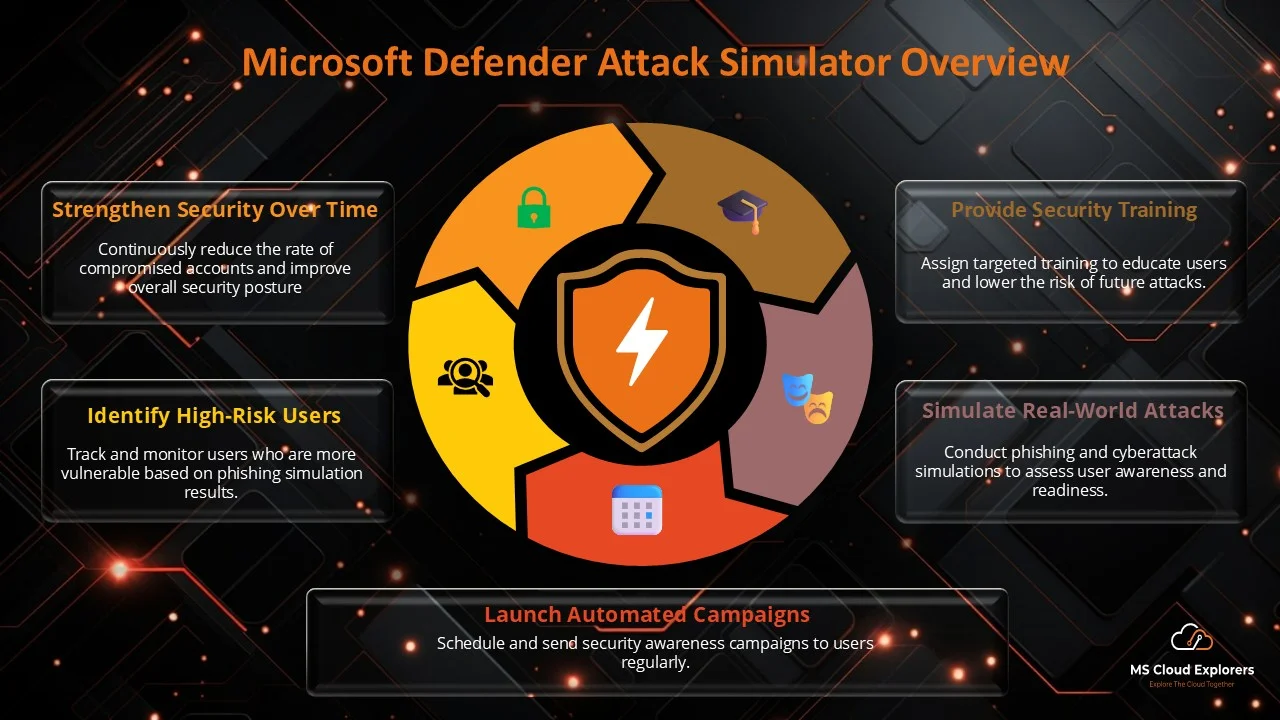
- How to Create and Assign Microsoft Phishing Simulator Training in Microsoft 365
- Microsoft 365 Applications Explained: A Complete Guide for IT Admins
- Step-by-Step Guide to Create and Manage Microsoft 365 Accounts and Groups
- How to Create a New Microsoft 365 Tenant: A Step-by-Step Guide
- How to Install & Connect Microsoft 365 PowerShell Modules (All)
References and Further Reading
- Microsoft Support: Send encrypted messages with Microsoft 365 Personal or Family subscription
- Microsoft Learn: Microsoft Purview Message Encryption
- Microsoft Learn: Message Encryption FAQ
- Microsoft Learn: Email encryption in Microsoft 365
- Microsoft Learn: Use mail flow rules to apply message encryption
Enjoyed the article?
We’d love to hear your thoughts—share your comments below!
For more insights, guides, and updates from the Microsoft ecosystem, be sure to subscribe to our newsletter and follow us on LinkedIn. Stay connected and never miss out on the latest tips and news!


As an IT admin managing a hybrid Microsoft 365 setup, I found this post really helpful. Users often ask about securely sending sensitive info, and this breakdown of encryption options in Outlook is exactly what they need. I appreciate the inclusion of both built-in M365 Message Encryption and S/MIME—makes it easier for us to guide different departments based on their needs. Definitely sharing this with my team.
Thank you for your feedback! We’re glad the guide was helpful for managing encryption across your Microsoft 365 environment. It’s great to hear that you’re sharing it with your team—our goal is to make these features more approachable for admins and users alike. If there are any specific scenarios or tools you’d like us to cover in future posts, feel free to suggest them!