

Creating Microsoft 365 accounts and managing users or groups doesn’t have to be complicated, especially if you’re just getting started. Whether you’re setting up your first user account or learning how different Microsoft 365 groups work, this guide is designed to keep things simple and practical.
If you’re a beginner trying to understand Microsoft 365 groups, distribution lists, security groups, dynamic groups, user mailboxes, and shared mailboxes, you’re in the right place. Many new admins struggle to understand the purpose of each option, when to use one over another, and how to manage them correctly.
In this step-by-step guide, I’ll explain what each account and group type is used for, along with clear instructions to create and manage them in your Microsoft 365 environment. Everything is explained in a straightforward, beginner-friendly way—so you can confidently apply it in a real-world set-up.
Create Microsoft 365 Accounts
A Microsoft 365 Business account is a cloud-based service designed for businesses of all sizes. It gives users access to everyday apps like Word, Excel, PowerPoint, and Outlook, along with Microsoft Teams and SharePoint to help people work together and communicate easily.
With this account, users get a business email address using their own domain name, plus built-in security features that help protect emails, files, and devices. Each user also gets at least 1 TB of OneDrive cloud storage, which can be used to safely store files, share documents, and back up important data.
All Microsoft 365 tools work smoothly together, making it easier for teams to stay productive, collaborate from anywhere, and keep company data secure.
Steps:
- Sign in to the Admin Center: Go to Microsoft 365 Admin Center.
- Navigate to Users: Select “Active Users” in the left-hand menu.
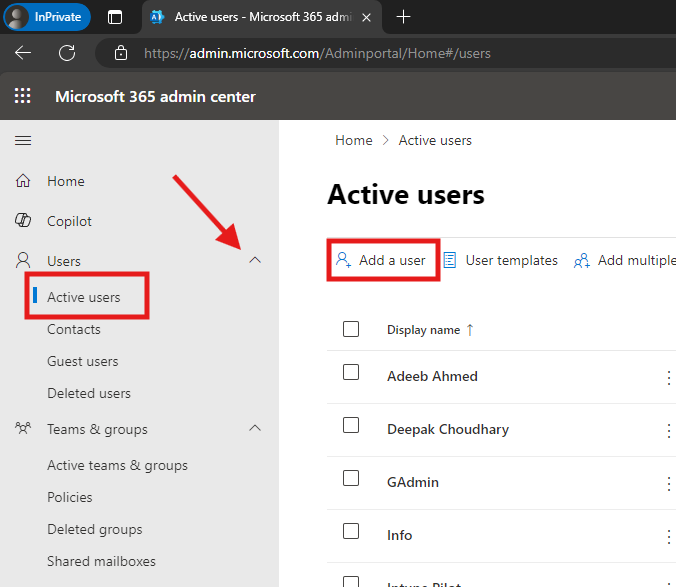
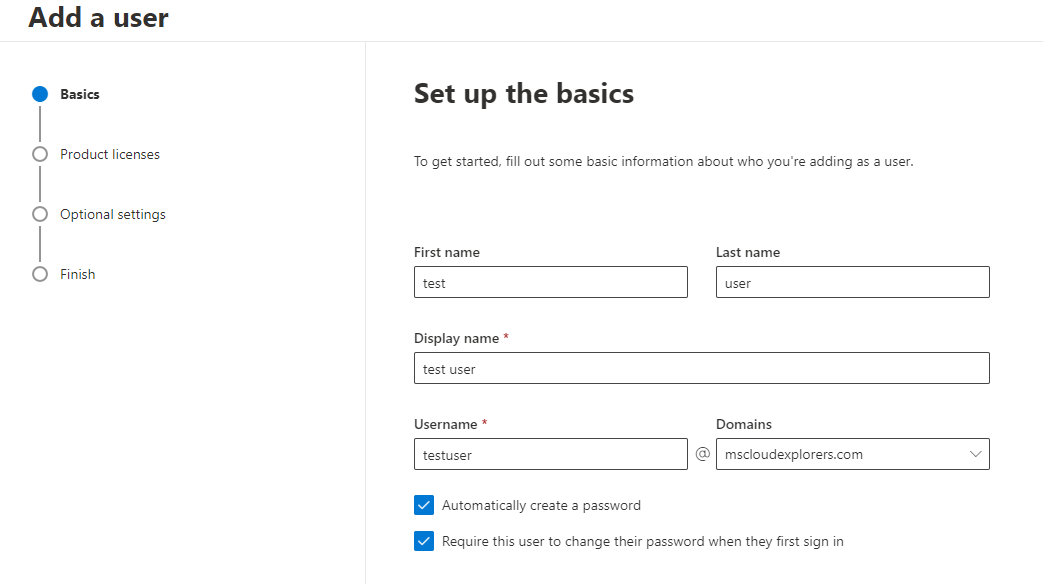
- Add a New User: Click “Add a user,” then fill in the user’s details such as name, Display name, username. and password information.
- Assign Licenses: Choose a Microsoft 365 license to enable the user to access Office 365 apps.

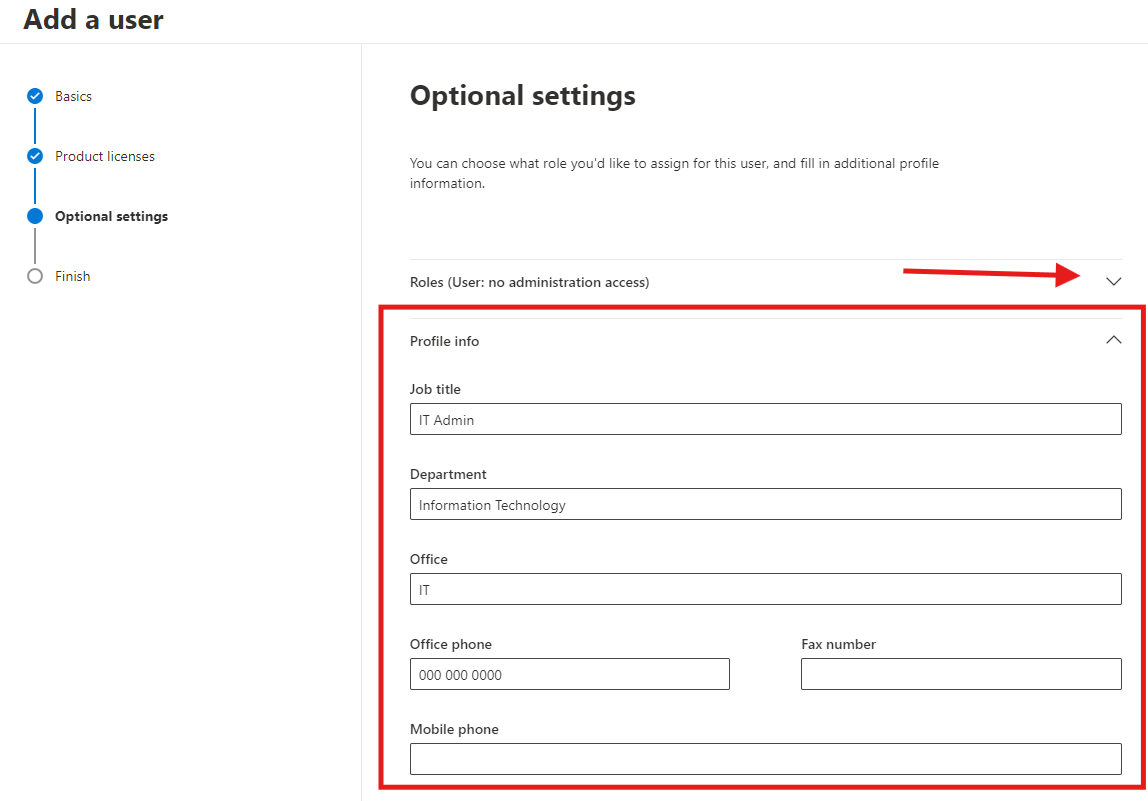
- Optional Settings: Setup Profile information such as, Job title, Department, Office phone etc. Also If you want to delegate any admin access you can give it selecting the Roles. Admin Roles
- Save and Finish: Review the user account details and click “Finish adding” to complete the process.

Create Microsoft 365 accounts in Bulk
- Open the Admin Center: Visit Microsoft 365 Admin Center.
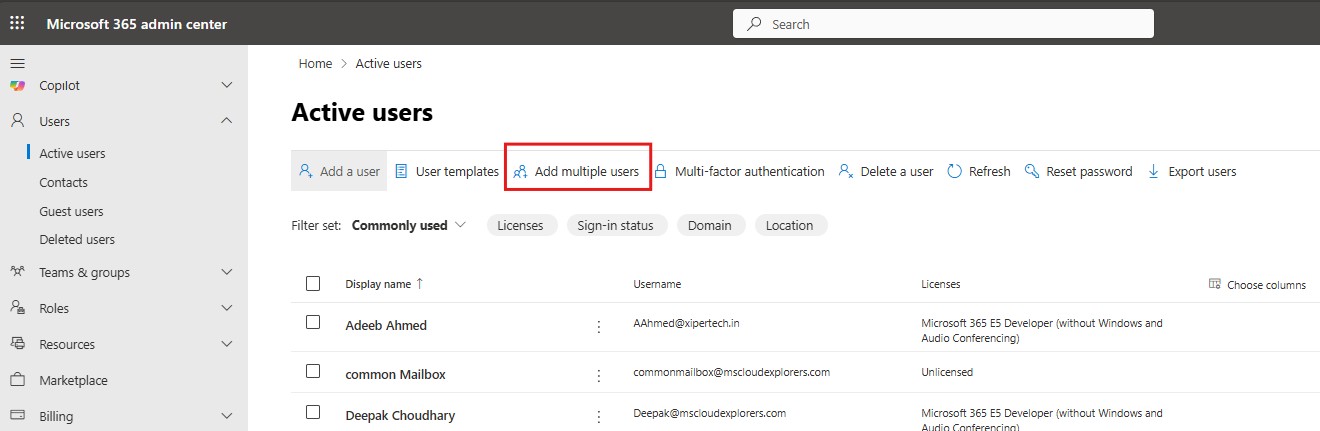
- Users > Active User and select the Add multiple users at the top ribbon.
- You have two options: Type all the new user’s name details manually, OR Create accounts from a CSV file.
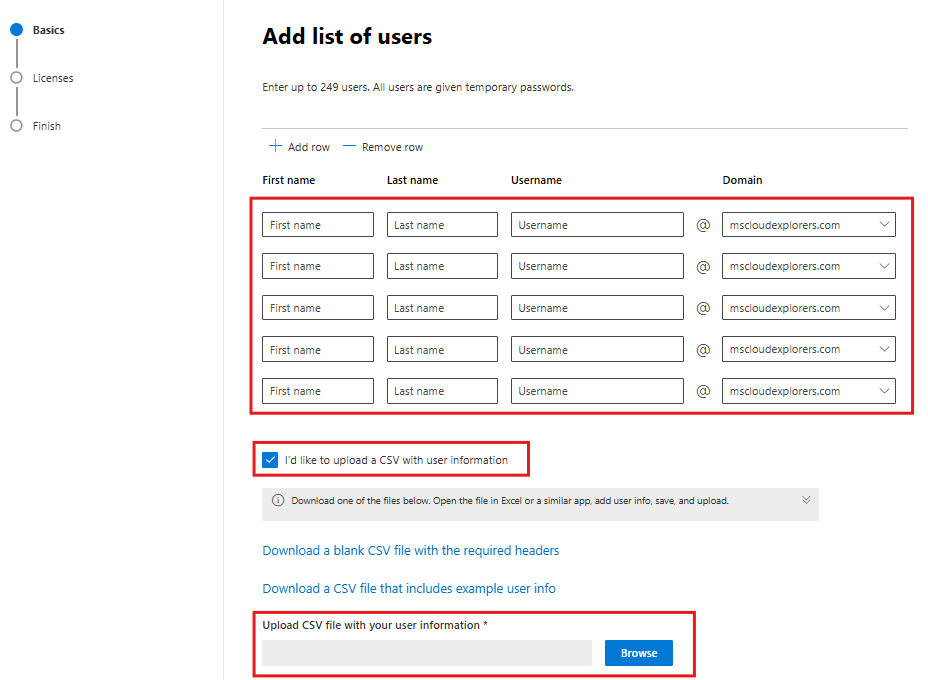
- Enable the check Box “I’d like to upload a CSV with user Information“. When you enable the box, you should see additional options.
- Download a Blank CSV with required headers. Add the user’s information in the CSV sheet.

- Click on the Browse option and upload the CSV file. (If you are getting any error, please check all the mandatory headers (e.g. First and Last Name, Display Name, Username.)
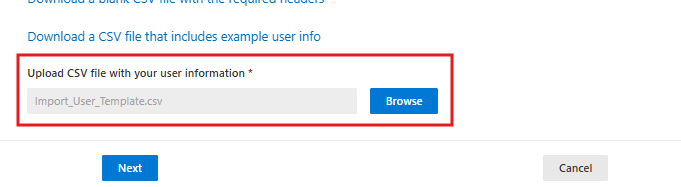
- Assign the Licenses and Click Next.
- Review the Information and click on Add Users.
- The process will take a few minutes to create all the accounts, depending on the number of accounts.

- Once the user account is created, Download the User’s credentials sheet or Print.
If you want to Manage office 365 account with PowerShell, please check the guide on PowerShell with Microsoft 365
Create a Microsoft 365 Shared Mailbox
A Shared Mailbox in Microsoft 365 is an email inbox that multiple users can use together. It allows a team to send and receive emails from a single email address like info@company.com or support@company.com.
A shared mailbox does not need its own license, which makes it a cost-effective option. Users who have permission can open the mailbox in Outlook, read incoming emails, reply using the shared email address, and manage shared calendars or contacts.
Shared mailboxes are commonly used for support teams, HR, finance, or general company inquiries, where more than one person needs access to the same emails.
Steps:
- Open the Admin Center: Visit Microsoft 365 Admin Center.
- Go to Groups: Click on “Active Teams & Groups” in the navigation panel and select “Shared Mailboxes.”
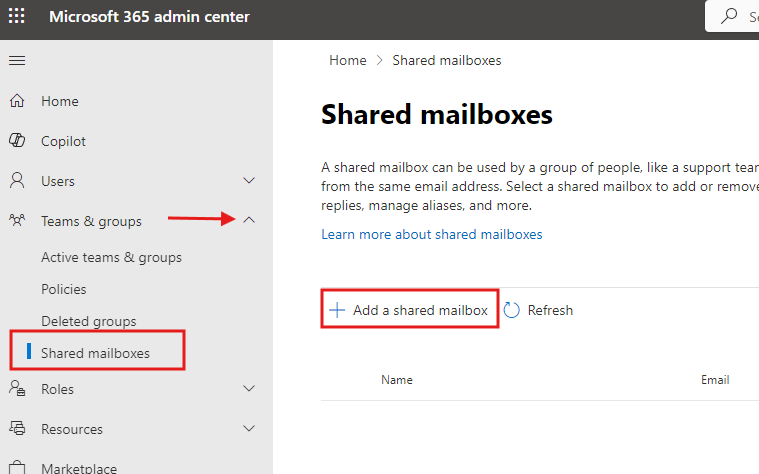
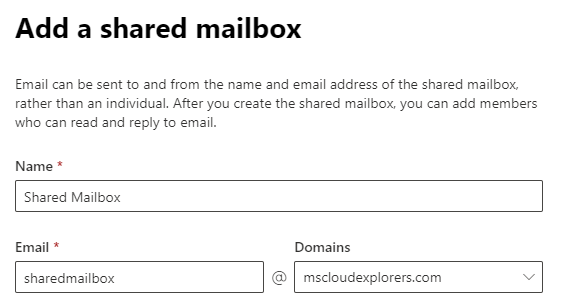
- Add a Shared Mailbox: Click Add a shared mailbox, provide a name and email address and click on Save changes.
- Assign Members: Select the add members to your shared mailbox, add the users who will access the shared mailbox.

- Save Changes: Click “Save” to finalize.
Create a Microsoft 365 Distribution List
A distribution list lets you send an email to many people at the same time using a single email address. Instead of adding each person individually, you send one email and everyone on the list receives it, making group communication quick and easy.
Steps:
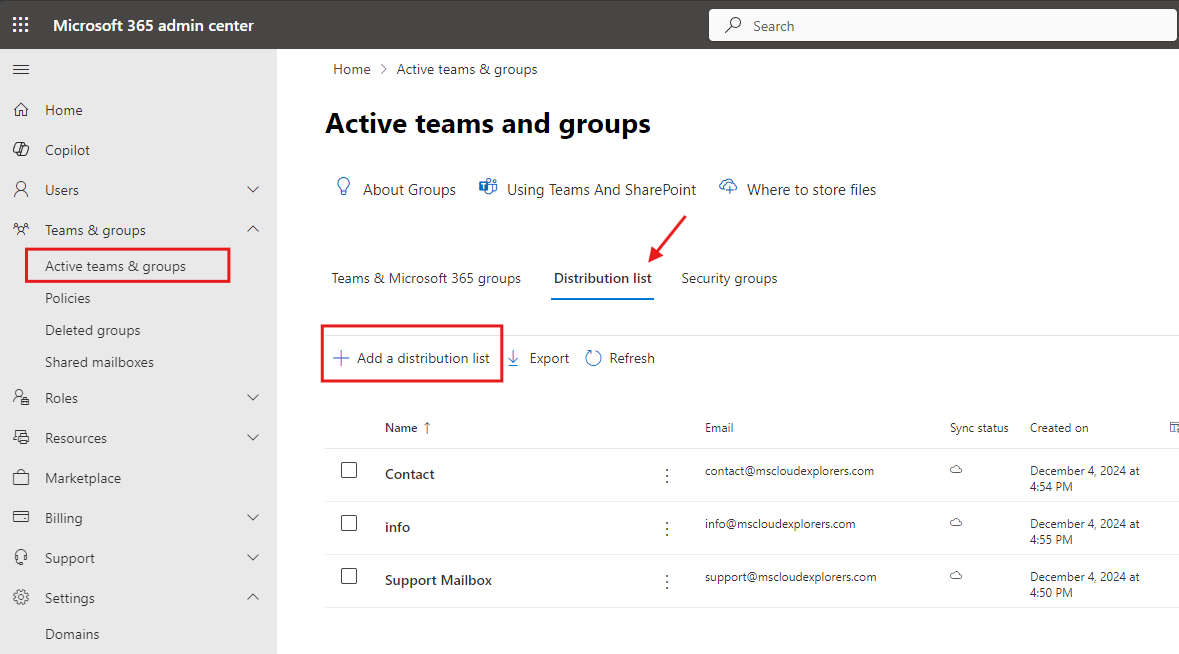
- Access the Admin Center: Log in to the Admin Center.
- Navigate to Groups: click “teams & groups” and select “Active Teams & Groups. “and then “Distribution list tab”
- Add a New List: Click “Add a distribution list”.
- Basic Information: Setup the name and Description.
- Add Owners & Members: Specify the users to include and Manage the list.
- Distribution List Email: setup the email address of DL.
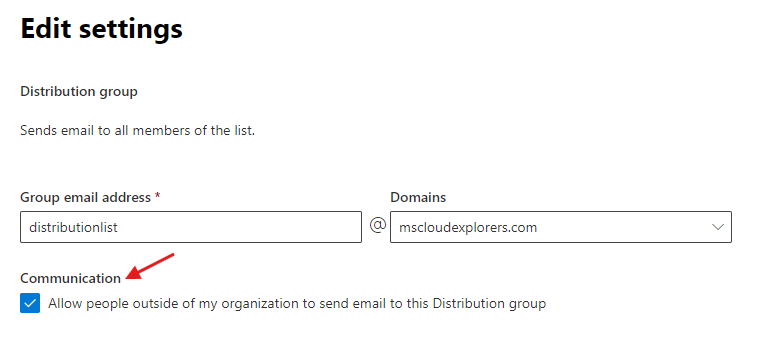
- Communication: Enable the check box if you allow external users to send emails to it.
- Save and Close: Save the distribution list and confirm.
Create a Microsoft 365 Group
Microsoft 365 Groups give teams a shared space to work together in one place. When you create a group, it automatically includes a shared email inbox, calendar, SharePoint site, and OneNote notebook.
Team members can share files, work on documents together in real time, and communicate using Outlook or Microsoft Teams. Groups can be set as public or private, and admins can easily manage who can join or access the group.
Because Microsoft 365 Groups work across many Microsoft 365 apps, they are perfect for project teams, departments, or people working together on a common task.
Steps:
- Go to Groups: In the Admin Center, click “Teams & Groups” and select “Active Teams & Groups.”
- Create a New Group: At the top Click “Add a Microsoft 365 group.

- Name the Group: Provide a group name and description.
- Assign Owner & Members: Add users to the group by searching their names.
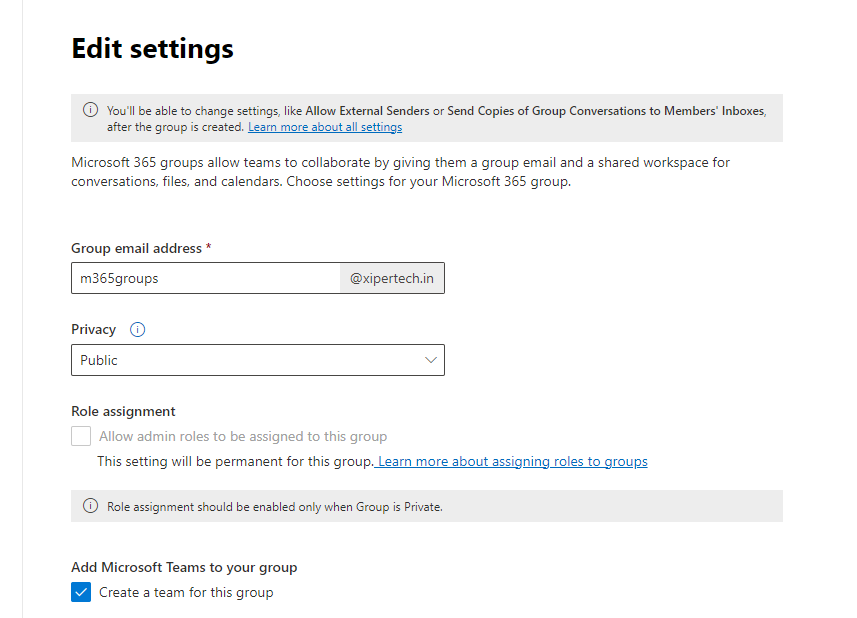
- Group Email & Privacy type: Setup the group email address. And select the Privacy type.
- Add MS Teams Group: Check the box if you need this group with teams site.
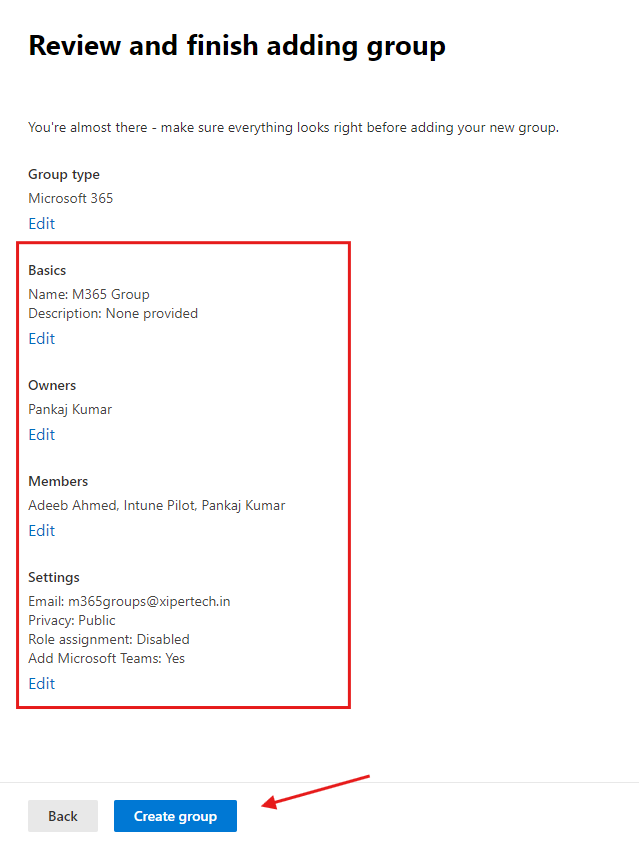
- Finalize: Review and Click on Create Group.
Create a Microsoft 365 Security Group
Security groups are used to control access to resources like files, applications, and services. Instead of giving permissions to users one by one, you add users to a security group and assign access to the group, making permission management easier and more secure.
Steps:
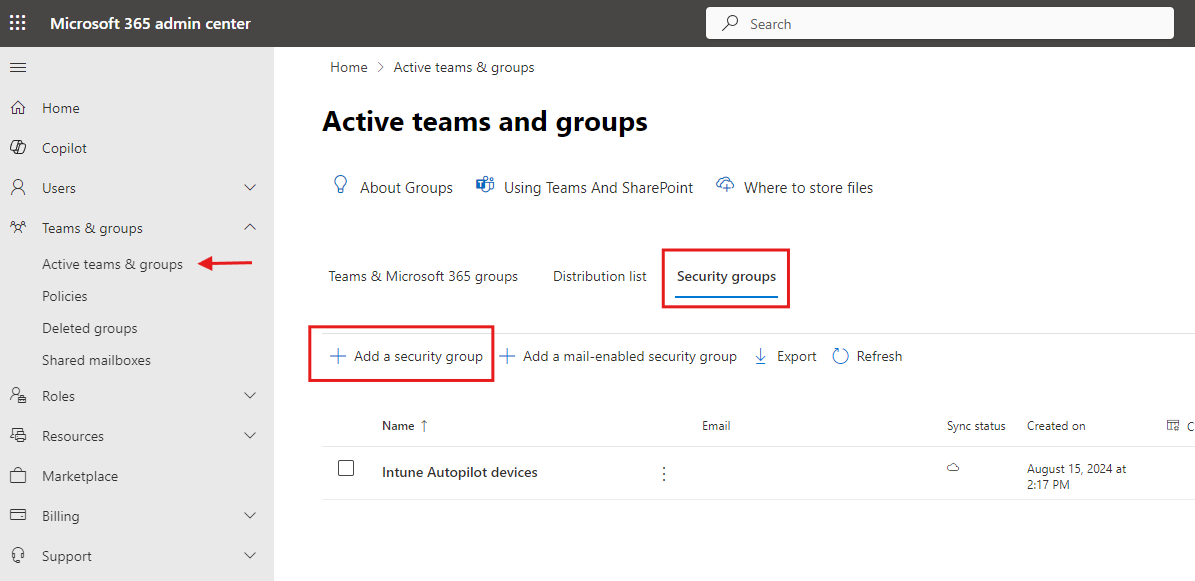
- Sign in to Admin Center: Log into Microsoft 365 Admin Center.
- Select Groups: Expand the teams & groups, and select the Active teams & groups”
- Add a Security Group: Click on “Security group tab,” and add a Security group.”
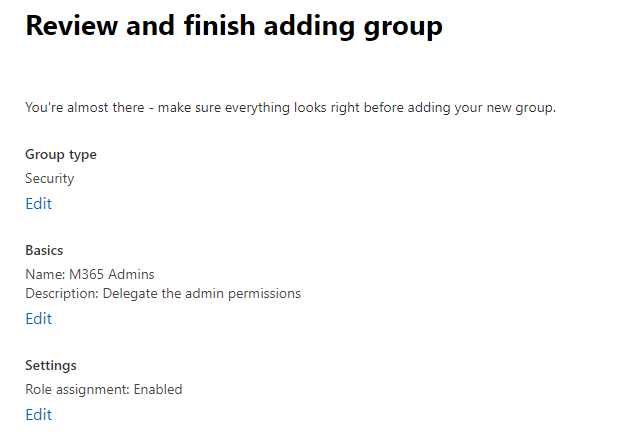
- Name and Configure: Provide a name and description.
- Role assignment: Enable the checkbox If you’re planning to Assign admin roles to this group.

- Save Changes: Complete the setup by saving the group.
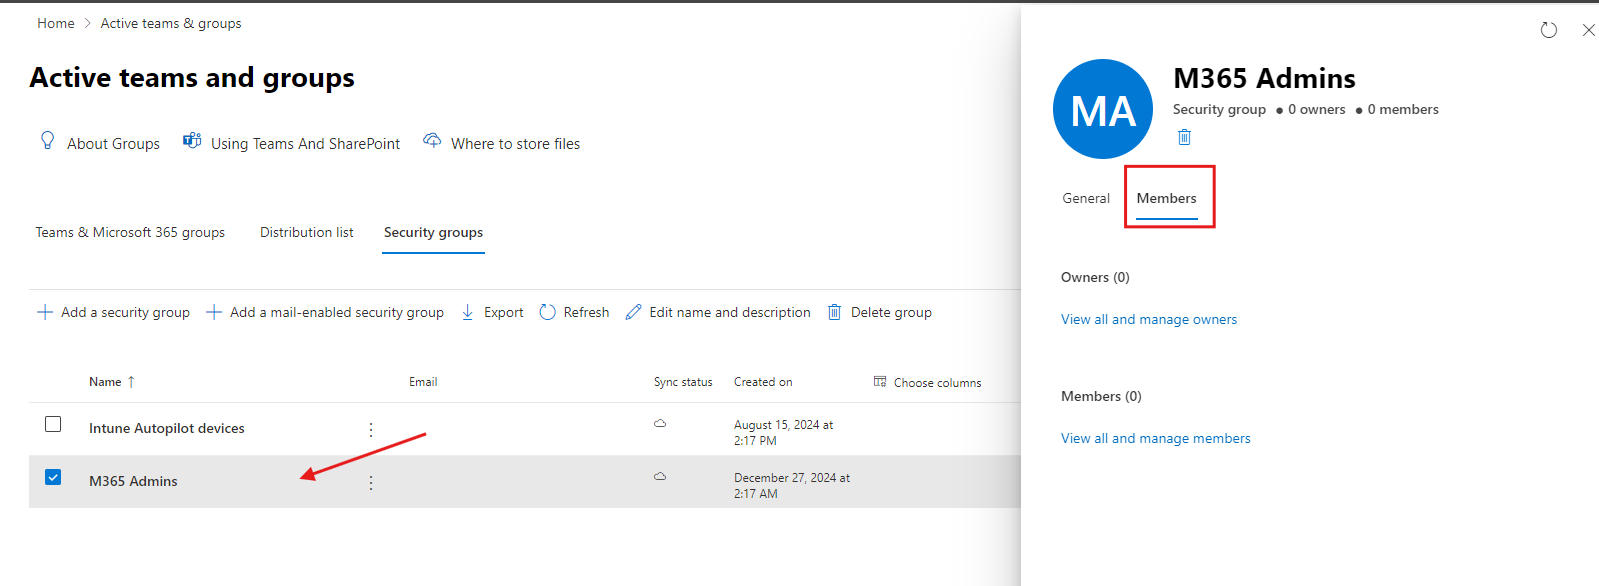
- Add Owners and Members: Open the created security group, Navigate to Members section. Add the owners and Members their respective section.
Create Microsoft Entra ID Dynamic Groups
Dynamic groups automatically add or remove users and devices based on set conditions, such as job title, department, or device type. This means you don’t have to manage group members manually. Dynamic groups can be created as security groups or Microsoft 365 groups, depending on how you want to use them.
If you want to learn more about dynamic user and device membership groups, we’ve explained this in detail in a separate guide. In that post, you’ll learn what Azure AD (Microsoft Entra ID) Dynamic Groups are, when to use them, and how they keep group membership updated automatically using simple rules.
If you’re interested in learning about dynamic user and device membership groups, be sure to check out our dedicated blog on Azure AD Dynamic Groups
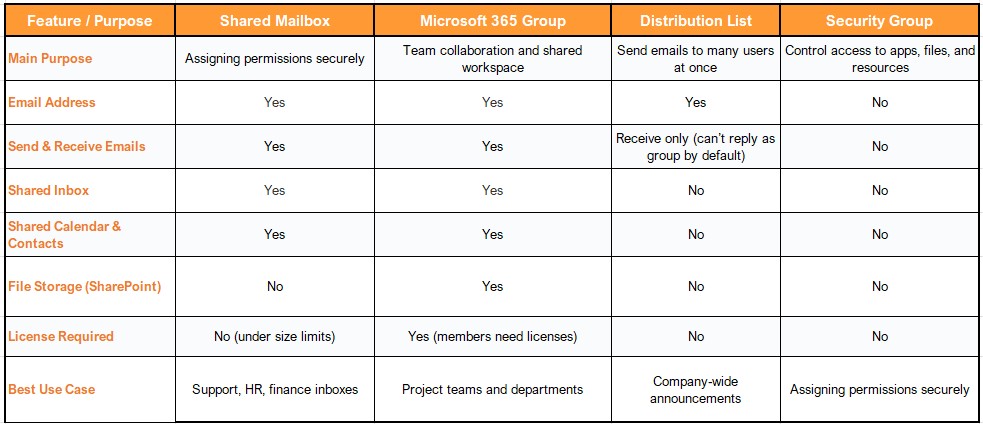
Microsoft 365: Shared Mailbox vs Groups vs Distribution Lists vs Security Groups
FAQs
- How do I create a new Office 365 account?
To create a new Office 365 account, log into the Microsoft 365 Admin Center, navigate to “Users,” and click “Add a user.” Fill out the required details and assign a license. - What differentiates a distribution list from a shared mailbox?
A shared mailbox is a single mailbox shared by multiple users, while a distribution list forwards emails to all members in the list. - Can I create a Microsoft 365 account without assigning a license?
Yes, but the account will not have access to Office 365 apps or services until a license is assigned. - How do Microsoft 365 Groups help in collaboration?
Microsoft 365 Groups provide shared resources like mailboxes, calendars, and SharePoint sites, improving team collaboration. - Is it necessary to have admin access to create accounts and groups in Office 365?
Yes, only users with admin privileges can create accounts, shared mailboxes, and groups in Microsoft 365.
Related Links:
- How to add Shared Mailbox to Outlook (End-User Step-by-Step Guide)
- Overview of Microsoft 365 Apps and End-User training
- Microsoft Entra ID: Complete Guide, Features, Security, and Subscriptions
- A Complete Guide to Exchange Online: Everything You Need to Know
Enjoyed the article?
We’d love to hear your thoughts—share your comments below!
For more insights, guides, and updates from the Microsoft ecosystem, be sure to subscribe to our newsletter and follow us on LinkedIn. Stay connected and never miss out on the latest tips and news!


6 comments on “Step-by-Step Guide to Create Microsoft 365 Accounts and Groups”