
Let’s say your company uses Dialpad for communication, but employees are constantly forgetting their passwords or having trouble with login. To solve this, your organization decides to integrate Dialpad with Microsoft Entra ID (Azure AD) for Single Sign-On (SSO).
Now, when employees log into their computers using their company credentials, they’re automatically logged into Dialpad as well, without needing to remember a separate password. This not only streamlines the process but also enhances security. Since all access is controlled through Microsoft Entra ID, it ensures only authorized users can sign in, reducing the risk of unauthorized access. With SSO, employees can easily move between Dialpad and other applications, saving time and avoiding the frustration of managing multiple passwords.
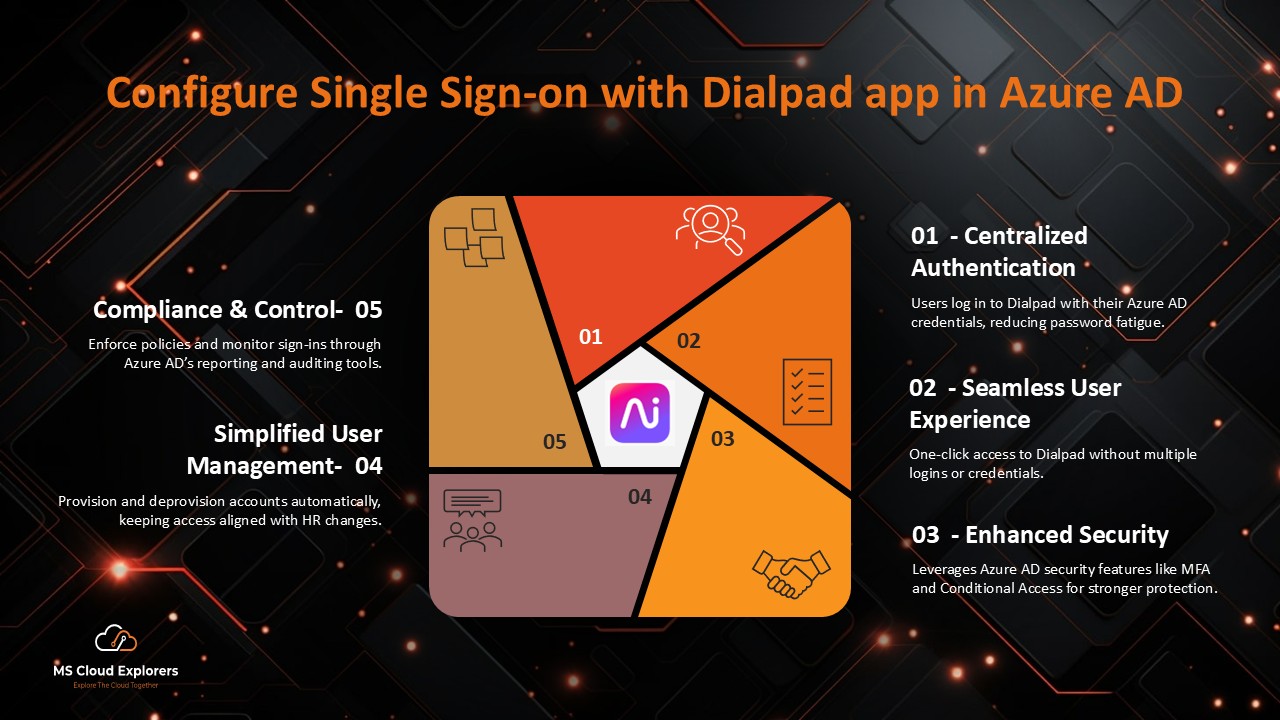
Why SSO with Dialpad and Microsoft Entra ID Is Essential
- Enhanced Security: SSO ensures that access to Dialpad is managed through Microsoft Entra ID, which offers robust identity protection mechanisms.
- Streamlined User Experience: Employees only need one set of credentials to access multiple applications, reducing login friction.
- Centralized Access Control: Administrators can manage access to Dialpad directly from Microsoft Entra ID, simplifying user provisioning and deprovisioning.
- Compliance: SSO enables organizations to enforce strict compliance policies, ensuring data security and regulatory adherence.
Benefits of Enabling SSO with Dialpad Using Microsoft Entra ID
- Time Savings: Eliminate the need for employees to remember multiple passwords.
- Reduced IT Overhead: Fewer password resets lead to lower helpdesk costs.
- Improved Security Posture: Centralized authentication protects against phishing attacks and unauthorized access.
- Scalability: Gain access control with ease as your company expands.
Steps to Configure SSO for Dialpad Using Microsoft Entra ID
Prerequisites
Ensure you have the following:
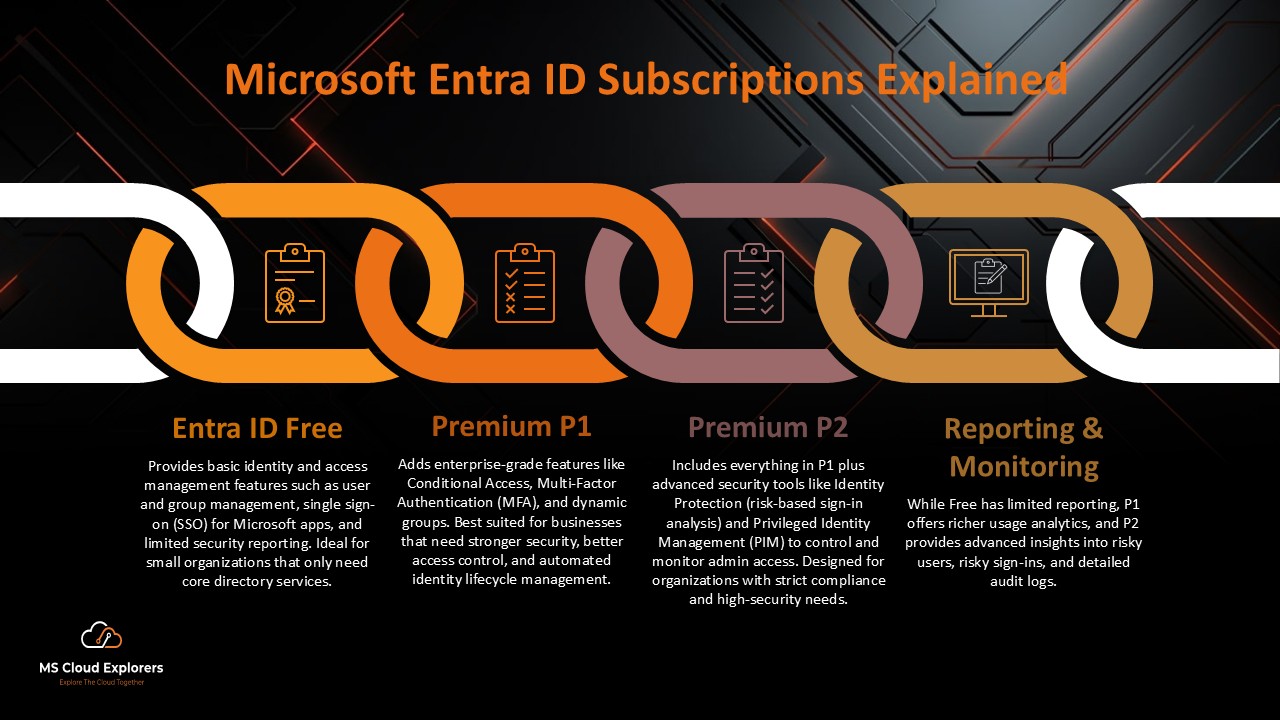
- An active Microsoft Entra ID subscription.
- Administrative access to the Microsoft Entra ID portal.
- A Dialpad admin account with access to the Admin portal.
- A premium subscription plan in Dialpad that supports SSO.
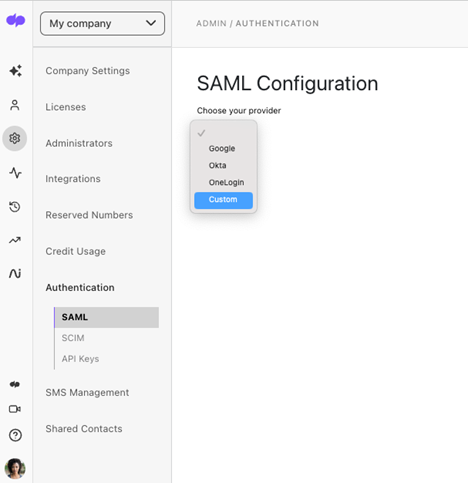
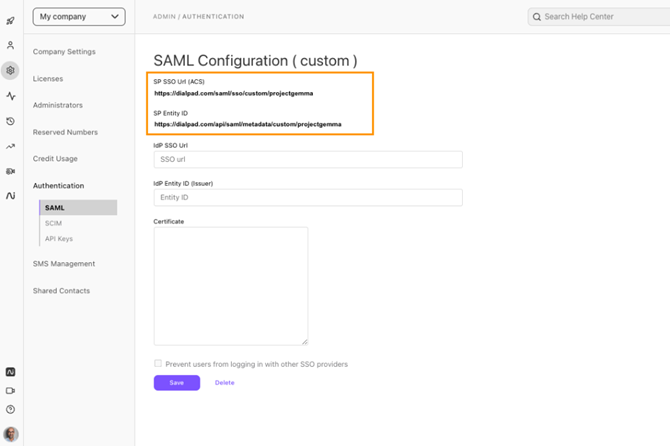
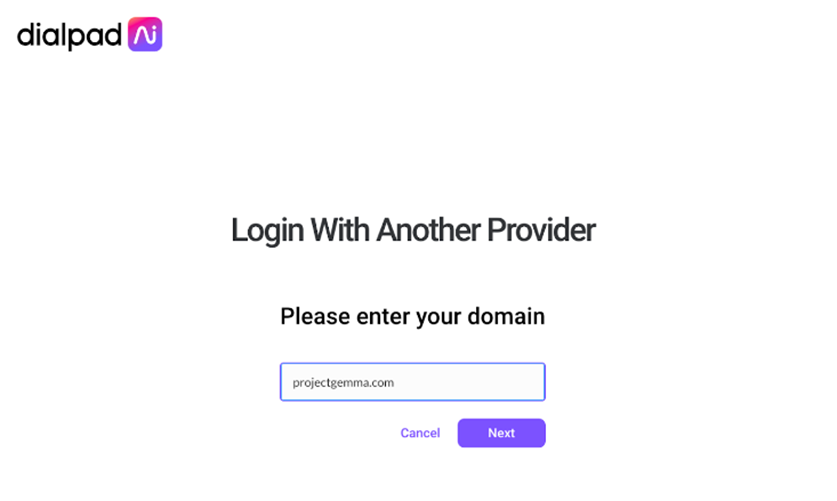
Step 1: Configure SSO in the Dialpad Admin Portal
- Log in to the Dialpad admin portal.
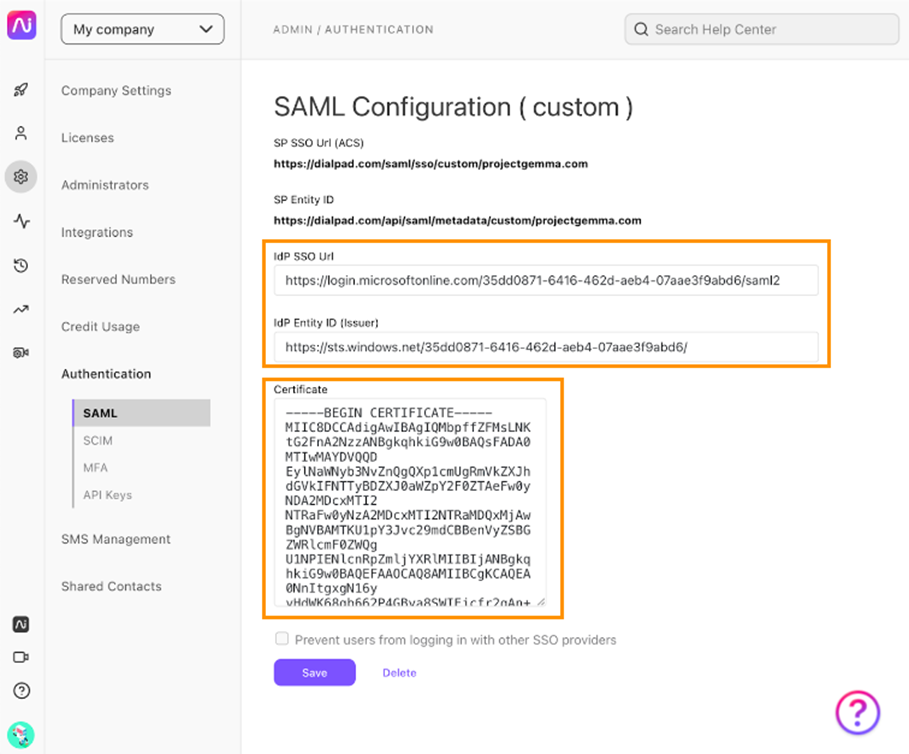
- Navigate to Settings > My Company > Authentication > SAML.
- Select “Custom” as the provider.
- Copy the SP SSO URL (ACS) and SP Entity ID for later use.
Step 2: Set Up the Application in Microsoft Entra ID
- Log in to the Microsoft Entra ID portal with administrator credentials.
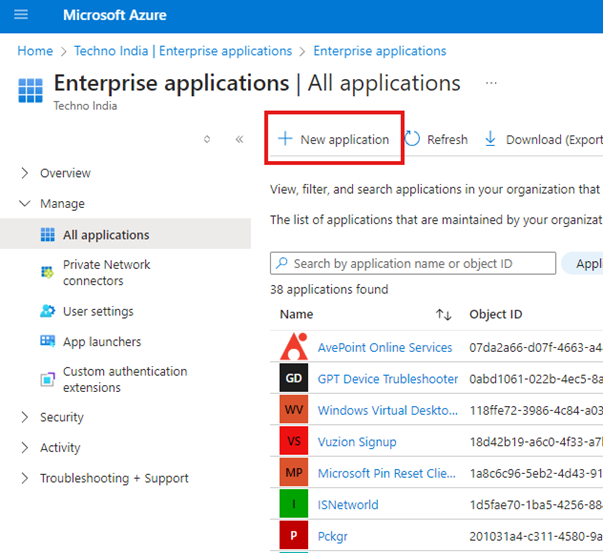
- In the left Side select the Enterprise Applications, under the Manage.
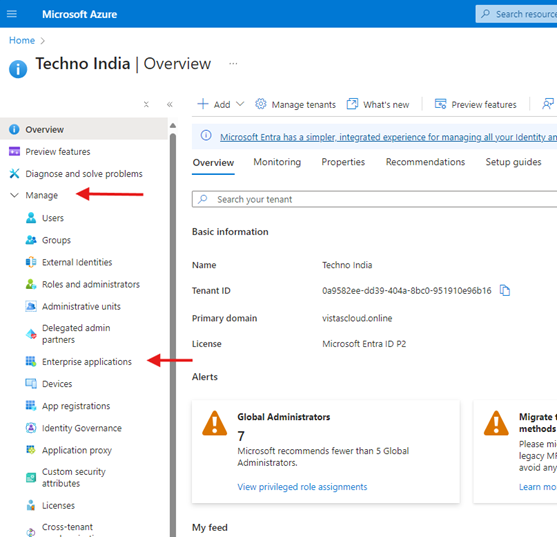
- Navigate to Enterprise Applications > New Application.
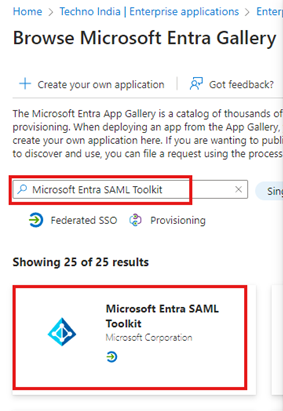
- In the Search type “Microsoft Entra SAML Toolkit” and click add it.
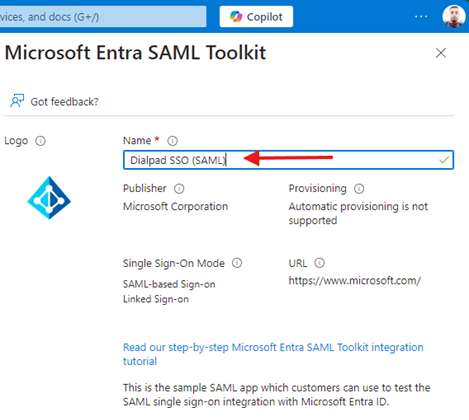
- Name the application “Dialpad SSO (SAML)” and click Create.
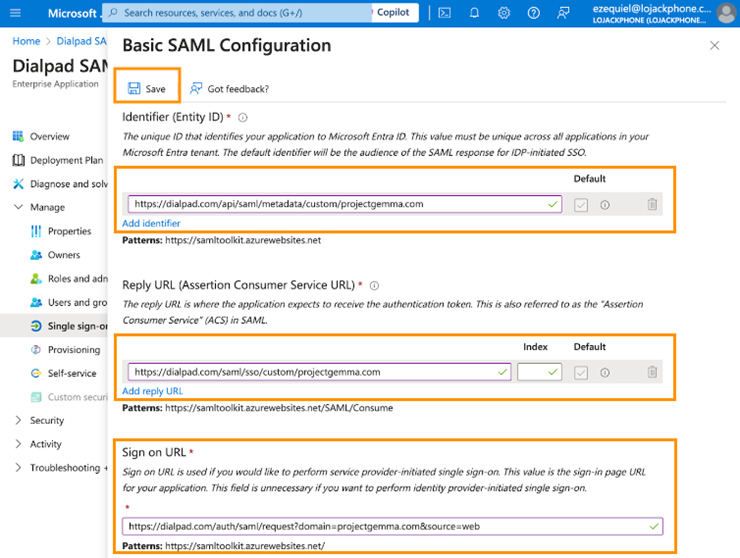
Step 3: Configure SSO in Microsoft Entra ID
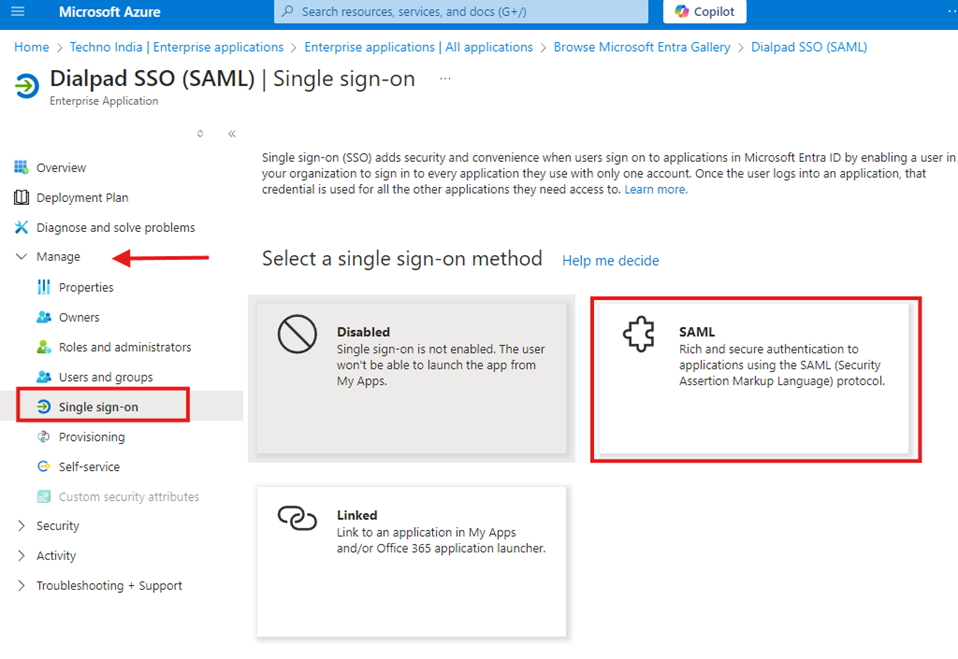
- Under the Dialpad app in Azure AD, navigate to Single Sign-On and select SAML.
- In the basic SAML configuration, enter the SP SSO URL and SP Entity ID copied earlier. Save the configuration.
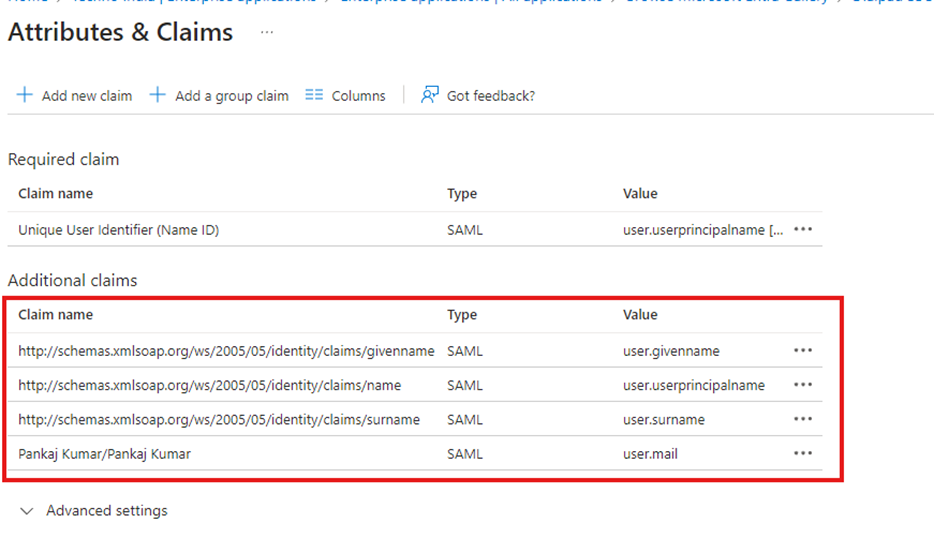
- Add claims as required by Dialpad.

- Add the Name and Source Attribute as mentioned below
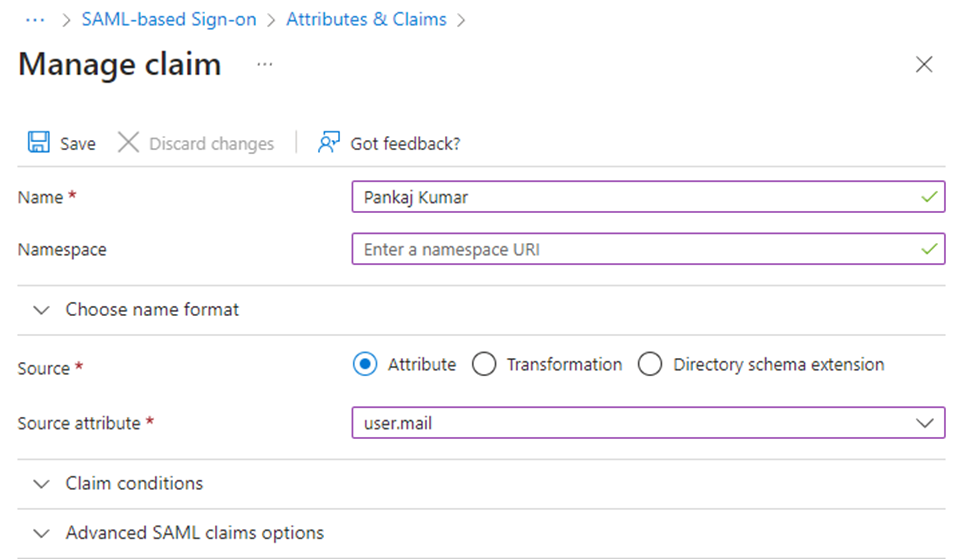
- Save the changes. Now you should see newly created claim.
- Download the certificate Under SAML Certificates.
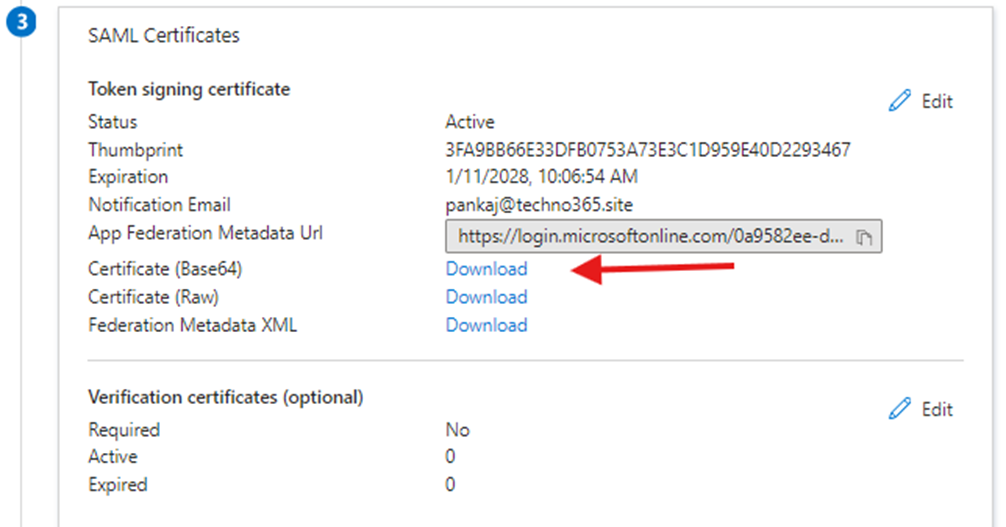
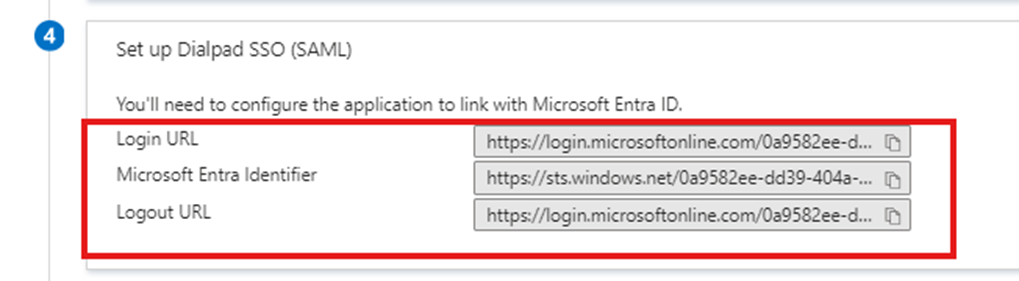
- Note the Login URL and Microsoft Entra Identifier for later use under the Set up Dialpad SSO (SAML).
Step 4: Complete SSO Setup in the Dialpad Admin Portal
- Add the Login URL and Microsoft Entra Identifier to the Dialpad admin portal.
- Upload the certificate downloaded from Azure AD.
- Save the changes.
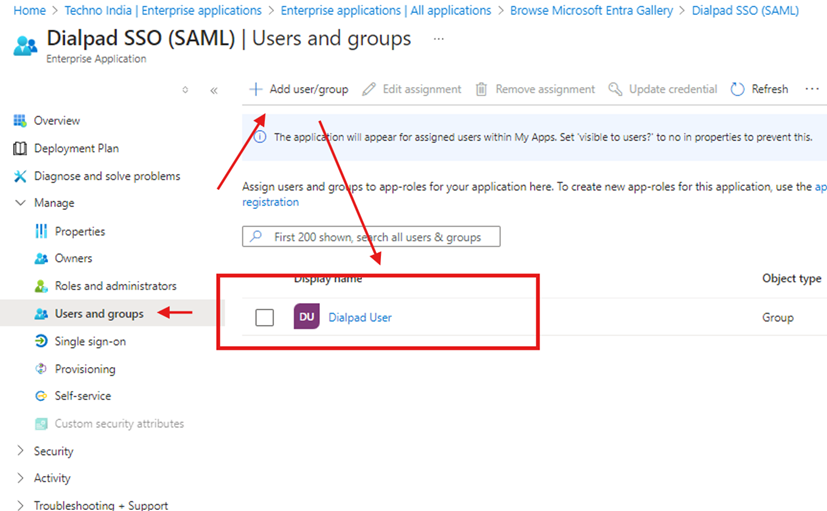
Step 5: Assign Users and Groups in Microsoft Entra ID
- Go to Users and Groups in the Dialpad app in Azure AD.
- Click Add Assignment and assign users or groups to the app.
Testing the SSO Configuration
- Log in to Dialpad using Microsoft Entra ID credentials.
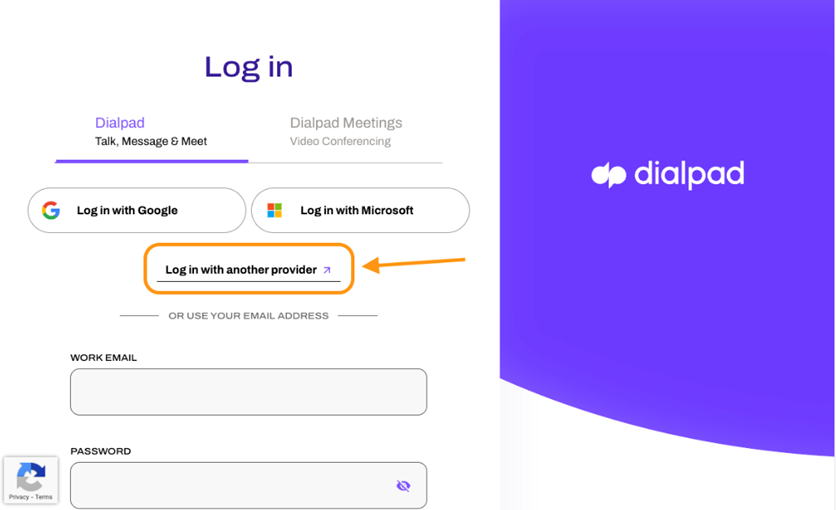
- Confirm successful redirection and authentication.
- Test with multiple users to verify mapping and permissions.
Troubleshooting Common Issues
- Login Failure: Verify Identifier and Reply URL fields in the SAML configuration.
- Attribute Mapping Errors: Ensure user attributes align between Microsoft Entra ID and Dialpad.
- Access Denied: Confirm that users/groups are assigned to the Dialpad app in Microsoft Entra ID.
Best Practices for SSO Integration
- Use Conditional Access Policies to require MFA for Dialpad access.
- Regularly update SSO metadata to avoid disruptions.
- Monitor Microsoft Entra ID logs for insights and potential issues.
Conclusion
Integrating Dialpad with Microsoft Entra ID for SSO enhances security, streamlines access, and reduces administrative overhead. By following this step-by-step guide, your organization can unlock the full potential of SSO while ensuring a seamless experience for users.
Related URLs:-
- Step-by-Step Guide to Package and Deploy Dialpad App Using Intune
- Microsoft Entra ID: Complete Guide, Features, Security, and Subscriptions
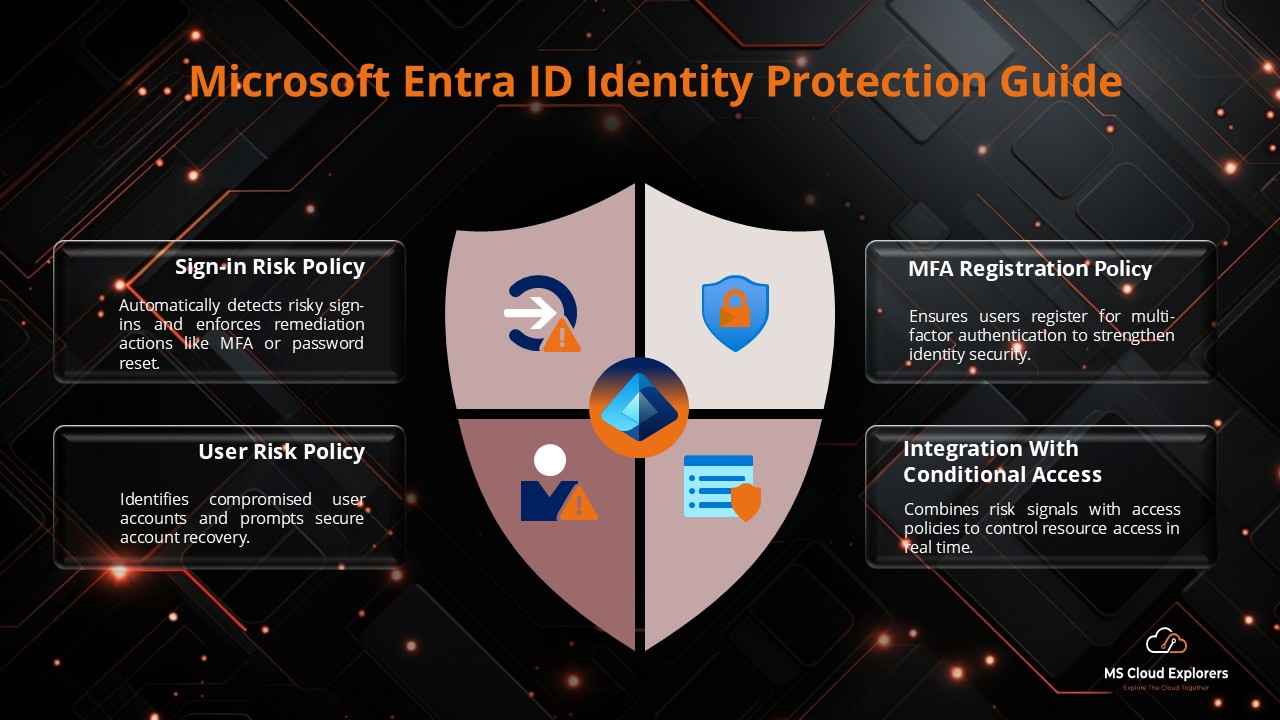
- Microsoft Entra ID Identity Protection: A Complete Guide to Securing Your Digital World
- Azure AD Free vs. Premium P1 & P2: Which Edition Is Right for Your Business?
Enjoyed the article?
We’d love to hear your thoughts—share your comments below!
For more insights, guides, and updates from the Microsoft ecosystem, be sure to subscribe to our newsletter and follow us on LinkedIn. Stay connected and never miss out on the latest tips and news!


Thanks for providing great guide on this. I have completed my SSO for dialpad for my company.
checking if there are auto provision option for new users.
This is great blog, please help me the deploy Dialpad with Intune also
Yes, If you add any of new user in the Dialpad user group, they will automatically will be added in dialpad.
This is exactly what I was looking for—helped me configure group-based access and automatic provisioning effortlessly. One thing I’d love to see in a future update: how to troubleshoot common SAML errors when implementing SSO.
guide is already created, please check out other blogs on Intune and you should able to find the guide what you are looking for.
Excellent suggestion about SAML troubleshooting—great call. We’re working on adding a dedicated troubleshooting section that covers common issues like certificate mismatches, attribute mapping errors, and SSO session failures. It should go live within the next week!
Perfect timing—I was just evaluating whether our Azure AD tier supports automatic provisioning. The article helped clarify prerequisites and SAML‑claim steps. You’ve saved me a lot of troubleshooting!
That’s great to hear! We’re thrilled the timing worked out and that the content saved you some effort. More provisioning-focused content is on the way—stay tuned!