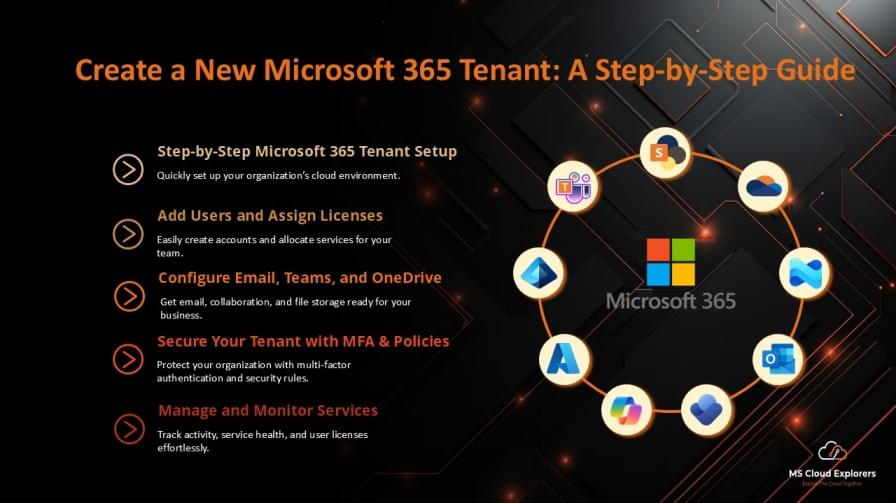
Creating a new Microsoft 365 tenant is a critical task for businesses and organizations looking to leverage Microsoft’s suite of cloud-based services. This process allows you to manage user accounts, services, and resources centrally within your organization. In this comprehensive guide, we will walk you through the steps required to create a new Microsoft 365 tenant, ensuring a smooth setup for your organization.
Understanding the Microsoft 365 Tenant
A Microsoft 365 tenant is the foundational unit that allows organizations to access and manage Microsoft’s cloud services, including Exchange Online, OneDrive, SharePoint, Teams, and more. The tenant is essentially your organization’s home in Microsoft’s cloud, where all of your data, settings, and users are managed.
Creating a new Microsoft 365 tenant involves several important steps, each crucial to ensuring that your tenant is configured correctly for your business needs. Whether you’re setting up for a small business or a large enterprise, it’s essential to follow these steps carefully.
Step 1: Sign Up for Microsoft 365
The first step to creating a new Microsoft 365 tenant is to sign up for a Microsoft 365 subscription. Follow these steps:
- Go to the Microsoft 365 Sign-Up Page
Head over to https://www.microsoft.com/en-us/microsoft-365/business to begin the sign-up process. - Choose Your Plan
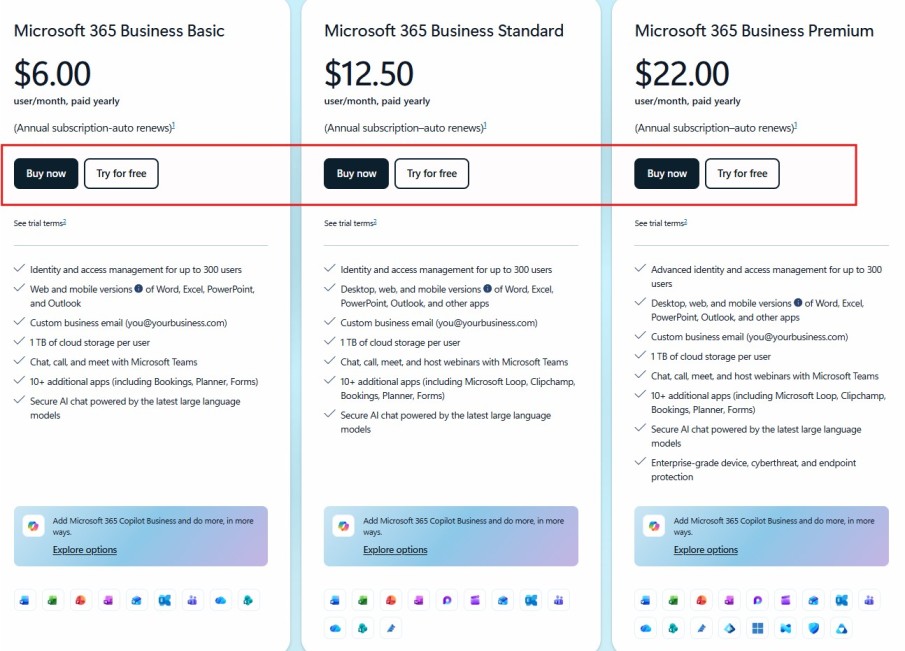
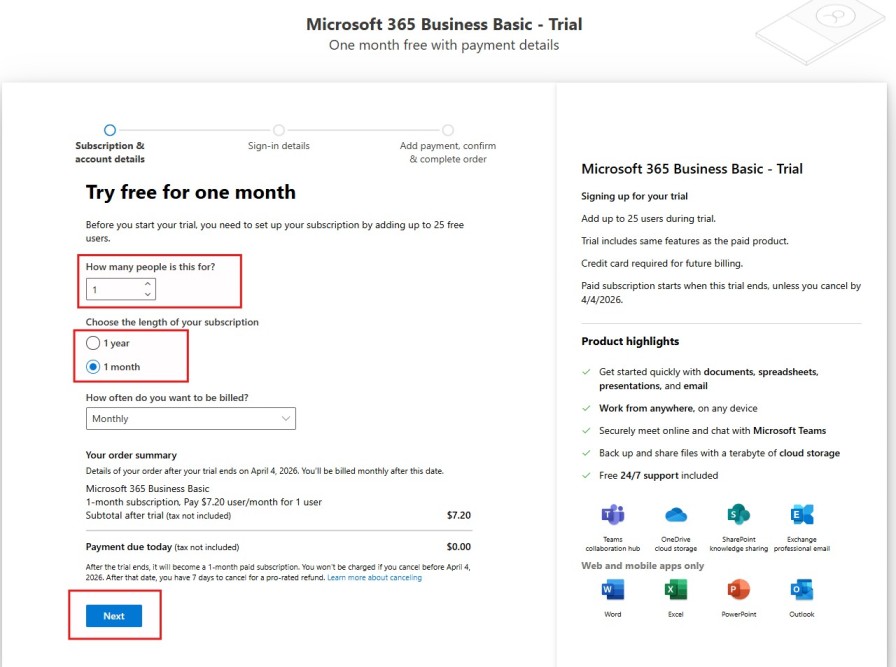
Microsoft offers several subscription plans based on business size and needs. Select the plan that best fits your requirements.
- Microsoft Subscription Details
After choosing the right subscription add the License count and the billing cycle and Click Next.
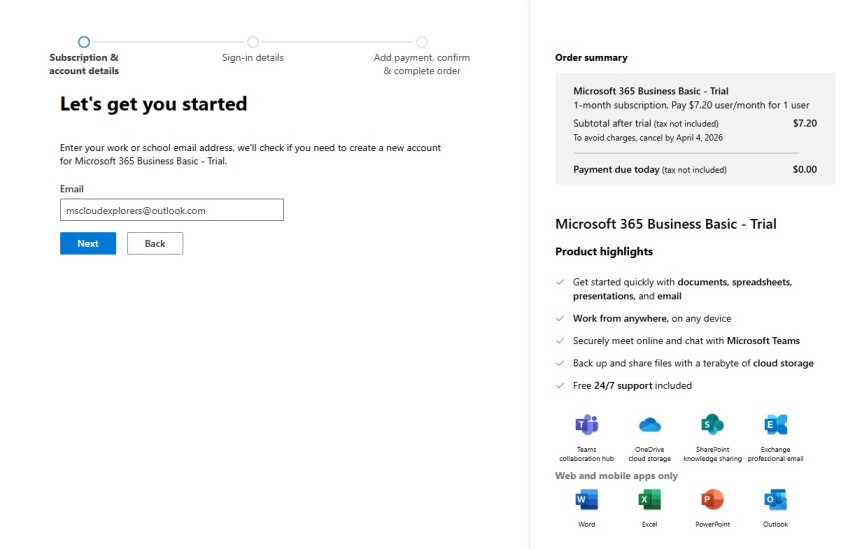
- Create Your Microsoft Account
You will need to create a Microsoft account or use an existing one to sign in. If you’re setting up a business account, this is where you will enter your organization’s details.
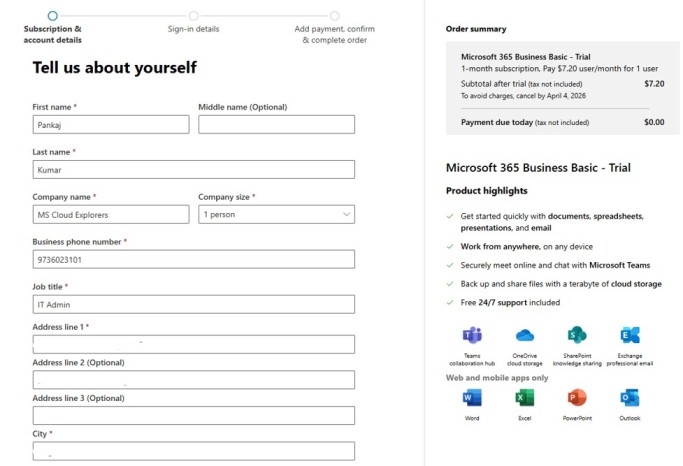
- Enter Your Organization’s Name
Provide your organization’s name, which will also be the name of your tenant. This name will be visible to all users within your organization.
- Choose Your Domain Name
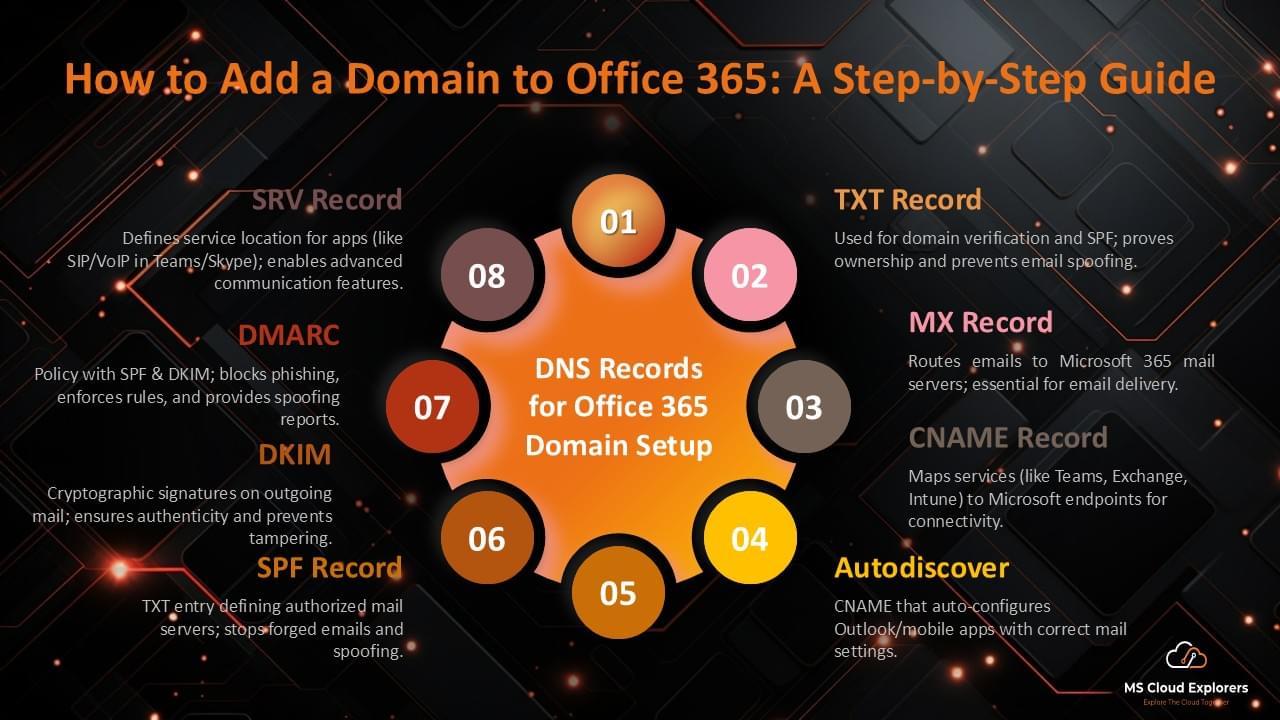
When you create a new Microsoft 365 tenant, you initially use the .onmicrosoft.com domain, which acts as the default domain for the tenant. After the tenant is created, you can add a custom domain (for example, mscloudexplorers.com) and use it for services such as email addresses and user sign-ins.
However, the SharePoint URL is created using the original .onmicrosoft.com tenant name (for example,
https://tenantname.sharepoint.com). This URL is generated when SharePoint is first provisioned and does not automatically change when you add a custom domain. However changing the SharePoint URL is possible, but it requires additional steps.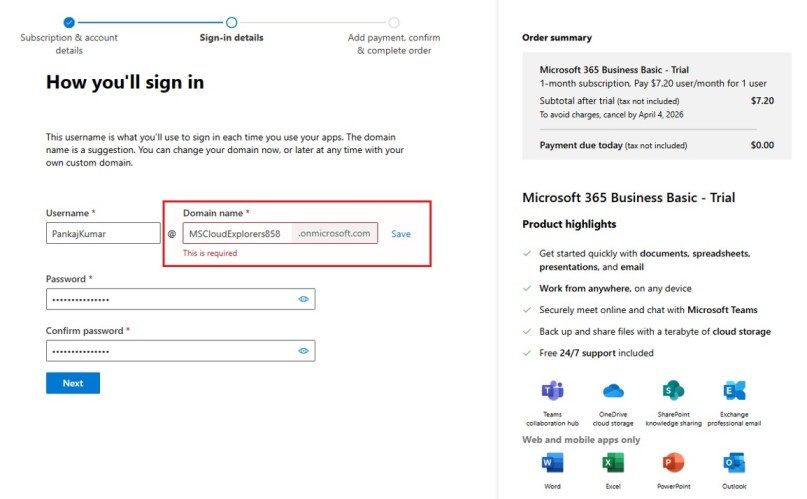
- Provide Billing Information
Fill in the necessary contact and Billing information and PAN, including your business address and phone number.
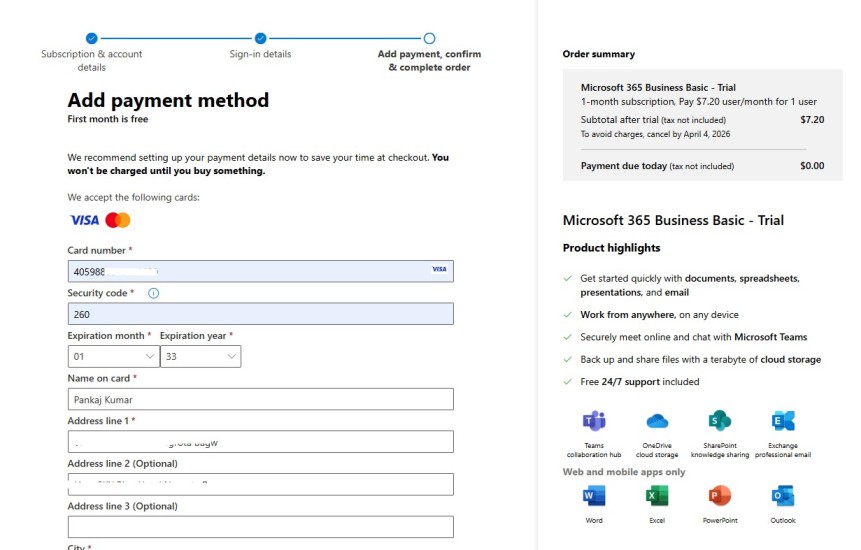
- Review the Information and Confirmation
Review the entire information for the new Microsoft Tenant and create the subscription.
Step 2: Complete the Microsoft 365 Tenant Setup
Once you’ve signed up and logged into Microsoft 365, it’s time to complete the tenant setup.
- Set Up Your Admin Account
When you create a new tenant, the account you use automatically becomes the Global Administrator. You can also set up additional admin accounts after the tenant is created. The Global Admin account has full access to manage users, security settings, and services. You can assign least privilege permissions to other admins based on their roles, such as Exchange Admin, Security Admin, Helpdesk, and more. - Verify Your Domain
If you’re using a custom domain, you will need to verify ownership of the domain with Microsoft. This process typically involves adding a TXT record to your domain’s DNS settings. Check out Step-by-Step guide on How to Add Custom Domain on Microsoft 365. - Choose Your Region
Microsoft 365 offers data centers in various regions around the world. Choose the region closest to your business operations to ensure better performance and compliance with data residency requirements. - Configure Additional Settings
Set up additional configuration settings like security options, user permissions, and license assignments.
Step 3: Assign Licenses to Users
Once your Microsoft 365 tenant is created, the next step is to assign licenses to users within your organization.
- Add Users
Navigate to the Microsoft 365 Admin Center and add users to your tenant. You can manually create users or import them in bulk using a CSV file. - Assign Licenses
After adding users, assign them appropriate Microsoft 365 licenses based on their roles and needs. Each license gives users access to specific services such as Exchange, SharePoint, or Teams. - Set User Roles
Assign user roles such as Global Administrator, User, or Custom Roles based on their responsibilities within the organization.
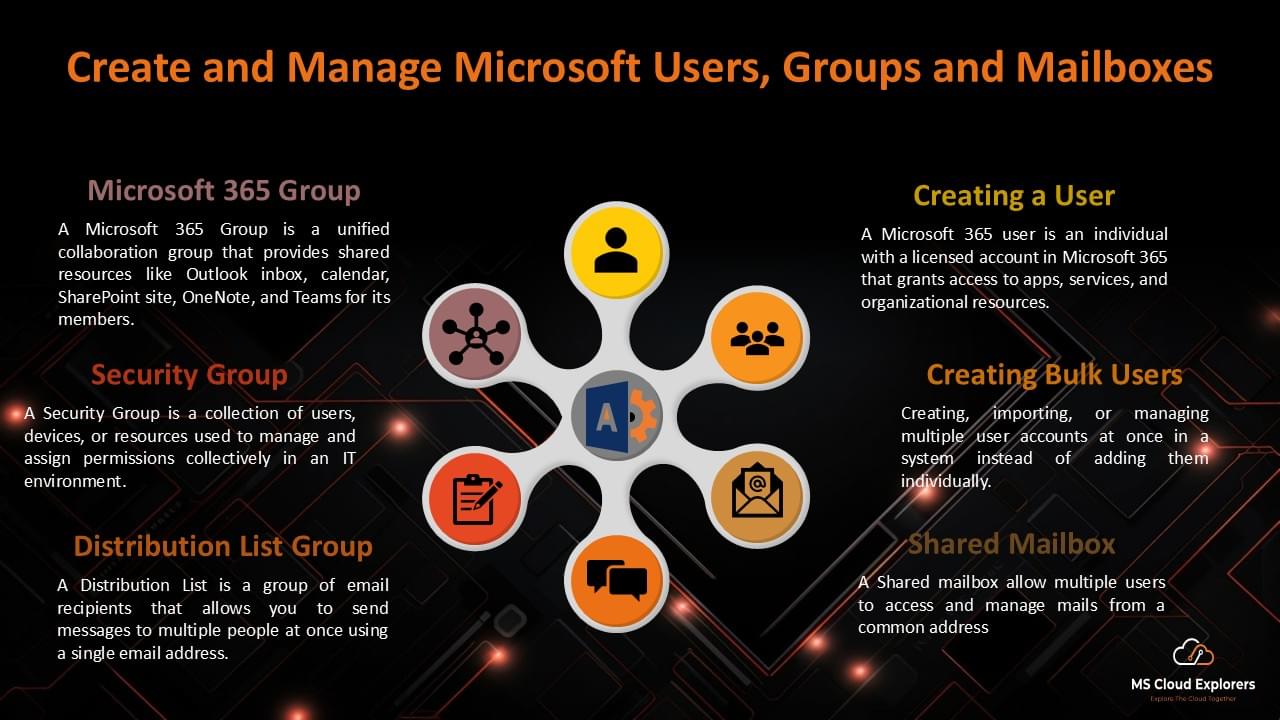
Check out the complete guide on User and Group Creation for a detailed step-by-step walkthrough: To Create Microsoft 365 Accounts And Groups
Step 4: Set Up Email and Other Services
One of the primary reasons businesses use Microsoft 365 is for its powerful suite of tools, including email through Outlook, file storage via OneDrive, and collaboration using Teams:
- Configure Exchange Online for Email
Microsoft 365 is tightly integrated with all Microsoft services, including Exchange Online, SharePoint, OneDrive, Teams, and more. When you create a user account in Microsoft 365, it automatically syncs across all services. You can manage basic functions from the Microsoft 365 Admin Center, but core email features are managed directly through Exchange Online. - Set Up SharePoint and OneDrive
Configure SharePoint and OneDrive for business file storage. Ensure you set up permissions for who can access files and documents within these platforms. - Set Up Microsoft Teams
If your organization uses Microsoft Teams for collaboration, make sure to configure teams, channels, and permissions appropriately. Teams also integrates with Exchange, SharePoint, and OneDrive, making it an essential tool for collaboration.
Step 5: Configure Security and Compliance Settings
Security and compliance are crucial when managing a Microsoft 365 tenant. Microsoft 365 offers several tools to help you secure your tenant:
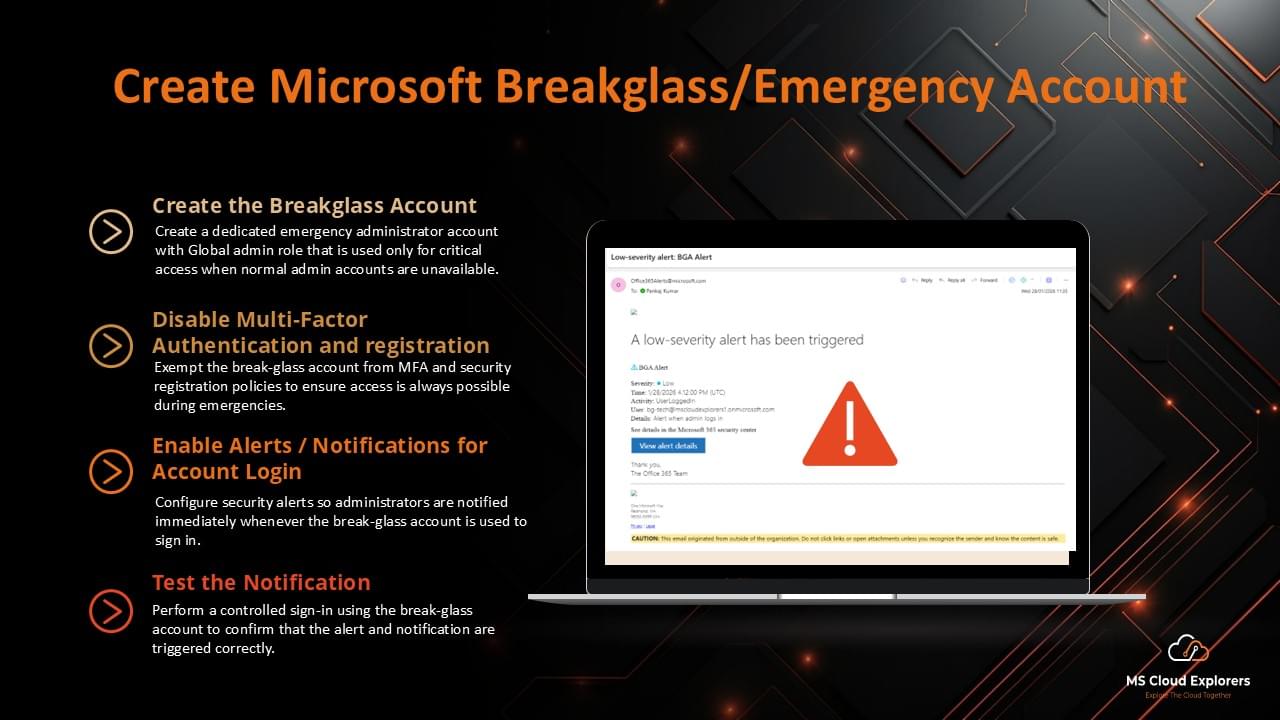
- Set Up Multi-Factor Authentication (MFA)
MFA is an essential security measure that requires users to verify their identity through multiple means (e.g., SMS or app). Enable MFA for all users to enhance security. - Configure Conditional Access Policies
Conditional Access policies allow you to define rules for who can access your resources, based on factors such as location, device, or user risk. Understand Conditional Access Policies and learn how to configure them in your tenant step by step - Compliance Center
Microsoft 365 has built-in compliance features that help businesses meet regulatory requirements. Set up retention policies, data loss prevention (DLP), and audit logs to maintain compliance.
Step 6: Monitor and Manage Your Microsoft 365 Tenant
After setting up your tenant, continuous monitoring and management are key to keeping everything running smoothly. You can do this through the Microsoft Entra ID or Azure Admin Center:
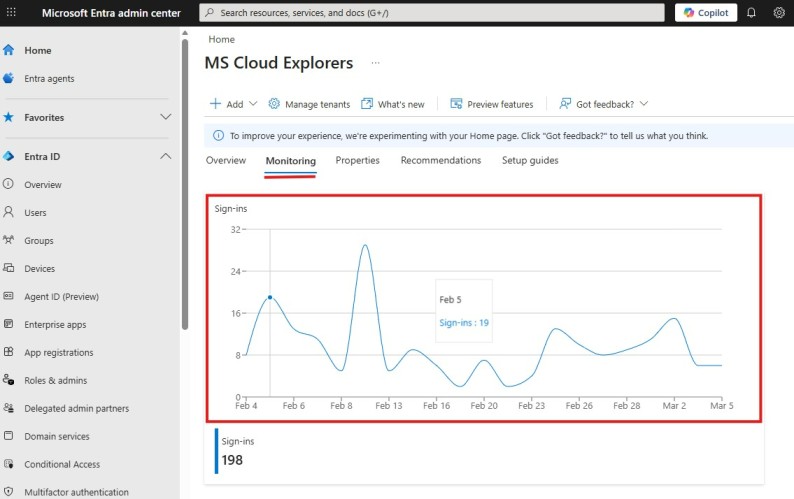
- Monitor User Activity
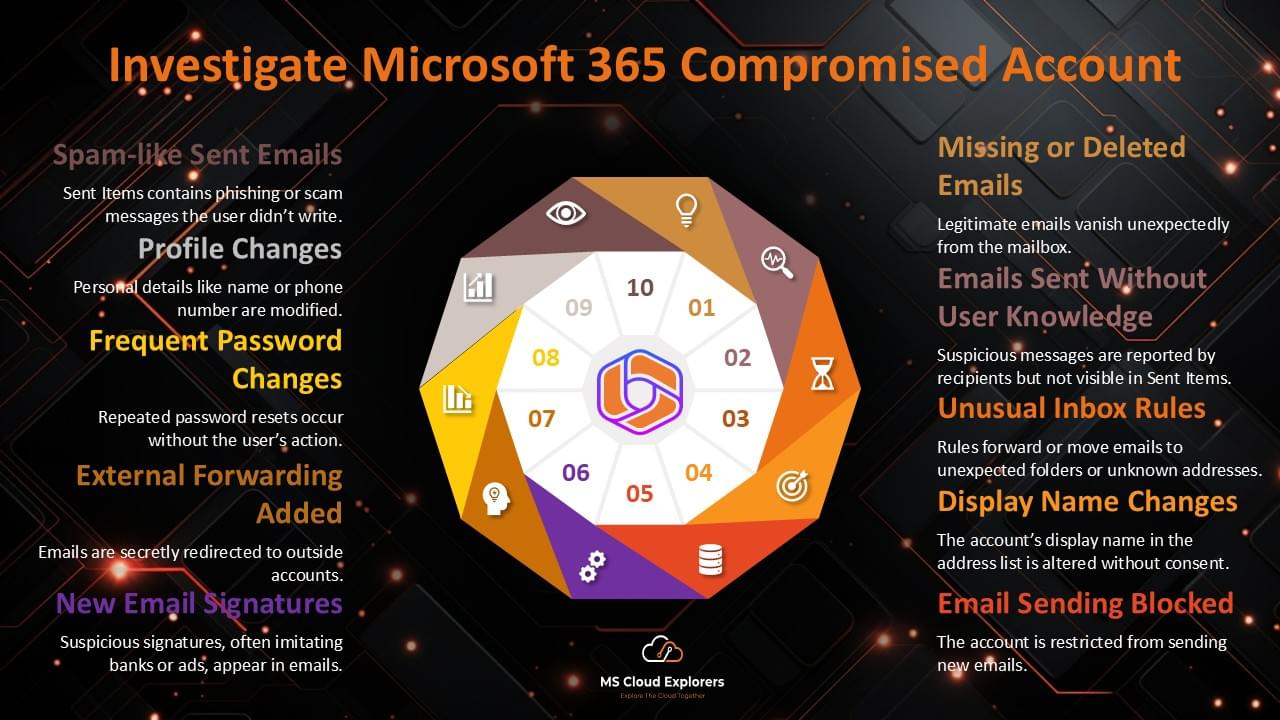
Regularly monitor user activity and report any unusual behavior. Microsoft 365 provides logs and reports that help you track user actions and identify potential security risks.
Microsoft Entra ID > Users > Sign-in Logs
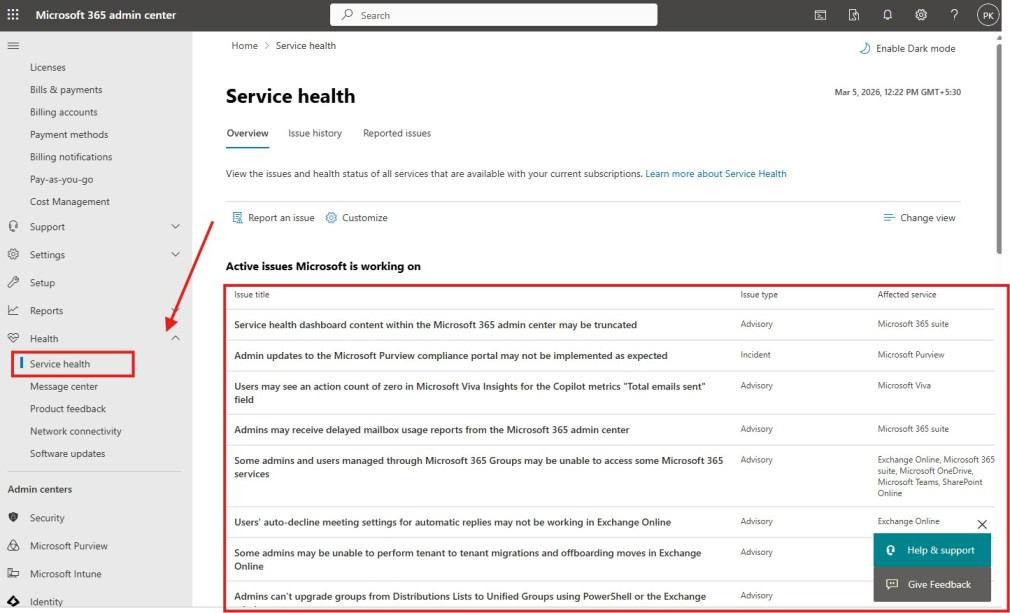
- Review Service Health
The Service Health dashboard in the Admin Center lets you track the status of Microsoft 365 services, ensuring everything is running smoothly and that there are no outages.
Microsoft 365 Admin > Health > Service Health
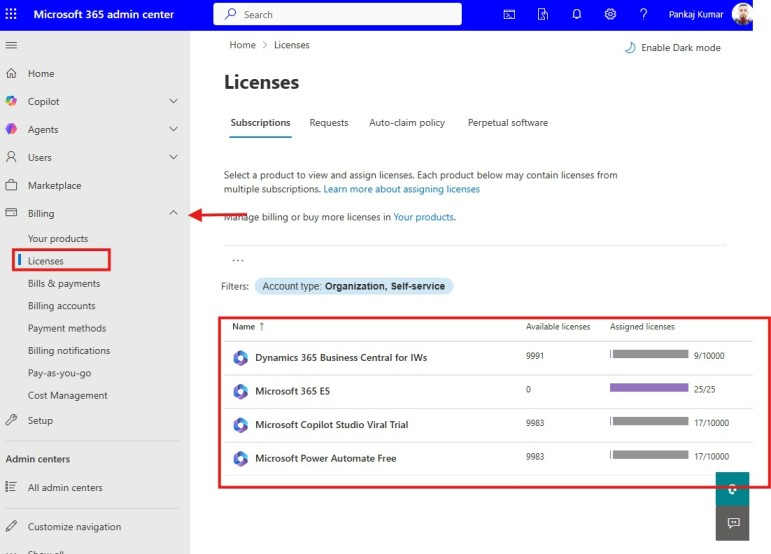
- Manage Licenses and Billing
Stay on top of your billing and licensing to ensure your organization has the appropriate number of licenses and is paying for the services it uses.
Microsoft 365 Admin > Billing > Licenses
Conclusion
Creating a new Microsoft 365 tenant is a crucial first step in setting up your organization’s cloud infrastructure. By following the detailed steps outlined in this guide, you can ensure a smooth and efficient setup, enabling your organization to take full advantage of Microsoft’s cloud services. With careful configuration of security, user roles, and services, you can establish a robust and secure environment for your business operations.
FAQs
- How to Create a Tenant in Microsoft 365?
To create a tenant, sign up for Microsoft 365, choose a subscription plan, and enter your organization’s details. After that, set up an admin account and verify your domain. - How to Create a New Microsoft 365 Tenant with a Custom Domain?
To use a custom domain, verify it in Microsoft 365 by adding a TXT record to your DNS settings. Then, assign the domain to your email and services. - What Is the Difference Between Creating a Microsoft 365 Tenant and an Office 365 Tenant?
Microsoft 365 includes Office 365 along with extra features like advanced security and management tools. Office 365 focuses mainly on productivity tools. - How to Create an Office 365 Tenant Without a Credit Card?
No, Microsoft has change their Trail License usage you need to give Credit or Debit card information to start the trial . - How to Create a Tenant in Azure?
In Azure, go to the portal, create a new Azure Active Directory (AD) tenant, and provide your organization details to set it up. - Can I Change My Microsoft 365 Tenant Name After Creation?
No, you cannot change the tenant name once it is created. However, you can set up alternate domains if needed. - Can I Migrate an Existing Office 365 Tenant to Microsoft 365?
Yes, you can migrate your Office 365 tenant to Microsoft 365 by upgrading your current subscription. This process usually involves selecting the appropriate Microsoft 365 plan and transitioning services. - Can I Add Multiple Domains to My Microsoft 365 Tenant?
Yes, Microsoft 365 allows you to add multiple domains to your tenant. This helps if you have multiple brands or business divisions using different domain names. - What Services Are Included in a Microsoft 365 Tenant?
A Microsoft 365 tenant includes services like Exchange Online, SharePoint, Teams, OneDrive for Business, and advanced security features such as Azure AD and Intune. - How Do I Change the Region of My Microsoft 365 Tenant?
Once a Microsoft 365 tenant is created, the region cannot be changed. However, you can create additional tenants in a different region if needed.
Explore More from MS Cloud Explorers
- A Practical Guide to Successful Microsoft 365 Adoption
- Microsoft 365 Applications Explained: A Complete Guide for IT Admins
- Microsoft Zero Trust Assessment: A Step-by-Step Guide for IT Admins
- Setting Up Intune Policies with Just a Few Clicks: The Ultimate Guide for Administrators
- Ultimate Guide to SharePoint: Create a Site Template and Lock Down Permissions
- The Ultimate Guide to Exchange Email Online Archive for Efficient Email Management
Enjoyed the article?
We’d love to hear your thoughts—share your comments below!
For more insights, guides, and updates from the Microsoft ecosystem, be sure to subscribe to our newsletter and follow us on LinkedIn. Stay connected and never miss out on the latest tips and news!