

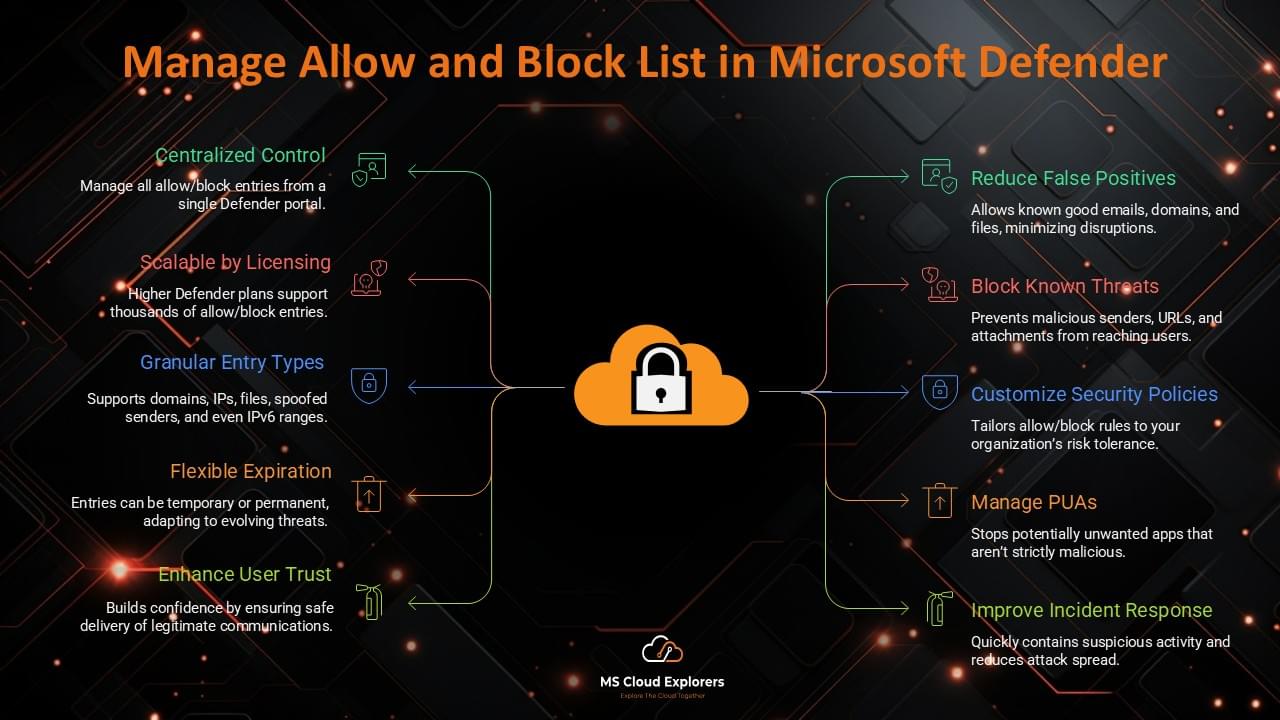
Quick answer: To whitelist a domain in Office 365, open the Microsoft Defender portal, go to Email & collaboration > Policies & rules > Threat policies > Tenant Allow/Block Lists, select Domains & addresses, choose Add > Allow, enter the trusted domain, configure the expiration or notes, and save the entry. In some scenarios, you may also use the anti-spam inbound policy, Exchange Online mail flow rules, or PowerShell, but each method should be used carefully because domain whitelisting can reduce email security if applied too broadly.
As a Microsoft 365 Engineer, I often hear requests such as “please whitelist this domain,” “add this sender to the allow list,” or “this vendor email is going to junk.” These requests sound simple, but in Microsoft 365 they should be handled with care. Allowing an entire domain can help legitimate business email reach users, but it can also create risk if the sender domain is spoofed, compromised, or poorly authenticated.
In this guide, you will learn how to whitelist a domain in Office 365 and Microsoft 365 using Microsoft Defender, the Tenant Allow/Block List, anti-spam policies, Exchange Online mail flow rules, and PowerShell. You will also learn when each method should be used, how to verify the configuration, and how to troubleshoot common issues when whitelisted emails are still blocked or delivered to junk.
|
Important security warning |
What Does Whitelisting a Domain in Office 365 Mean?
Whitelisting a domain in Office 365 means creating an allow condition so messages from a trusted domain are less likely to be treated as spam, bulk email, phishing, or unwanted email. In modern Microsoft 365 environments, admins usually manage this through Microsoft Defender for Office 365, Exchange Online Protection, anti-spam policies, the Tenant Allow/Block List, or Exchange Online mail flow rules.
|
Term |
Meaning |
Scope |
|
Sender allow |
Allows a specific email address such as user@mscloudexplorers.com. |
More secure and targeted |
|
Domain allow |
Allows messages from a domain such as contoso.com. |
Broader and riskier |
|
Safe Senders list |
Mailbox-level Outlook safe sender setting. |
User/mailbox level |
|
Tenant Allow/Block List |
Microsoft Defender list for manual allow/block overrides. |
Tenant level |
|
Mail flow rule |
Exchange Online transport rule that can bypass or modify filtering behavior. |
Tenant or scoped recipient level |
Best Method to Whitelist a Domain in Office 365
There is no single method that fits every scenario. The safest method depends on why the email is being blocked, whether the sender is a vendor, whether the issue is spam, spoofing, phishing simulation, or a mail flow exception, and whether the allow entry should be temporary or permanent.
|
Method |
Best For |
Where to Configure |
Recommendation |
|
Tenant Allow/Block List |
Temporary or specific filtering overrides for domains and email addresses. |
Microsoft Defender portal |
Recommended for controlled allow/block management. |
|
Anti-spam allowed senders/domains |
Spam or bulk false positives from trusted senders. |
Microsoft Defender > Anti-spam policy |
Use carefully and review regularly. |
|
Exchange Online mail flow rule |
Advanced routing or conditional bypass with extra checks. |
Exchange admin center |
Use only when you need rule conditions. |
|
Advanced Delivery |
Third-party phishing simulations and security awareness testing. |
Microsoft Defender > Advanced Delivery |
Recommended for phishing simulations. |
|
Outlook Safe Senders |
Individual user preference for safe senders. |
Outlook or mailbox settings |
Not recommended for tenant-wide admin control. |
|
Expert recommendation |
Before You Whitelist a Domain: Prerequisites and Checks
Before adding a domain to an Office 365 whitelist, complete these checks:
- Confirm the business requirement: Identify why the domain must be allowed and whether a single sender address is enough.
- Check message trace and quarantine: Verify whether the email was blocked, quarantined, routed to junk, or never reached Microsoft 365.
- Review sender authentication: Check SPF, DKIM, and DMARC alignment for the sender domain.
- Prefer least privilege: Allow the smallest possible scope, such as one sender instead of an entire domain.
- Use expiration dates: Temporary allow entries are safer than permanent exceptions.
- Document the reason: Add notes such as vendor name, ticket number, requester, and review date.
Method 1: Whitelist a Domain Using Microsoft Defender Tenant Allow/Block List
The Tenant Allow/Block List is one of the most important places to manage allow and block entries in Microsoft Defender for Office 365. It can be used to manually override filtering verdicts for senders, domains, files, URLs, spoofed senders, and other supported entities. This is the main method from the original guide and should remain in the optimized article.
Steps to add a domain to the allow list
- Sign in to the Microsoft Defender portal at https://security.microsoft.com with an account that has the required security or Exchange permissions.
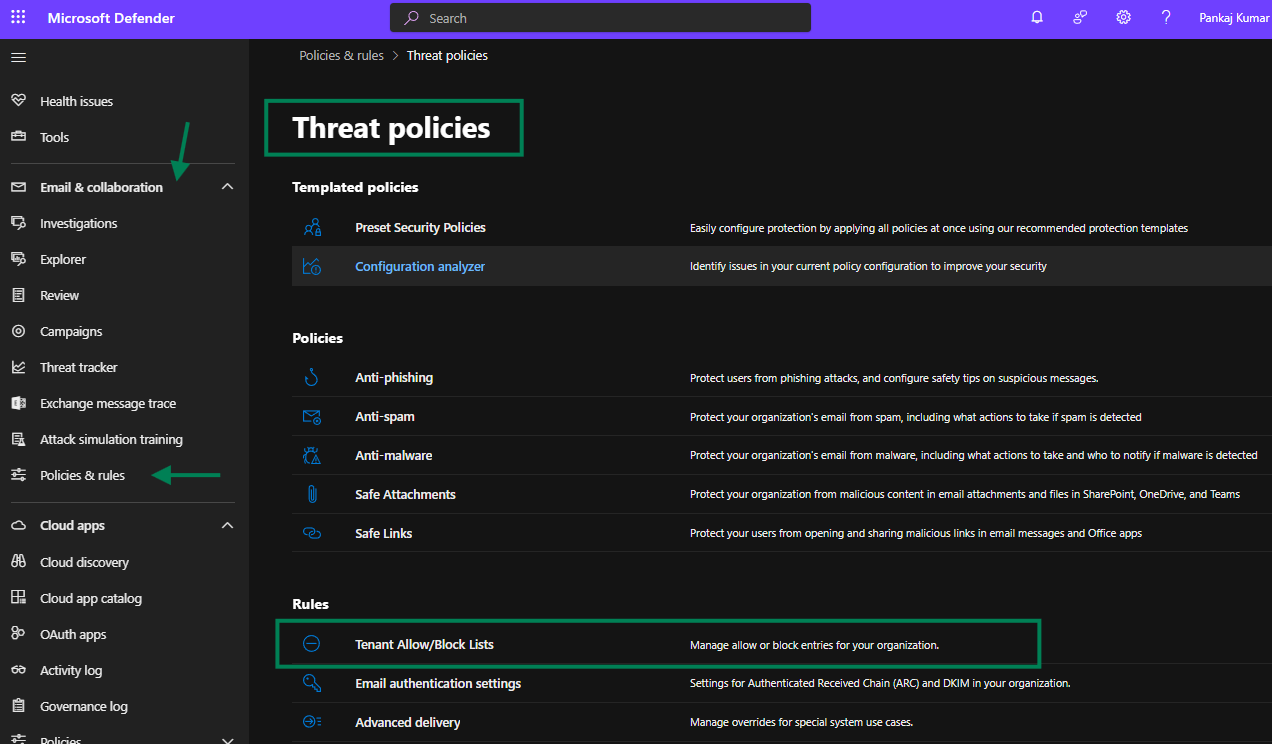
- Go to Email & collaboration > Policies & rules > Threat policies.
- Under Rules, select Tenant Allow/Block Lists.
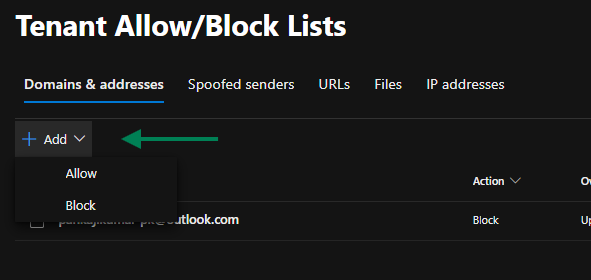
- Open the Domains & addresses tab.
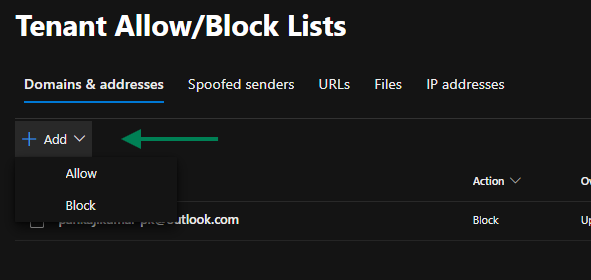
- Select Add, and then choose Allow.
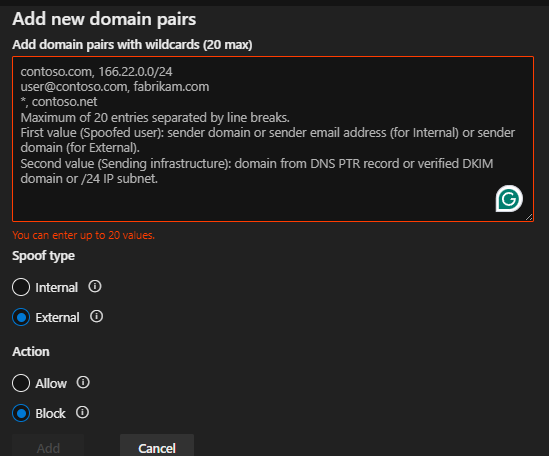
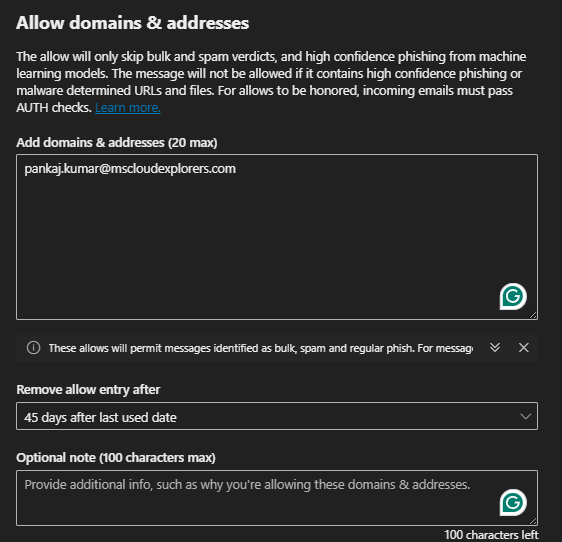
- Enter the trusted domain or email address. Add one domain or email address per line.
- Select an expiration option when available. Avoid permanent allow entries unless absolutely required.
- Add a note that explains why the domain is being allowed.
- Select Add to save the allow entry
Admin note
Tenant Allow/Block List entries should be reviewed regularly. If the original email was blocked as high confidence phishing or malware, use the Microsoft Defender Submissions workflow instead of blindly allowing the sender or domain.
Method 2: Whitelist a Domain Using Anti-Spam Allowed Senders and Domains
Some admins search for “Office 365 whitelist domain” because they want the older anti-spam policy location where allowed senders and domains are managed. This method is still relevant when the problem is spam or bulk email classification and you want to allow a trusted sender or domain through an inbound anti-spam policy.
Steps to allow a domain in the anti-spam inbound policy
- Open the Microsoft Defender portal at https://security.microsoft.com.
- Go to Email & collaboration > Policies & rules > Threat policies.
- Select Anti-spam policies.
- Open the Anti-spam inbound policy that applies to the affected users. This may be the default policy or a custom policy.
- Scroll to Allowed and blocked senders and domains.
- Select Edit allowed and blocked senders and domains.
- Add the trusted domain under Allowed domains or add a specific email address under Allowed senders.
- Save the policy and allow time for the configuration to apply.
- Test with a new email and verify the result using message trace and message headers.
|
When to use this method |
Method 3: Whitelist a Domain Using Exchange Admin Center Mail Flow Rules
Exchange Online mail flow rules can be used to bypass spam filtering for specific senders or domains. However, this method should be used carefully because a poorly designed rule can allow spoofed or malicious messages to bypass normal filtering. For domain-level rules, add authentication-based conditions wherever possible.
Steps to create a mail flow rule
- Open the Exchange admin center at https://admin.exchange.microsoft.com.
- Go to Mail flow > Rules.
- Select Add a rule > Create a new rule.
- Name the rule clearly, for example: Allow trusted vendor domain – contoso.com.
- Under Apply this rule if, select The sender > domain is, and enter the trusted domain.
- Under Do the following, select Modify the message properties > Set the spam confidence level (SCL), and set it to bypass spam filtering only if this is required.
- Add additional conditions such as Authentication-Results includes dmarc=pass when possible.
- Set rule mode to Enforce only after testing.
- Save the rule and place it in the correct priority order.
Condition example:
The sender domain is: contoso.com
AND message header Authentication-Results includes: dmarc=pass
Action:
Set the spam confidence level (SCL) to bypass spam filtering
|
Security recommendation |
Method 4: Whitelist a Domain in Office 365 Using PowerShell
PowerShell is useful when you need to add, review, or remove allow entries in a controlled way. For Microsoft Defender Tenant Allow/Block List items, use Exchange Online PowerShell.
Connect to Exchange Online PowerShell
Install-Module ExchangeOnlineManagement -Scope CurrentUser
Import-Module ExchangeOnlineManagement
Connect-ExchangeOnline
Add a domain or sender to the Tenant Allow/Block List
New-TenantAllowBlockListItems `
-ListType Sender `
-Allow `
-Entries “contoso.com” `
-RemoveAfter 30 `
-Notes “Trusted vendor domain approved by IT. Review after 30 days.”
Add multiple senders or domains
New-TenantAllowBlockListItems `
-ListType Sender `
-Allow `
-Entries “vendor1.com”,”alerts@vendor2.com” `
-RemoveAfter 30 `
-Notes “Temporary allow entries for business-approved vendors.”
Review current Tenant Allow/Block List sender entries
Get-TenantAllowBlockListItems -ListType Sender |
Select-Object Identity, Entries, ListSubType, ExpirationDate, Notes
|
PowerShell note |
Method 5: Use Advanced Delivery for Phishing Simulations
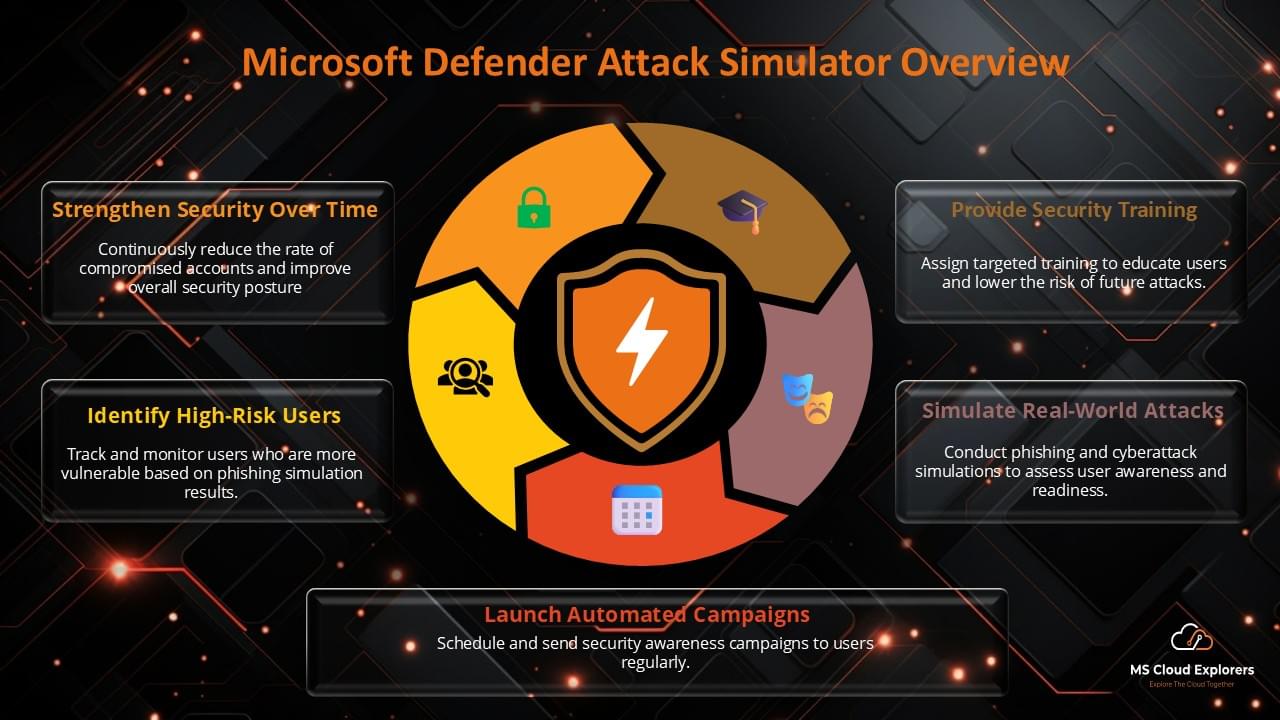
If the request is related to phishing simulation platforms or security awareness training, do not treat the scenario the same way as a normal vendor domain. Microsoft provides Advanced Delivery policies for third-party phishing simulations. This is usually safer and more accurate than creating broad URL or domain allow entries.
- Open the Microsoft Defender portal.
- Go to Email & collaboration > Policies & rules > Threat policies.
- Select Advanced delivery.
- Open the Phishing simulation tab.
- Add the sending domains, sending IP addresses, and simulation URLs provided by the phishing simulation vendor.
- Save the configuration and run a controlled test campaign.
|
Important |
How to Block a Domain or Sender in Microsoft Defender
The original article also covered blocking domains and senders, which is useful because admins often manage allow and block lists together. Blocking a malicious sender or domain helps prevent known unwanted email from reaching users and can also prevent users from sending mail to blocked domains in supported scenarios.
- Open the Microsoft Defender portal.
- Go to Email & collaboration > Policies & rules > Threat policies > Tenant Allow/Block Lists.
- Open the Domains & addresses tab.
- Select Add > Block.
- Enter the email address or domain that should be blocked.
- Choose an expiration option or set the entry to never expire when justified.
- Add a clear note explaining why the entry is being blocked.
- Select Add to save the entry.
Managing Files and Spoofed Senders in Tenant Allow/Block List
The Tenant Allow/Block List is not limited to domains and email addresses. It also supports other entity types such as files, URLs, spoofed senders, IP addresses, and Teams-related domains or addresses depending on the feature area and licensing. These options should be used as part of a broader investigation process rather than as a first reaction to every blocked message.
Blocking file types or file hashes
- Use file blocking when a known malicious attachment or file hash must be blocked.
- Review blocked file entries periodically to avoid unnecessary false positives.
- Use Microsoft Defender investigations and submissions before creating broad file allow entries.
Managing spoofed senders
Spoofed sender handling is especially important when a vendor uses a third-party platform to send mail on behalf of another domain. If the visible From address and sending infrastructure do not align, messages may be treated as spoofing or phishing. In this case, review the message headers, SPF/DKIM/DMARC results, spoof intelligence, and Defender submissions before adding an allow entry.
Using Threat Explorer and Submissions with Allow/Block Decisions
Threat Explorer and the Submissions page are important because they help you investigate the reason a message was blocked or allowed. Instead of blindly whitelisting a domain, use these tools to review the detection technology, policy hit, authentication status, sender reputation, URLs, attachments, and final delivery action.
- Search for the affected message in Threat Explorer, Explorer, Message trace, or Quarantine.
- Review why the message was blocked or delivered to junk.
- If the message is legitimate, submit it to Microsoft as “I have confirmed it is clean.”
- Create an allow entry only when the investigation supports it.
- If the message is malicious, submit it as a threat and create a block entry if needed.
How to Verify That Domain Whitelisting Is Working
After adding a domain to the allow list, always verify with a new test message. Do not rely only on the fact that the entry appears in the portal.
|
Verification Step |
What to Check |
Expected Result |
|
Send a new test email |
Ask the vendor to send a fresh message after the change. |
Message should not be blocked by the same spam/bulk verdict. |
|
Run message trace |
Check delivery status, event details, and recipient. |
Trace should show delivered, quarantined, or filtered reason. |
|
Review message headers |
Check SPF, DKIM, DMARC, SCL, and authentication results. |
Authentication should pass whenever possible. |
|
Check quarantine |
Confirm the latest test message is not quarantined. |
No new quarantine event for the same reason. |
|
Review Defender Explorer |
Check detection technology and policy hits. |
Allow entry should explain the override where applicable. |
Troubleshooting: Office 365 Whitelist Domain Not Working
|
Issue |
Likely Cause |
Recommended Fix |
|
Domain added but email still goes to junk |
Another policy, mailbox rule, Outlook setting, or sender authentication issue may be involved. |
Check message trace, headers, mailbox rules, junk settings, and policy hits. |
|
Allow option is missing |
The message may need to be submitted first, or the admin may not have required permissions. |
Use Submissions or verify Security Administrator/Exchange permissions. |
|
High confidence phishing still blocked |
Some verdicts cannot be safely overridden by a direct allow entry. |
Submit the message to Microsoft and confirm it is clean before allowing. |
|
Mail comes from a subdomain |
The allowed domain may not cover the exact subdomain or sending identity. |
Add the precise sender/domain only after validation. |
|
Vendor uses third-party mail platform |
SPF/DKIM/DMARC alignment may fail or the platform may send from different infrastructure. |
Ask vendor to fix authentication or provide sending IPs/domains. |
|
Mail flow rule does not apply |
Rule priority, conditions, exceptions, or recipient scope may be wrong. |
Review rule order, conditions, and message trace events. |
|
Allow entry expired |
Temporary allow entries can expire automatically. |
Review expiration date and renew only if still justified. |
|
Third-party gateway involved |
Barracuda, Proofpoint, Mimecast, or another gateway may process mail before Exchange Online. |
Trace at the gateway and Microsoft 365 to identify where filtering occurs. |
Best Practices for Whitelisting Domains in Office 365
- Prefer sender-level allow entries: A specific sender is safer than allowing an entire domain.
- Avoid permanent exceptions: Use expiration dates and review allow entries regularly.
- Validate authentication: Check SPF, DKIM, and DMARC before trusting a domain.
- Use Advanced Delivery for simulations: Do not bypass filtering broadly for phishing simulation vendors.
- Document every allow entry: Include requester, business reason, ticket number, and review date.
- Monitor after changes: Use message trace, Explorer, and quarantine to confirm behavior.
- Do not bypass security blindly: If a domain repeatedly fails authentication, ask the sender to fix their DNS and email configuration.
- Review allow/block lists monthly: Remove entries that are no longer required.
FAQs: Whitelist a Domain in Office 365
How do I whitelist a domain in Office 365?
Open the Microsoft Defender portal, go to Email & collaboration > Policies & rules > Threat policies > Tenant Allow/Block Lists, open Domains & addresses, choose Add > Allow, enter the trusted domain, configure expiration/notes, and save the entry.
Is Office 365 the same as Microsoft 365 for domain whitelisting?
Most admin portals now use Microsoft 365 branding, but many admins still search for Office 365. The email security experience is managed through Microsoft Defender, Exchange Online Protection, and Exchange Online.
Should I whitelist a sender or an entire domain?
A sender-level allow entry is usually safer. Only whitelist an entire domain when there is a strong business case and the domain is trusted and properly authenticated.
Where is the Tenant Allow/Block List in Microsoft Defender?
Go to security.microsoft.com > Email & collaboration > Policies & rules > Threat policies > Tenant Allow/Block Lists. You can also use the direct URL: https://security.microsoft.com/tenantAllowBlockList.
How long does domain whitelisting take to work?
Microsoft 365 changes can often apply quickly, but always validate with a new test email, message trace, headers, and quarantine review.
Why is my whitelisted domain still blocked?
Possible causes include high confidence phishing verdicts, failed SPF/DKIM/DMARC, spoofing, expired allow entry, another mail flow rule, third-party gateway filtering, or mailbox-level junk settings.
Can I whitelist a domain in Office 365 using PowerShell?
Yes. Use Exchange Online PowerShell and the New-TenantAllowBlockListItems cmdlet for Tenant Allow/Block List sender entries.
Is it safe to bypass spam filtering in Exchange Online?
Bypassing spam filtering can be risky. Use it only when required, add authentication conditions, limit the scope, and review the rule regularly.
What is the difference between Safe Senders and domain whitelisting?
Safe Senders is typically user or mailbox level. Domain whitelisting through Defender, anti-spam policies, or mail flow rules affects the organization or scoped recipients.
Should I use Advanced Delivery for phishing simulations?
Yes. For approved third-party phishing simulations, use Advanced Delivery instead of broad domain or URL allow entries.
Conclusion
Whitelisting a domain in Office 365 is a common Microsoft 365 admin task, but it should never be handled as a simple “add and forget” change. The safest approach is to investigate the message first, understand why Microsoft 365 blocked or filtered it, and then choose the right allow method based on the scenario.
For most administrators, Microsoft Defender Tenant Allow/Block List is the best starting point for controlled sender and domain allow/block management. Anti-spam policies can help with spam or bulk false positives, Exchange Online mail flow rules can support advanced conditional bypasses, and Advanced Delivery should be used for phishing simulations. Always prefer narrow allow entries, use expiration dates, validate sender authentication, and monitor the results after making changes.
Explore More from MS Cloud Explorers
- Mail Flow Rules in Exchange Online: A Comprehensive Guide
- How to Install & Connect Microsoft 365 PowerShell Modules (All)
- Complete Breakdown of Microsoft Defender for Business and Step-by-Step Configuration Guide
- Microsoft Defender for Endpoint: Comprehensive Guide to Architecture, Features, and Plans
- The Ultimate Guide to Microsoft Secure Score: Strengthening Your Security Posture
- Microsoft Defender for Office 365 Overview and Step-by-Step Implementation
- How to Send Encrypted Email in Outlook: A Step-by-Step Guide for Beginners
- How to Run Extended Message Trace in Microsoft 365: A step-by-step guide.
- Microsoft Sensitivity Labels Explained: Boost Security and Compliance in Office 365
- The Ultimate Guide to Exchange Email Online Archive for Efficient Email Management
Microsoft References and Further Reading
- Manage allows and blocks in the Tenant Allow/Block List
- Allow or block email using the Tenant Allow/Block List
- Submit messages, URLs, and attachments to Microsoft for analysis
- Configure advanced delivery for phishing simulations
- Configure anti-spam policies in Microsoft Defender for Office 365
- Connect to Exchange Online PowerShell
Enjoyed the article?
We’d love to hear your thoughts—share your comments below!
For more insights, guides, and updates from the Microsoft ecosystem, be sure to subscribe to our newsletter and follow us on LinkedIn. Stay connected and never miss out on the latest tips and news!
Hey, this was super helpful! I always got confused between spam filters and the allow/block list. This guide cleared it up nicely. One thing though—do I need to set this up even if I’m using a third-party email filter? Just curious. 😅
Glad it helped and totally get the confusion—those filters can get messy! 😄 If you’re using a third-party filter, it depends on how your mail flow is set up. But it’s still a good idea to keep the Tenant Allow/Block List updated just in case something slips through or bypasses the third-party filtering. Appreciate the comment!